What is needed to repair a mobile home kitchen faucet? Fixing a mobile home kitchen faucet often involves identifying the source of the problem, gathering the right tools (like a wrench, screwdriver, and possibly a faucet repair kit), and then either repairing or replacing the faulty part. Let’s explore common mobile home faucet issues and how to fix them.
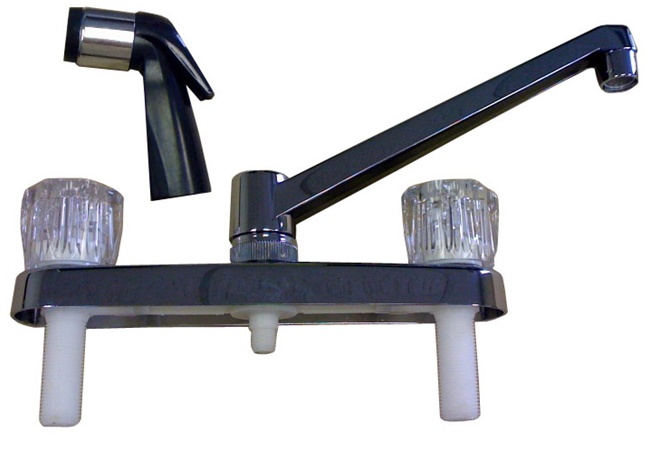
Image Source: www.completemobilehomesupply.com
Common Mobile Home Faucet Problems
Mobile home faucets often face unique challenges due to different plumbing systems and materials compared to traditional homes. Recognizing these issues is the first step in mobile home faucet repair.
Drips and Leaks
One of the most frequent issues is a faucet leak mobile home. These can range from a minor drip to a steady stream, wasting water and potentially causing water damage. Leaks often originate from:
- Worn-out Washers: These small rubber or plastic rings create a seal and degrade over time.
- O-rings: Similar to washers, O-rings seal connections within the faucet.
- Corroded Valve Seats: The valve seat is where the washer presses to stop the flow of water.
- Loose Connections: Over time, connections between the faucet and the water supply lines can loosen.
Low Water Pressure
Low water pressure can be frustrating. Several factors can contribute to this, including:
- Clogged Aerator: The aerator, located at the faucet’s tip, can become clogged with mineral deposits.
- Partially Closed Shut-off Valves: Check the shut-off valves under the sink to ensure they are fully open.
- Kinked or Damaged Supply Lines: The flexible supply lines connecting the faucet to the water supply can become kinked or damaged.
- Problems Elsewhere in the Plumbing System: Low pressure in other fixtures may indicate a bigger issue with the water supply to the mobile home.
Stiff or Difficult-to-Turn Handles
Hard-to-turn handles often point to problems inside the faucet body:
- Corrosion: Mineral buildup can cause corrosion inside the faucet, making handles difficult to move.
- Worn Cartridge: Cartridge-style faucets use a cartridge to control water flow, which can wear out over time.
- Lack of Lubrication: Internal faucet parts may simply need lubrication to move freely.
Tools and Materials You’ll Need
Before starting any mobile home faucet repair, gather the necessary tools and materials:
- Basin Wrench: This specialized wrench helps loosen and tighten nuts in tight spaces under the sink.
- Adjustable Wrench: For loosening and tightening larger nuts and connections.
- Screwdrivers (Phillips and Flathead): To remove handles and access internal parts.
- Penetrating Oil: To loosen corroded parts.
- Plumber’s Tape (Teflon Tape): To seal threaded connections.
- Faucet Repair Kit: A kit containing replacement washers, O-rings, and other small parts.
- New Faucet (if replacing): Choose a mobile home-compatible faucet.
- Towels or Rags: To absorb spills.
- Bucket: To catch water.
- Safety Glasses: To protect your eyes.
- Gloves: To protect your hands.
Mobile Home Faucet Repair: Step-by-Step Guide
Here’s a general guide on how to tackle common mobile home faucet problems. Remember to always turn off the water supply before starting any repairs.
1. Shut Off the Water Supply
- Locate the shut-off valves under the sink.
- Turn both the hot and cold water valves clockwise until they are completely closed.
- If there are no shut-off valves under the sink, you’ll need to shut off the main water supply to the mobile home. This is usually located near the water meter.
2. Diagnose the Problem
- Carefully inspect the faucet to identify the source of the leak or problem.
- Is the leak coming from the base of the faucet, the spout, or the handles?
- Is the water pressure low in both hot and cold water, or just one?
3. Repairing a Leaky Faucet
a. Replacing Washers and O-rings
- Remove the Handle: Depending on the faucet type, you may need to pry off a decorative cap or unscrew a setscrew to remove the handle.
- Disassemble the Faucet: Carefully remove the faucet stem or cartridge. Note the order of the parts as you disassemble them.
- Replace Worn Parts: Replace any worn washers or O-rings with new ones from your faucet repair kit.
- Lubricate: Apply a small amount of plumber’s grease to the new parts before reassembling the faucet.
- Reassemble: Reassemble the faucet in the reverse order of disassembly.
- Turn on the Water: Slowly turn on the water supply and check for leaks.
b. Tightening Loose Connections
- Identify the Leak: Locate the source of the leak.
- Tighten the Nut: Use an adjustable wrench to gently tighten the nut or connection. Be careful not to overtighten, as this can damage the fitting.
- Check for Leaks: Turn on the water supply and check for leaks.
4. Addressing Low Water Pressure
a. Cleaning the Aerator
- Remove the Aerator: Unscrew the aerator from the tip of the faucet.
- Clean the Aerator: Disassemble the aerator and clean all the parts with a brush and vinegar or a limescale remover.
- Reassemble and Reinstall: Reassemble the aerator and screw it back onto the faucet.
- Check the Water Pressure: Turn on the water supply and check if the water pressure has improved.
b. Checking Shut-off Valves and Supply Lines
- Ensure Valves are Fully Open: Make sure the shut-off valves under the sink are fully open.
- Inspect Supply Lines: Check the supply lines for kinks or damage. Replace any damaged lines.
5. Fixing Stiff Handles
- Apply Penetrating Oil: Spray penetrating oil around the base of the handle and let it sit for a few minutes.
- Disassemble and Lubricate: If the handle is still stiff, disassemble the faucet and lubricate the internal parts with plumber’s grease.
6. Replacing a Cartridge Faucet
A worn-out cartridge is a common cause of leaks and stiff handles in cartridge-style faucets. Replacing the cartridge is often a straightforward solution.
Steps to Replace a Cartridge:
- Turn Off Water: Shut off the water supply to the faucet.
- Remove the Handle: Typically, there’s a setscrew on the side of the handle. Loosen it with an Allen wrench and pull off the handle. Some handles have decorative caps that need to be pried off first.
- Remove Retaining Clip/Nut: After removing the handle, you’ll likely see a retaining clip or nut holding the cartridge in place. Remove this clip or nut.
- Pull Out the Old Cartridge: Grasp the cartridge (you might need pliers if it’s stuck) and pull it straight up and out of the faucet body.
- Install the New Cartridge: Align the new cartridge with the faucet body and push it down until it’s fully seated. Ensure it’s oriented correctly; some cartridges have specific alignment marks.
- Reinstall Retaining Clip/Nut: Secure the new cartridge with the retaining clip or nut.
- Reattach the Handle: Put the handle back on and tighten the setscrew.
- Turn On Water: Slowly turn the water supply back on and check for leaks.
RV Faucet Replacement Considerations
While RV faucet replacement shares similarities with mobile homes, there are key differences. RV faucets often have unique dimensions and connections. Here’s a table summarizing the main differences and considerations:
| Feature | Mobile Home Faucet | RV Faucet |
|---|---|---|
| Size & Weight | Standard sizes, may be heavier | Compact and lightweight are prioritized |
| Material | Metal (chrome, stainless steel, etc.) | Plastic or lightweight metal alloys |
| Water Usage | Less emphasis on water conservation | Designed for water conservation |
| Connection | Standard plumbing connections | Specialized connections (often quick-connect) |
| Durability | Designed for stationary use | Designed to withstand vibration and movement |
| Cost | Varies, can be more expensive than RV faucets | Generally less expensive |
When to Replace vs. Repair
Deciding whether to replace or repair a mobile home sink faucet repair hinges on several factors:
- Age of the Faucet: An older faucet may be more prone to future problems, making replacement a more sensible option.
- Extent of the Damage: If the faucet is severely corroded or damaged, replacement is usually the best choice.
- Cost of Repair vs. Replacement: Compare the cost of a new faucet to the cost of the repair parts and your time.
- Availability of Parts: For older faucets, replacement parts may be difficult or impossible to find.
If the faucet is relatively new and the problem is minor (e.g., a worn washer), repair is a good option. However, if the faucet is old, heavily damaged, or if replacement parts are unavailable, replacing the faucet is usually the better choice.
Mobile Home Faucet Installation: A Basic Guide
If you decide to replace your mobile home faucet, here’s a general guide:
-
Remove the Old Faucet:
- Shut off the water supply.
- Disconnect the water supply lines from the old faucet.
- Loosen the mounting nuts holding the faucet in place. Use a basin wrench if necessary.
- Remove the old faucet.
- Clean the sink surface thoroughly.
-
Install the New Faucet:
- Apply plumber’s tape to the threads of the faucet tailpieces.
- Insert the faucet into the sink holes.
- Secure the faucet with the mounting nuts.
- Connect the water supply lines to the faucet tailpieces.
- Turn on the water supply slowly and check for leaks.
Tips for Maintaining Your Mobile Home Faucet
Regular maintenance can prevent many faucet problems:
- Clean the Aerator Regularly: This prevents mineral buildup and maintains good water pressure.
- Check for Leaks Regularly: Address leaks promptly to prevent water waste and potential water damage.
- Lubricate Moving Parts: Periodically lubricate faucet stems and cartridges to keep them moving smoothly.
- Use a Water Softener: If you have hard water, a water softener can help prevent mineral buildup in your faucet and plumbing system.
- Winterize Properly: In cold climates, protect your plumbing from freezing by winterizing your mobile home.
Mobile Home Plumbing Repair Specifics
Mobile home plumbing systems differ slightly from standard residential plumbing. Here’s what to keep in mind:
- PEX Piping: Many mobile homes use PEX (cross-linked polyethylene) piping, which requires special fittings and tools.
- Limited Space: Working space under mobile home sinks is often limited, so use compact tools.
- Water Pressure Regulators: Mobile homes often have water pressure regulators to protect the plumbing from excessive pressure. Ensure yours is functioning correctly.
- Grounding: Proper grounding of the plumbing system is essential for safety. Ensure all connections are properly grounded.
Choosing the Right Mobile Home Faucet
When choosing a new mobile home kitchen faucet, consider the following:
- Compatibility: Make sure the faucet is compatible with your sink’s hole configuration (single-hole, three-hole, etc.).
- Spout Height and Reach: Choose a spout height and reach that is comfortable for you and fits your sink.
- Style and Finish: Select a style and finish that complements your kitchen decor.
- Water Conservation: Look for faucets with low-flow aerators to conserve water.
- Durability: Choose a faucet made from durable materials that will withstand regular use.
Here’s a table outlining different types of faucets, along with their pros and cons:
| Faucet Type | Description | Pros | Cons |
|---|---|---|---|
| Ball Faucet | Features a single handle controlling a ball mechanism to mix hot and cold water. | Simple design, relatively inexpensive. | Can be prone to leaks over time due to multiple parts. |
| Cartridge Faucet | Uses a cartridge to control water flow with a single lever. | Easy to operate, durable, and less prone to drips. | Can be more expensive than compression faucets. |
| Ceramic Disc Faucet | Employs ceramic discs to control water flow, offering precise temperature control. | Highly durable, leak-resistant, and offers smooth operation. | Typically more expensive and may require professional installation. |
| Compression Faucet | Utilizes separate hot and cold water handles that compress washers to stop water flow. | Traditional design, inexpensive to purchase. | More prone to drips and leaks due to washer wear. Requires more maintenance. |
Grasping Mobile Home Faucet Maintenance
Consistent maintenance is key to extending the lifespan of your mobile home kitchen faucet and preventing costly repairs. Regularly cleaning the aerator, checking for leaks, and lubricating moving parts can significantly reduce the chances of faucet problems. Staying proactive with mobile home faucet maintenance will save you time, money, and hassle in the long run.
FAQ: Mobile Home Faucet Repair
Can I use any faucet in my mobile home?
No, not all faucets are suitable for mobile homes. Mobile home faucets often need to meet specific standards for water pressure and materials. RV faucet replacement can be a suitable alternative, as they’re designed for similar conditions.
Who is responsible for faucet repairs in a rented mobile home?
Typically, the landlord is responsible for maintaining the plumbing system, including faucet repairs. However, it’s essential to review your lease agreement to determine specific responsibilities.
What is the best type of faucet for water conservation in a mobile home?
Faucets with low-flow aerators are ideal for water conservation. Look for models with a flow rate of 1.5 gallons per minute (GPM) or less.
How often should I replace my mobile home kitchen faucet?
The lifespan of a faucet depends on its quality and usage. However, a good-quality faucet can last 10-15 years with proper maintenance.
Where can I buy mobile home faucets?
You can purchase mobile home faucets at most home improvement stores, online retailers specializing in mobile home parts, and RV supply stores. Always check for compatibility before purchasing.
By following this guide, you can effectively tackle many common mobile home kitchen faucet issues. Remember to prioritize safety and consult a professional plumber if you’re unsure about any step. Good luck!
Hi, I’m Scott Fischer, the voice behind SliceItRight. My passion for food started in my grandmother’s kitchen, where I learned the art of slicing, dicing, and creating delicious meals. Over the years, I’ve explored everything from the perfect kitchen gadgets to mastering culinary techniques, and I’m here to share all of it with you. Whether you’re a beginner or an experienced home chef, my goal is to make cooking easier, more enjoyable, and a lot more fun. So, let’s slice it right and cook up something amazing together!