Are you searching for ways to remove rust from your beloved kitchen knives? Yes, you can remove rust from kitchen knives using a variety of methods, ranging from simple household ingredients to specialized rust removers. This comprehensive guide will walk you through the best rust removal methods for knives, how to clean rust off knife blade, restoring rusty kitchen knives, homemade rust remover knife options, and crucial tips for preventing rust in the first place. We’ll explore various knife rust removal techniques to help you keep your blades sharp, clean, and rust-free.
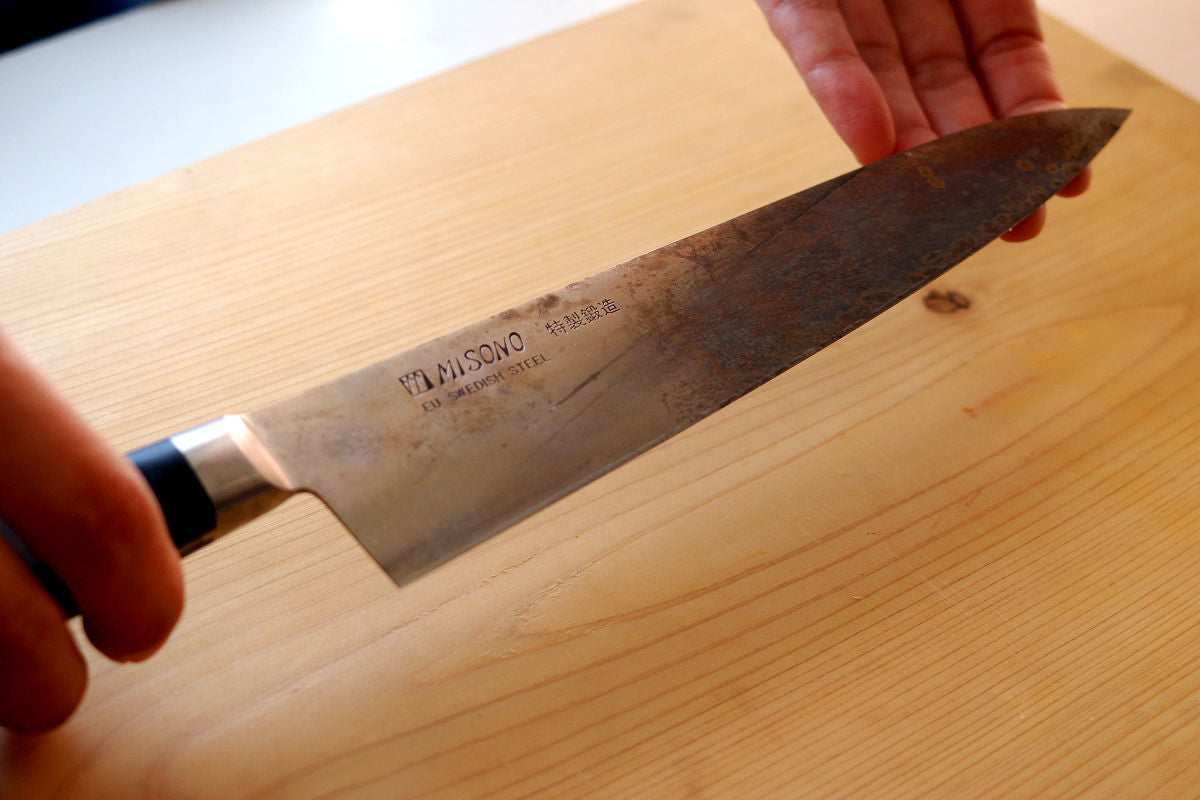
Image Source: www.globalkitchenjapan.com
Decoding Rust on Kitchen Knives
Rust, that reddish-brown flaky coating, is a form of iron oxide. It develops when iron or an iron alloy, like the steel in your knives, is exposed to oxygen and moisture. This electrochemical process, often accelerated by the presence of salt or acids, weakens the metal and can ultimately compromise the knife’s performance and safety. Comprehending this process will help you choose the best method for cleaning rusty kitchen knives and preventing future occurrences.
Types of Rust Commonly Found on Knives
Knowing the type of rust can help you choose the right rust removal method.
- Surface Rust: This is a light coating that appears as a reddish dust. It’s relatively easy to remove.
- Pitting Rust: This is more severe and creates small pits or holes in the metal. Removing pitting rust might require more aggressive techniques and can permanently alter the knife’s surface.
- Scale Rust: This is a thick, layered form of rust that can be quite difficult to remove.
Effective Rust Removal Methods for Knives
Here’s a look at some of the most effective rust removal methods for kitchen knives, considering both homemade and commercial rust remover for knives options.
1. The Power of Vinegar: A Natural Rust Dissolver
Vinegar, especially white vinegar, contains acetic acid, which reacts with iron oxide to dissolve rust. It’s a safe and readily available homemade rust remover knife option.
How to Use Vinegar for Rust Removal
- Soaking: Submerge the rusty knife in white vinegar for several hours or overnight. The soaking time depends on the severity of the rust.
- Scrubbing: After soaking, use a non-abrasive scrub pad or an old toothbrush to scrub away the loosened rust.
- Rinsing and Drying: Thoroughly rinse the knife with water and dry it completely to prevent new rust from forming.
Vinegar Pros and Cons
| Feature | Pro | Con |
|---|---|---|
| Effectiveness | Good for light surface rust | May not be effective for heavy or pitting rust |
| Availability | Readily available and inexpensive | Requires soaking time |
| Safety | Generally safe; avoid prolonged skin contact | Can be corrosive to some materials with prolonged contact |
2. Baking Soda Paste: A Gentle Abrasive
Baking soda is a mild alkali that can help lift rust from the surface of your knife. It’s an excellent choice for those seeking a gentle rust removal method.
How to Use Baking Soda for Rust Removal
- Make a Paste: Mix baking soda with water to form a thick paste.
- Apply the Paste: Coat the rusty areas of the knife with the baking soda paste.
- Scrubbing: Let the paste sit for an hour or two, then scrub with a non-abrasive pad or toothbrush.
- Rinsing and Drying: Rinse the knife thoroughly and dry it immediately.
Baking Soda Pros and Cons
| Feature | Pro | Con |
|---|---|---|
| Effectiveness | Good for light surface rust | Less effective on heavy or pitting rust |
| Availability | Common household item | Requires some scrubbing effort |
| Safety | Safe for most surfaces and skin | Can leave a residue if not rinsed properly |
3. Lemon Juice and Salt: A Corrosive Combination
The citric acid in lemon juice, combined with the abrasive action of salt, can effectively remove rust. This method is simple and utilizes ingredients you likely already have.
How to Use Lemon Juice and Salt for Rust Removal
- Coat with Salt: Sprinkle a generous amount of salt onto the rusty areas of the knife.
- Apply Lemon Juice: Squeeze lemon juice over the salted areas, ensuring the rust is thoroughly saturated.
- Let it Sit: Allow the mixture to sit for 2-3 hours.
- Scrubbing: Scrub with a lemon rind or a non-abrasive pad.
- Rinsing and Drying: Rinse well and dry immediately.
Lemon Juice and Salt Pros and Cons
| Feature | Pro | Con |
|---|---|---|
| Effectiveness | Moderate effectiveness, good for surface rust | Can be messy, not ideal for deeply pitted rust |
| Availability | Common household ingredients | Lemon juice can be acidic; avoid prolonged skin contact |
| Safety | Relatively safe, but test on a small area first | May slightly etch certain knife materials if left too long |
4. Potato Power: Using Oxalic Acid Naturally
Potatoes contain oxalic acid, which can help dissolve rust. While it might seem unconventional, this is a worthwhile rust removal tips for knives.
How to Use Potatoes for Rust Removal
- Cut and Coat: Cut a potato in half and coat the cut end with baking soda or dish soap.
- Scrubbing: Rub the potato firmly over the rusty areas of the knife. The oxalic acid reacts with the rust.
- Rinsing and Drying: Rinse the knife thoroughly and dry it immediately.
Potato Pros and Cons
| Feature | Pro | Con |
|---|---|---|
| Effectiveness | Mild, good for very light surface rust | Not very effective for heavy or established rust |
| Availability | Common and readily available | Requires some physical effort in scrubbing |
| Safety | Very safe; no harsh chemicals involved | Can be time-consuming for noticeable results |
5. Commercial Rust Removers: When You Need Extra Strength
If homemade remedies don’t suffice, commercial rust removers offer more potent rust removal methods for knives. Always follow the manufacturer’s instructions carefully when using these products.
Types of Commercial Rust Removers
- Chemical Rust Removers: These contain strong acids that dissolve rust quickly. They are very effective but require careful handling.
- Rust Converter: These products convert rust into a stable compound, preventing further corrosion. They are often used for treating larger surfaces.
How to Use Commercial Rust Removers
- Preparation: Wear gloves and eye protection. Work in a well-ventilated area.
- Application: Apply the rust remover to the affected area according to the product instructions.
- Waiting Time: Allow the product to sit for the recommended time.
- Scrubbing: Scrub with a brush or pad if necessary.
- Rinsing and Drying: Rinse the knife thoroughly and dry it completely.
- Oiling: Apply a thin coat of food-grade mineral oil to protect the blade.
Commercial Rust Remover Pros and Cons
| Feature | Pro | Con |
|---|---|---|
| Effectiveness | Highly effective, even for severe rust | Can be expensive and requires careful handling |
| Availability | Available at hardware stores and online retailers | May contain harsh chemicals |
| Safety | Follow all safety precautions; wear gloves and eye protection | Can be harmful if ingested or if it comes into contact with skin |
6. Abrasive Methods: When Gentle Won’t Cut It
For stubborn rust, abrasive methods can be effective, but they also pose a greater risk of scratching or damaging the knife.
Options for Abrasive Rust Removal
- Steel Wool: Use fine-grade steel wool to gently rub away rust. Be careful not to scratch the blade.
- Sandpaper: Very fine-grit sandpaper (400 grit or higher) can be used to remove rust. Always move in the direction of the blade’s grain.
- Rust Erasers: These are specialized abrasive blocks designed for removing rust without damaging the metal.
How to Use Abrasive Methods
- Start Gently: Begin with the finest grade abrasive material and increase the coarseness only if necessary.
- Consistent Pressure: Apply even pressure and move in smooth, consistent strokes.
- Lubrication: Use a lubricant, such as mineral oil, to help reduce friction and prevent scratching.
- Inspection: Regularly inspect the blade to ensure you are not removing too much material.
- Cleaning: Clean the knife thoroughly after removing the rust.
Abrasive Methods Pros and Cons
| Feature | Pro | Con |
|---|---|---|
| Effectiveness | Can remove stubborn rust when other methods fail | High risk of scratching or damaging the knife blade |
| Availability | Abrasive materials are widely available | Requires a delicate touch and careful technique |
| Safety | Wear gloves to protect your hands | Potential for metal shavings or abrasive particles to get in your eyes |
Table Summary of Rust Removal Methods
| Method | Effectiveness | Availability | Safety | Pros | Cons |
|---|---|---|---|---|---|
| Vinegar | Moderate | High | High | Safe, readily available, good for light rust | Not effective for heavy rust, requires soaking |
| Baking Soda | Moderate | High | High | Safe, gentle, good for surface rust | Less effective for heavy rust, can leave residue |
| Lemon Juice and Salt | Moderate | High | Moderate | Simple, uses common ingredients, decent for surface rust | Can be messy, acidic, not ideal for pitted rust |
| Potato | Low | High | High | Very safe, uses a common vegetable, good for very light surface rust | Not very effective for heavy rust, requires effort |
| Commercial Remover | High | Moderate | Low | Highly effective, even for severe rust | Can be expensive, requires careful handling, may contain harsh chemicals |
| Abrasive Methods | High | Moderate | Moderate | Can remove stubborn rust when other methods fail | High risk of scratching or damaging the blade, requires a delicate touch |
Restoring Rusty Kitchen Knives: Step-by-Step
Restoring a rusty kitchen knife involves not only removing the rust but also ensuring the knife is properly cleaned, sharpened, and protected. Here’s a detailed step-by-step guide on restoring rusty kitchen knives:
Step 1: Initial Cleaning
Before starting any rust removal method, clean the knife with warm, soapy water to remove any dirt, grease, or food particles. This will help the rust removal method work more effectively.
Step 2: Rust Removal
Select the rust removal method that best suits the level of rust on your knife (vinegar, baking soda, lemon juice, commercial remover, or abrasive methods). Follow the instructions for your chosen method carefully.
Step 3: Deep Cleaning
After removing the rust, give the knife a thorough cleaning. Use a mild dish soap and a non-abrasive sponge or brush to remove any remaining rust particles or residue from the rust removal process.
Step 4: Sharpening the Blade
Rust can dull the blade of your knife. Sharpen the knife using a whetstone, honing steel, or knife sharpener to restore its cutting edge. If you’re not comfortable sharpening yourself, consider taking your knife to a professional.
Step 5: Polishing (Optional)
To further refine the blade and remove any remaining imperfections, you can polish the knife with a metal polish. Apply a small amount of polish to a soft cloth and rub it along the blade, following the grain of the metal.
Step 6: Protecting the Blade
After cleaning and sharpening, protect the blade from future rust by applying a thin coat of food-grade mineral oil or camellia oil. This creates a barrier against moisture and helps prevent oxidation.
Step 7: Proper Storage
Store your knives in a dry place, preferably in a knife block, magnetic strip, or individual sheaths. Avoid storing knives loose in a drawer, as this can damage the blades and increase the risk of rust.
Preventing Rust on Kitchen Knives: Proactive Measures
The best way to deal with rust is to prevent it from forming in the first place. Here are some essential tips for preventing rust on kitchen knives:
1. Wash and Dry Immediately
Always wash your knives immediately after use, especially after cutting acidic foods like lemons or tomatoes. Dry them thoroughly with a clean towel. Never leave knives to air dry, as this can lead to water spots and rust.
2. Avoid Dishwashers
Dishwashers can be harsh on knives. The high heat and prolonged exposure to water can promote rust, especially on knives with carbon steel blades. Hand washing is always the best option.
3. Regular Oiling
Apply a thin coat of food-grade mineral oil or camellia oil to your knives regularly, especially if they are not used frequently. This creates a protective barrier against moisture and prevents rust.
4. Proper Storage
Store your knives in a dry environment. Knife blocks, magnetic strips, or individual sheaths are ideal storage solutions. Avoid storing knives in humid areas or near sources of moisture.
5. Use a Cutting Board
Always use a cutting board when preparing food. Cutting directly on countertops or other hard surfaces can damage the blade and increase the risk of rust.
6. Consider Stainless Steel or High-Carbon Stainless Steel
If rust is a persistent problem, consider investing in knives made from stainless steel or high-carbon stainless steel. These materials are more resistant to rust than carbon steel.
7. Dehumidifiers
In humid environments, consider using a dehumidifier in your kitchen to reduce moisture levels.
FAQ: Addressing Common Questions About Knife Rust Removal
-
What is the best rust remover for knives?
- The “best” rust remover depends on the severity of the rust. For light surface rust, vinegar, baking soda, or lemon juice may suffice. For heavy rust, a commercial rust remover may be necessary.
-
Can I use steel wool on my knife?
- Yes, but use fine-grade steel wool and apply gentle pressure to avoid scratching the blade.
-
How do I prevent my knives from rusting?
- Wash and dry knives immediately after use, avoid dishwashers, apply oil regularly, and store knives in a dry place.
-
Is rust on my knife dangerous?
- While surface rust is generally not harmful, it’s best to remove it to prevent further corrosion and maintain the knife’s performance. Ingesting large amounts of rust is not recommended.
-
What type of oil should I use to protect my knives?
- Food-grade mineral oil or camellia oil are excellent choices for protecting your knives.
-
How often should I oil my knives?
- Oil your knives every few weeks or after each use, especially if you live in a humid environment or wash them frequently.
By following these rust removal tips for knives and preventive measures, you can keep your kitchen knives in top condition for years to come. Restoring rusty kitchen knives is achievable with the right techniques and attention to detail.
Hi, I’m Scott Fischer, the voice behind SliceItRight. My passion for food started in my grandmother’s kitchen, where I learned the art of slicing, dicing, and creating delicious meals. Over the years, I’ve explored everything from the perfect kitchen gadgets to mastering culinary techniques, and I’m here to share all of it with you. Whether you’re a beginner or an experienced home chef, my goal is to make cooking easier, more enjoyable, and a lot more fun. So, let’s slice it right and cook up something amazing together!