Can I install crown molding on my kitchen cabinets myself? Yes, you can! Installing cabinet crown molding yourself is a rewarding DIY project that can significantly enhance the look of your kitchen. This comprehensive guide will walk you through every step, from planning and preparation to cutting, attaching, and finishing. Adding crown molding to kitchen cabinets isn’t as daunting as it seems.
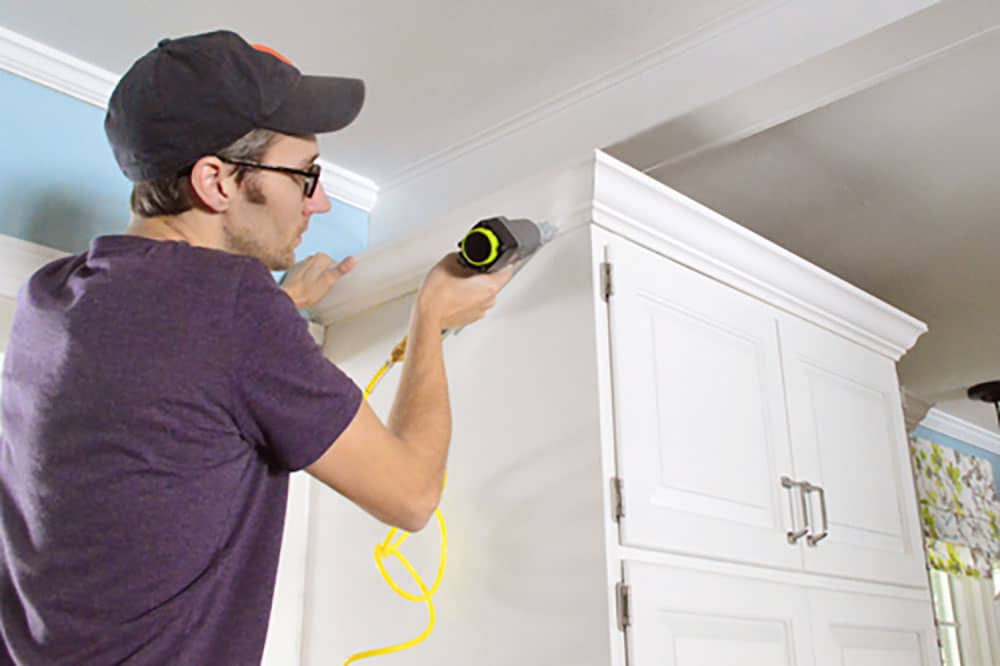
Image Source: www.younghouselove.com
Preparing for Your Kitchen Cabinet Trim Installation
Before you even think about cutting wood, proper planning is essential. This will save you time, money, and frustration in the long run.
Assessing Your Cabinets and Space
First, look at your cabinets.
- Cabinet Style: Are they frameless or framed? This impacts how you attach the molding. Framed cabinets provide a solid face frame to nail or screw into, while frameless cabinets might require additional blocking.
- Cabinet Height: Measure the height of your tallest cabinet. This dictates how much crown molding you’ll need.
- Ceiling Height: Consider the distance between the top of your cabinets and the ceiling. Too little space can make the crown molding look cramped.
- Room Style: Does your kitchen have a modern, traditional, or farmhouse style? The style of the crown molding should match. A simple, clean design works well for modern kitchens, while ornate molding suits traditional spaces.
Gathering Your Tools and Materials
Having the right tools will make the job much easier. Here’s a list:
- Crown Molding: Choose a style and material (wood, MDF, or PVC). Wood is paintable and stainable. MDF is less expensive and also paintable. PVC is moisture-resistant and good for humid environments.
- Miter Saw: This is crucial for accurate angle cuts. A 10-inch or 12-inch saw is recommended.
- Coping Saw: For creating cope joints (more on that later!).
- Nail Gun (or Drill): A brad nailer with 1 1/4″ or 1 1/2″ brad nails is ideal. If you don’t have a nail gun, you can use a drill with pilot holes and screws.
- Measuring Tape: Accuracy is key!
- Pencil: For marking your cuts.
- Level: To ensure your molding is straight.
- Stud Finder: Locate studs in the walls if you’re attaching blocking.
- Wood Glue: Adds extra strength to joints.
- Painter’s Caulk: To fill gaps for a seamless finish.
- Sandpaper: For smoothing rough edges.
- Primer and Paint (or Stain): To match your cabinets.
- Safety Glasses: Protect your eyes!
- Dust Mask: Protect your lungs!
- Crown Molding Jig (Optional): Helps hold the molding at the correct angle while cutting.
Estimating Your Crown Molding Needs
Measure the total length of cabinets that will receive crown molding. Add at least 10% extra for waste due to cuts and mistakes. It’s always better to have too much than too little.
- Straight Runs: Measure each straight section of cabinets.
- Inside Corners: These will require mitering or coping.
- Outside Corners: These also need mitering.
Cabinet Crown Molding Mitering: The Cutting Process
Cutting crown molding can be tricky because of its angles. Here are two methods: mitering and coping.
Fathoming Miter Cuts
Miter cuts involve cutting the molding at an angle to create a corner. Here’s how:
- Set Up Your Miter Saw: Most crown molding sits at a 45-degree angle against the wall and ceiling. Consult your molding’s specifications for the exact angle.
- Inside Corners: For an inside corner, cut one piece with the miter saw angled 45 degrees to the left and the other piece 45 degrees to the right.
- Outside Corners: For an outside corner, cut one piece with the miter saw angled 45 degrees to the right and the other piece 45 degrees to the left.
- “Upside Down and Backwards” Method: This method involves placing the crown molding upside down and backwards on the miter saw, mimicking its position against the wall and ceiling. Consult online resources for clear visuals of this technique.
- Test Fit: Always do a test fit before applying glue or nails.
Interpreting Cope Cuts
Coping is an alternative to mitering for inside corners. It creates a seamless joint even if the corner isn’t perfectly square.
- Miter One Piece: Cut one piece of molding at a 45-degree angle as if you were mitering it for an inside corner.
- Coping: Use a coping saw to cut away the back of the mitered edge, following the profile of the molding. This creates a curved edge that will fit snugly against the other piece of molding.
- Fine-Tune: Use a file or sandpaper to refine the cope cut for a perfect fit.
Mitering vs. Coping: Which is Better?
| Feature | Mitering | Coping |
|---|---|---|
| Best For | Perfect 90-degree corners, straight runs | Imperfect corners, textured walls |
| Skill Level | Beginner-friendly | Requires more skill and patience |
| Joint Accuracy | Sensitive to wall imperfections | Tolerates imperfect corners |
| Appearance | Clean, sharp lines | More forgiving, less prone to gaps |
Addressing Scarf Joints
When you need to join two pieces of crown molding along a straight run, use a scarf joint. This involves cutting both pieces at a 45-degree angle and overlapping them. This creates a stronger and less visible joint than a simple butt joint.
Attaching Crown Molding to Cabinets
Now it’s time to attach the crown molding to your cabinets.
Installing Cabinet Crown Molding: Direct Attachment
This is the most common method for framed cabinets.
- Apply Glue: Apply a bead of wood glue to the back of the crown molding where it will contact the cabinet face frame.
- Position the Molding: Carefully position the crown molding on top of the cabinets.
- Nail or Screw: Use a brad nailer to nail the molding to the face frame. If you’re using screws, pre-drill pilot holes to prevent splitting the wood.
- Check for Level: Use a level to ensure the molding is straight.
- Repeat: Repeat the process for each section of crown molding.
Adding Crown Molding to Kitchen Cabinets: Using Blocking
This method is often used for frameless cabinets or when you need extra support.
- Install Blocking: Attach wood blocks to the top of the cabinets, flush with the front edge. Use screws to secure the blocks from inside the cabinet.
- Attach Molding: Attach the crown molding to the blocking using glue and nails or screws.
Addressing Gaps and Imperfections
Even with careful cutting and installation, you might encounter small gaps.
- Caulk: Use painter’s caulk to fill any gaps between the crown molding and the cabinets or the ceiling. Apply a thin bead of caulk and smooth it with your finger or a damp cloth.
- Wood Filler: Use wood filler to fill any nail holes or imperfections in the molding. Sand smooth when dry.
Kitchen Cabinet Crown Molding Tips: Finishing Touches
Finishing is what elevates your project from good to great.
Sanding and Priming
- Sanding: Lightly sand the crown molding to create a smooth surface for paint or stain.
- Priming: Apply a coat of primer to the molding. This helps the paint adhere better and provides a uniform finish.
Painting or Staining
- Painting: Apply two coats of paint, allowing each coat to dry completely before applying the next. Use a high-quality brush or sprayer for a smooth finish.
- Staining: If you’re staining the molding, apply the stain evenly and wipe off any excess. Apply a clear coat of varnish or polyurethane to protect the stain.
Final Inspection
Take a step back and admire your work. Look for any imperfections and touch them up as needed.
Grasping Advanced Crown Molding Installation Techniques for Cabinets
For more complex installations, consider these techniques:
- Spring Angle Adjustments: Some rooms have ceilings that aren’t perfectly level. Adjust the spring angle of your miter saw to compensate.
- Using a Crown Molding Jig: A crown molding jig helps you hold the molding at the correct angle while cutting, improving accuracy.
- Pre-Assembling Corners: For long runs with multiple corners, pre-assemble the corners on a workbench before attaching them to the cabinets.
Kitchen Cabinet Crown Molding Tips: Problem Solving
Here are some common problems and solutions:
- Gaps at Corners: Recut the molding or use caulk to fill the gaps.
- Molding Not Level: Use shims to level the molding before attaching it.
- Nail Holes Visible: Fill the nail holes with wood filler and sand smooth.
- Paint Runs: Sand the runs smooth and apply another coat of paint.
FAQ: Cabinet Crown Molding Installation Guide
- What is the best type of crown molding for kitchen cabinets? The best type depends on your style and budget. Wood is versatile, MDF is affordable, and PVC is moisture-resistant.
- How do I measure for crown molding? Measure the total length of cabinets that will receive crown molding and add at least 10% extra for waste.
- Can I install crown molding on frameless cabinets? Yes, but you’ll need to install blocking first to provide a surface for attaching the molding.
- What is the best way to cut crown molding? Use a miter saw for accurate angle cuts. Coping is a good alternative for inside corners.
- How do I attach crown molding to cabinets? Use glue and nails or screws.
- How do I fill gaps in crown molding? Use painter’s caulk.
- How do I paint crown molding? Prime the molding first, then apply two coats of paint.
- Is installing crown molding on kitchen cabinets difficult? It can be challenging, but with careful planning and the right tools, it’s a manageable DIY project.
- What if my corners aren’t perfectly square? Coping is a good solution for inside corners that aren’t perfectly square.
- Who is best suited to install crown molding? Any homeowner comfortable with basic woodworking tools and techniques can tackle this project. If you’re unsure, consider hiring a professional.
Installing crown molding on your kitchen cabinets is a project that requires patience and attention to detail. But the results are well worth the effort. By following these steps and tips, you can transform your kitchen into a more elegant and stylish space.
Hi, I’m Scott Fischer, the voice behind SliceItRight. My passion for food started in my grandmother’s kitchen, where I learned the art of slicing, dicing, and creating delicious meals. Over the years, I’ve explored everything from the perfect kitchen gadgets to mastering culinary techniques, and I’m here to share all of it with you. Whether you’re a beginner or an experienced home chef, my goal is to make cooking easier, more enjoyable, and a lot more fun. So, let’s slice it right and cook up something amazing together!