How can you paint kitchen cabinets without leaving any brush marks? You can achieve a smooth cabinet finish by using the right tools, like a high-quality sprayer, and following specific cabinet painting techniques. Careful prep work, thin coats of paint, and a self-leveling paint will also eliminate brush strokes and give you professional-looking results.
Painting your kitchen cabinets is a fantastic DIY cabinet refinishing project that can dramatically transform your kitchen without breaking the bank. However, one of the biggest challenges many homeowners face is achieving a smooth cabinet finish free from unsightly brush marks. This guide will walk you through the steps, techniques, and tools needed for professional cabinet painting, focusing on eliminating brush strokes and achieving a flawless, factory-like finish.
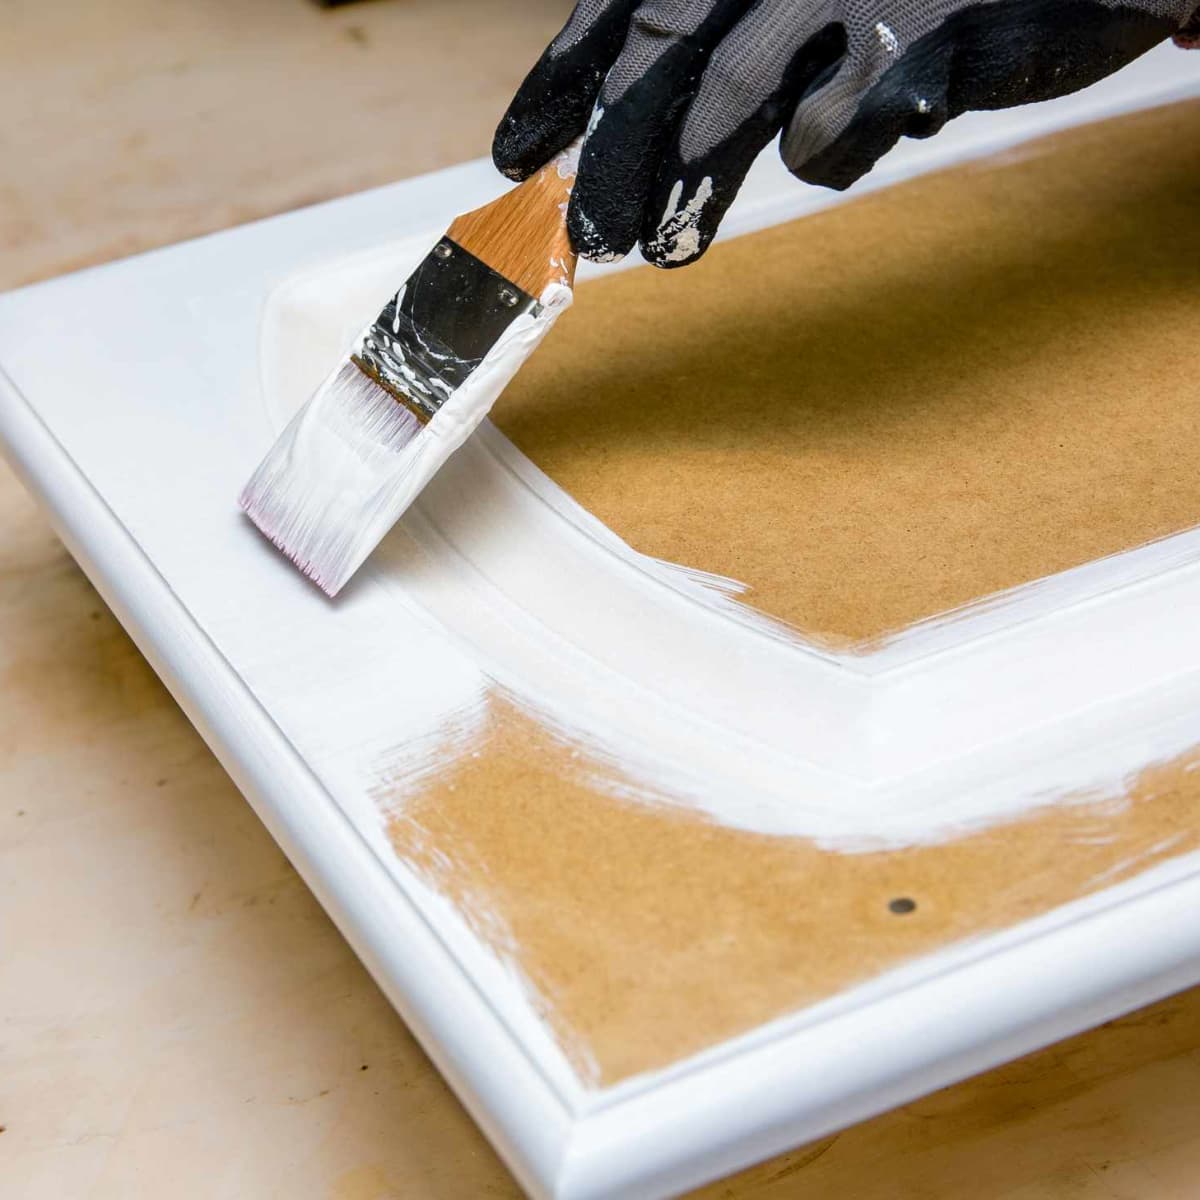
Image Source: images.saymedia-content.com
Grasping the Basics of a Flawless Cabinet Finish
Achieving a smooth, professional-looking cabinet finish isn’t just about applying paint. It’s about meticulous preparation, using the right materials, and employing proper cabinet painting techniques. Brush marks are a common issue, but with the right approach, they can be avoided.
Why Do Brush Marks Occur?
Several factors contribute to the appearance of brush marks:
- Using the wrong type of brush: Cheap brushes often leave bristles behind and create uneven textures.
- Applying too much paint: Thick coats of paint don’t level properly and tend to show brush strokes.
- Using the wrong type of paint: Some paints dry too quickly, not allowing enough time for the brush strokes to disappear.
- Poor surface preparation: Imperfections on the cabinet surface will be magnified by the paint.
- Incorrect painting technique: Not feathering the edges of each stroke can leave visible lines.
Cabinet Painting Tools and Materials
Having the right tools is crucial for achieving a smooth cabinet finish. Here’s a list of essential cabinet painting tools:
- Degreaser: For cleaning cabinets (e.g., TSP or a phosphate-free alternative).
- Sanding sponges/sandpaper (120-grit, 220-grit, 320-grit): For smoothing surfaces and creating adhesion.
- Tack cloth: For removing dust after sanding.
- Primer (specially formulated for cabinets): To improve paint adhesion and block stains.
- Paint (cabinet-grade): Choose a durable paint formulated for cabinets (more on this below).
- High-quality paint brushes: A fine-tipped brush for trim and details, and a small angled brush for corners.
- Paint roller (foam or microfiber with a short nap): For applying paint to larger, flat surfaces.
- Paint sprayer (optional): For a flawless, brush-free finish (HVLP or airless).
- Painter’s tape: For masking off areas you don’t want to paint.
- Drop cloths: To protect your floors and countertops.
- Screwdriver or drill: For removing cabinet doors and hardware.
- Wood filler: For repairing any cracks or imperfections.
- Caulk (paintable): For filling gaps around the cabinets.
- Respirator/mask: To protect yourself from fumes and dust.
- Safety glasses: To protect your eyes.
- Spray Shelter (if spray painting): To contain overspray and protect surrounding areas.
Selecting the Best Paint for Cabinets
Choosing the best paint for cabinets is critical for durability and aesthetics. Consider these options:
- Acrylic Latex Paint: A popular choice due to its durability, ease of use, and water-based cleanup. Look for a high-quality acrylic latex paint specifically formulated for cabinets and trim.
- Alkyd Paint (Oil-Based): Known for its hard, durable finish and excellent leveling properties (helps to eliminate brush strokes). However, it requires mineral spirits for cleanup and has a stronger odor. Modern alkyd paints have lower VOCs than traditional oil-based paints.
- Waterborne Alkyd Paint: Combines the benefits of both acrylic latex and alkyd paints. It offers the durability and leveling properties of alkyd paint with the low VOCs and easy cleanup of acrylic latex paint.
- Pre-catalyzed lacquer: This finish is often used by professional cabinet painters due to its exceptional durability and smooth finish. However, it requires specialized equipment and expertise to apply safely and effectively.
Table: Paint Types for Kitchen Cabinets
| Paint Type | Pros | Cons | Best For |
|---|---|---|---|
| Acrylic Latex | Durable, easy to use, water-based cleanup, low VOCs | May require multiple coats, not as hard as alkyd. | DIYers looking for convenience and ease of use. |
| Alkyd (Oil-Based) | Hard, durable finish, excellent leveling properties. | Strong odor, requires mineral spirits for cleanup, higher VOCs (traditional). | Professional-looking finish, high-traffic areas. |
| Waterborne Alkyd | Durable, good leveling, low VOCs, water-based cleanup. | Can be more expensive than other options. | A balance of durability and ease of use. |
| Pre-catalyzed Lacquer | Extremely durable, smooth finish, used by professionals. | Requires specialized equipment and expertise, can be expensive. | Professional cabinet painting. |
When choosing your paint, look for a self-leveling paint. This type of paint is formulated to flow smoothly and minimize brush strokes as it dries.
Step-by-Step Guide: Painting Kitchen Cabinets Like a Pro
Follow these steps carefully for professional cabinet painting results.
1. Preparation: The Key to a Flawless Finish
Proper preparation is the most important step in achieving a smooth, professional cabinet finish.
- Remove Doors and Hardware: Take off all cabinet doors, drawers, knobs, pulls, hinges, and other hardware. Label each door and drawer to ensure proper reinstallation.
- Clean the Cabinets Thoroughly: Use a degreaser (like TSP or a phosphate-free alternative) to remove grease, grime, and dirt. Rinse thoroughly with clean water and let dry completely.
- Sand the Surfaces: Use 120-grit sandpaper to lightly scuff the existing finish. This will create a better surface for the primer to adhere to. Focus on removing any glossy sheen. After the first sanding, inspect the cabinets and fill any holes, dings, or imperfections with wood filler. Let the wood filler dry completely, then sand smooth with 220-grit sandpaper. For extremely smooth results, wet sand with 320-grit sandpaper.
- Dust and Tack Cloth: Remove all sanding dust with a vacuum and then wipe down the cabinets with a tack cloth to remove any remaining particles.
- Masking: Use painter’s tape to protect any areas you don’t want to paint, such as walls, countertops, and the insides of cabinets.
2. Priming: Creating the Perfect Base
Primer is essential for several reasons:
- Adhesion: Primer creates a strong bond between the existing cabinet finish and the new paint.
- Stain Blocking: Primer prevents stains from bleeding through the paint.
- Uniform Finish: Primer creates a uniform surface for the paint to adhere to, ensuring consistent color and sheen.
Apply one or two thin, even coats of a high-quality cabinet-grade primer. Allow the primer to dry completely according to the manufacturer’s instructions. Lightly sand the primed surface with 320-grit sandpaper to remove any imperfections and create an even smoother surface for painting. Remember to remove all dust with a tack cloth before proceeding.
3. Painting: Techniques for Eliminating Brush Strokes
Here are several cabinet painting techniques that will help in eliminating brush strokes.
Technique 1: Brushing and Rolling
While spray painting is ideal, you can still achieve a smooth finish with a brush and roller.
- Choose the Right Tools: Use a high-quality brush with fine, synthetic bristles and a short-nap foam or microfiber roller.
- Apply Thin Coats: Apply thin, even coats of paint. Avoid applying too much paint at once, as this will increase the likelihood of brush marks.
- Feather the Edges: As you paint, feather the edges of each stroke to blend them together seamlessly.
- Roll After Brushing: For larger, flat surfaces, use a roller to smooth out any brush marks immediately after applying the paint with a brush.
- Self-Leveling Paint: Use a self-leveling paint formulated to minimize brush strokes.
- Allow Proper Drying Time: Let each coat dry completely before applying the next. Lightly sand between coats with 320-grit sandpaper to remove any imperfections.
Technique 2: Spray Painting Kitchen Cabinets
Spray painting kitchen cabinets is the best way to achieve a smooth, factory-like finish without brush marks.
- Choose the Right Sprayer: Options include HVLP (High Volume Low Pressure) sprayers, airless sprayers, and aerosol spray cans. HVLP sprayers are a good choice for DIYers because they provide excellent control and minimize overspray.
- Thin the Paint (if necessary): Some paints may need to be thinned before spraying. Follow the manufacturer’s instructions for thinning ratios.
- Practice: Practice your spraying technique on a piece of cardboard or scrap wood before painting the cabinets. This will help you get a feel for the sprayer and adjust the settings as needed.
- Apply Thin, Even Coats: Hold the sprayer 6-8 inches away from the surface and apply thin, even coats of paint, overlapping each stroke slightly.
- Maintain a Consistent Speed: Move the sprayer at a consistent speed to avoid drips and uneven coverage.
- Multiple Coats: Apply multiple thin coats of paint, allowing each coat to dry completely before applying the next. Lightly sand between coats with 320-grit sandpaper.
Table: Comparing Spray Painting Methods
| Method | Pros | Cons | Best For |
|---|---|---|---|
| HVLP Sprayer | Excellent control, minimal overspray, good for DIYers. | Can be slower than airless sprayers, requires practice. | Achieving a smooth finish with minimal waste. |
| Airless Sprayer | Fast, efficient, good for large projects. | Can produce more overspray, requires more skill to operate. | Large projects where speed is important. |
| Aerosol Cans | Convenient, easy to use for small touch-ups. | Can be expensive for large projects, less control than other methods. | Small projects, touch-ups, and hard-to-reach areas. |
4. Drying and Curing: Patience is Key
Allow the paint to dry completely according to the manufacturer’s instructions. This may take several hours or even overnight. Avoid touching or handling the cabinets until the paint is fully dry.
Once the paint is dry, allow it to cure for several days or weeks before reassembling the cabinets. Curing is the process where the paint hardens and becomes more durable.
5. Reassembly: Putting it All Back Together
Carefully reassemble the cabinets, attaching the doors, drawers, and hardware. Use the labels you created earlier to ensure that each piece is reinstalled in the correct location.
6. Final Touches: Achieving Perfection
Inspect the cabinets for any imperfections or touch-ups. Use a small brush or artist’s brush to touch up any areas that need attention.
Apply paintable caulk to any gaps or seams around the cabinets for a clean, professional look.
Cabinet Painting Tips for Success
Here are some additional cabinet painting tips to help you achieve the best results:
- Work in a well-ventilated area: This will help to reduce the fumes and odors from the paint.
- Use a paint additive: Consider using a paint additive designed to improve flow and leveling.
- Sand between coats: Lightly sanding between coats will remove any imperfections and create a smoother surface.
- Don’t rush the process: Take your time and follow the steps carefully for the best results.
- Clean your tools immediately after use: This will help to prolong the life of your tools.
- Consider the humidity: High humidity can affect the drying time of the paint.
- Temperature matters: Aim to paint in temperatures between 65°F and 75°F for optimal results.
- Invest in good lighting: Proper lighting will help you see any imperfections and ensure even coverage.
FAQ: Common Questions About Painting Kitchen Cabinets
- What is the best way to prepare kitchen cabinets for painting? The best way to prepare kitchen cabinets for painting is to clean them thoroughly, sand them to create a smooth surface, and apply a high-quality primer.
- Can I paint my kitchen cabinets without sanding? While it is possible to paint kitchen cabinets without sanding, it is not recommended. Sanding helps to create a better surface for the primer to adhere to, resulting in a more durable and long-lasting finish.
- Who is best suited to paint their own kitchen cabinets? Anyone with patience, attention to detail, and basic DIY skills can paint their own kitchen cabinets. However, if you are not comfortable with the process or lack the time, it may be best to hire a professional.
- What type of paint is best for kitchen cabinets? The best type of paint for kitchen cabinets is a high-quality acrylic latex or alkyd paint specifically formulated for cabinets and trim.
- How many coats of paint do I need on my kitchen cabinets? You will typically need two coats of paint on your kitchen cabinets to achieve full coverage and a smooth, even finish.
- How do I prevent brush marks when painting kitchen cabinets? To prevent brush marks when painting kitchen cabinets, use a high-quality brush or sprayer, apply thin, even coats of paint, and consider using a self-leveling paint additive.
- What is the best way to clean painted kitchen cabinets? The best way to clean painted kitchen cabinets is to use a mild soap and water solution. Avoid using harsh chemicals or abrasive cleaners, as these can damage the paint.
By following these tips and techniques, you can achieve a smooth, professional cabinet finish without brush marks and transform your kitchen into a space you’ll love. Good luck with your DIY cabinet refinishing project!
Hi, I’m Scott Fischer, the voice behind SliceItRight. My passion for food started in my grandmother’s kitchen, where I learned the art of slicing, dicing, and creating delicious meals. Over the years, I’ve explored everything from the perfect kitchen gadgets to mastering culinary techniques, and I’m here to share all of it with you. Whether you’re a beginner or an experienced home chef, my goal is to make cooking easier, more enjoyable, and a lot more fun. So, let’s slice it right and cook up something amazing together!