Are you wondering how to attach crown molding to kitchen cabinets? You can easily enhance the look of your kitchen by installing crown molding on top of your cabinets. This guide provides step-by-step instructions for kitchen cabinet crown molding installation, making the process simple and manageable, even for beginners.
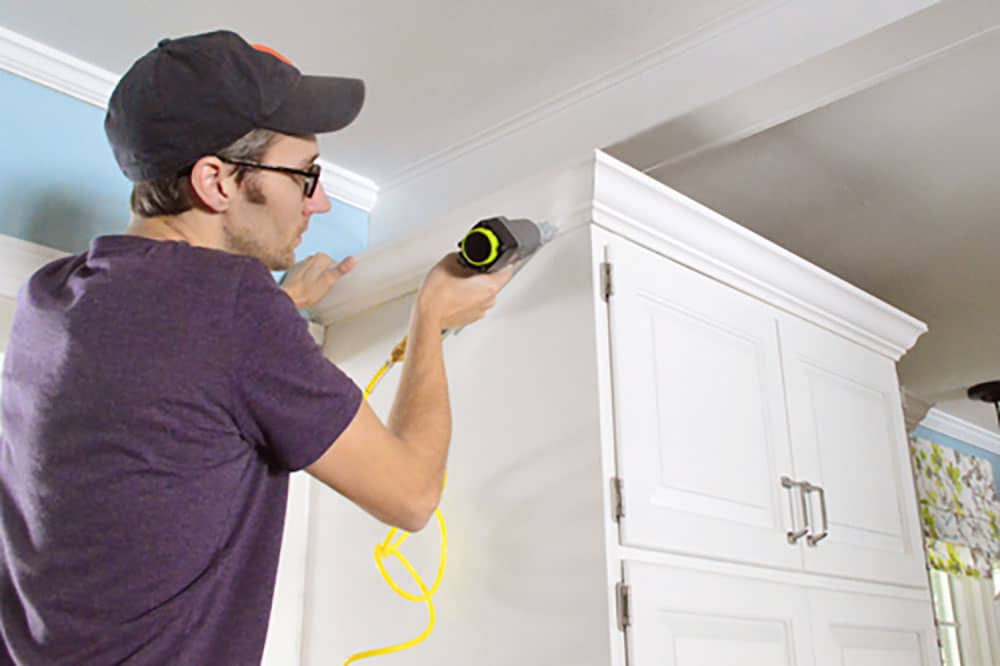
Image Source: www.younghouselove.com
Why Add Crown Moulding to Your Kitchen Cabinets?
Crown molding is a decorative trim that adds a touch of elegance and sophistication to any kitchen. Beyond aesthetics, crown molding for cabinets can:
- Increase Home Value: A well-done crown molding installation can boost your home’s appeal and perceived value.
- Hide Imperfections: Crown molding can conceal gaps or unevenness between the cabinets and the ceiling.
- Create a Finished Look: It provides a seamless transition and gives your kitchen a polished, professional appearance.
- Add Character: Choose from various styles to match your kitchen’s décor, from traditional to modern.
Tools and Materials Needed for Installing Crown Moulding on Kitchen Cabinets
Before you start installing crown moulding on kitchen cabinets, gather the necessary tools and materials. Having everything ready will make the project run smoothly.
- Crown molding (pre-primed or finished)
- Measuring tape
- Pencil
- Miter saw
- Coping saw (optional, for inside corners)
- Brad nailer or finish nailer
- Air compressor (if using a pneumatic nailer)
- Construction adhesive
- Caulk and caulk gun
- Wood filler
- Sandpaper
- Safety glasses
- Ear protection
- Stud finder (optional, but helpful)
- Laser level or regular level
- Clamps
- Painter’s tape
Step-by-Step Guide: Attaching Crown Moulding to Cabinets
Follow these detailed steps for attaching crown moulding to cabinets and achieve a professional-looking result.
Step 1: Accurate Measuring is Key
The success of your cabinet crown molding how to project hinges on precise measurements.
- Measure the Lengths: Measure the length of each cabinet run where you’ll install the crown molding. Note each measurement carefully.
- Account for Corners: Determine the angles of your corners. Most corners are 90 degrees, but check to be sure. For inside corners, you’ll either miter or cope the joint.
- Add Extra Length: Always add a few extra inches to each piece of molding. It’s better to have too much than too little. You can always trim off excess.
Step 2: Cutting the Crown Molding
Proper cutting is essential for seamless joints. Use a miter saw for accurate angles.
- Set the Miter Saw: Adjust the miter saw to the correct angle for your corners. For a 90-degree corner, each piece of molding needs a 45-degree cut.
- Cut Outside Corners: For outside corners, the molding pieces should meet with the points extending outward.
-
Cut Inside Corners: For inside corners, you have two options:
- Mitered Joint: Cut each piece at a 45-degree angle, similar to outside corners, but with the points facing inward.
- Coped Joint: Cut one piece square and cope the other piece to fit against it. Coping involves removing the back portion of the molding to match the profile of the adjacent piece. This technique is often preferred because it allows for slight variations in wall angles.
4. Test the Fit: Before applying adhesive or nails, test the fit of each piece to ensure accurate cuts. Adjust as necessary.
Step 3: Preparing the Cabinets for Crown Moulding
Before securing crown molding to cabinets, ensure the surface is clean and ready for installation.
- Clean the Surface: Wipe down the top of the cabinets with a clean cloth to remove any dust or debris.
- Create a Nailing Surface: Adding a “nailer” can be very useful, this will be a piece of wood that attaches to the top of the cabinet and provides a good surface for nailing the crown molding. The nailer will need to be custom made to fit your cabinets.
- Mark Stud Locations (Optional): If possible, use a stud finder to locate studs in the wall behind the cabinets. Marking these locations can help when securing the molding for extra support.
Step 4: Applying Adhesive and Nailing
Combining adhesive with nails provides a strong and durable bond. This is critical for kitchen cabinet top trim installation.
- Apply Adhesive: Apply a thin bead of construction adhesive along the top edge of the cabinets where the crown molding will be attached.
- Position the Moulding: Carefully position the crown molding against the cabinets, aligning it with your pencil marks.
- Nail the Moulding: Using a brad nailer or finish nailer, drive nails through the molding into the cabinet frame. Space the nails approximately every 6-8 inches.
- Secure Corners: Pay special attention to securing the corner joints. Use clamps to hold the pieces together while the adhesive dries. You may need to use more nails in these areas for added stability.
Step 5: Finishing Touches: Caulking, Filling, and Painting
These final steps will give your kitchen cabinet molding attachment methods a professional finish.
- Caulk the Seams: Apply caulk along the top edge of the crown molding where it meets the ceiling and along any seams or joints. This will create a seamless appearance and prevent drafts.
- Fill Nail Holes: Use wood filler to fill any nail holes or imperfections in the molding. Allow the filler to dry completely.
- Sand Smooth: Once the filler is dry, sand the surface smooth with fine-grit sandpaper.
- Paint or Stain: If your crown molding is not pre-finished, apply paint or stain to match your cabinets or kitchen décor. Apply multiple thin coats for best results.
Different Methods of Attaching Crown Moulding
There are a few different kitchen cabinet molding attachment methods that you can consider, depending on your skill level and the materials you have available.
Traditional Nailing
Using a nail gun or hammer and nails is a straightforward method.
- Pros: Relatively simple and quick.
- Cons: Can leave visible nail holes, requires filling and sanding.
Adhesive Only
Using construction adhesive alone can work, especially for lightweight molding.
- Pros: No nail holes to fill, less risk of damaging the cabinets.
- Cons: Requires strong adhesive and careful clamping while it dries. Not suitable for heavy molding.
Combination of Adhesive and Nailing
This method combines the benefits of both nailing and adhesive, providing a strong and durable bond while minimizing visible nail holes.
- Pros: Strongest and most reliable method, minimizes visible nail holes.
- Cons: Requires both tools and materials, slightly more time-consuming.
Using Crown Molding Clips
These clips attach to the top of the cabinets and allow you to snap the crown molding into place.
- Pros: Easy to install and remove, no nails or adhesive needed.
- Cons: May not be suitable for all types of crown molding, can be less secure than other methods.
Fathoming Miter and Coping Cuts
Choosing the right cutting method can make a significant difference in the final look of your crown molding.
Miter Cuts
Miter cuts involve cutting each piece of molding at an angle to create a joint.
- Ideal for: Outside corners and simple inside corners.
- Pros: Quick and easy to execute.
- Cons: Can be less forgiving if walls are not perfectly square.
Coping Cuts
Coping involves cutting one piece of molding square and shaping the other piece to fit snugly against it.
- Ideal for: Inside corners, especially when walls are not perfectly square.
- Pros: More forgiving, creates a tight and seamless joint.
- Cons: Requires more skill and patience, can be time-consuming.
| Cutting Method | Ideal Use | Pros | Cons |
|---|---|---|---|
| Miter Cut | Outside Corners | Quick, Easy | Less forgiving with uneven walls, visible seams may occur |
| Coping Cut | Inside Corners | Forgiving, Seamless joint | Requires more skill and time, potentially more waste of material |
Tips for a Successful Crown Moulding Installation
- Practice Cuts: Before cutting your actual molding, practice on scrap pieces to get a feel for the miter saw and the angles.
- Use a Crown Moulding Jig: A crown molding jig can help hold the molding in place while you cut it, ensuring accurate angles.
- Work in Small Sections: Don’t try to install all the crown molding at once. Work in small sections to ensure accuracy and prevent mistakes.
- Get Help: Installing crown molding can be easier with a helper. One person can hold the molding in place while the other nails it.
- Take Your Time: Rushing the process can lead to mistakes. Take your time and pay attention to detail for best results.
Common Mistakes to Avoid
- Inaccurate Measurements: Double-check your measurements to avoid cutting the molding too short.
- Incorrect Angles: Ensure your miter saw is set to the correct angle for the corners.
- Poorly Secured Joints: Use plenty of adhesive and nails to secure the joints and prevent them from separating.
- Skipping the Finishing Touches: Don’t skip the caulking, filling, and painting. These steps are essential for a professional-looking result.
- Not Using Safety Gear: Always wear safety glasses and ear protection when using power tools.
Maintaining Your Crown Moulding
Once your crown molding is installed, proper maintenance will keep it looking its best.
- Dust Regularly: Dust the crown molding regularly with a soft cloth or vacuum cleaner with a brush attachment.
- Clean as Needed: Clean any spills or stains with a damp cloth and mild detergent.
- Inspect Periodically: Inspect the crown molding periodically for any signs of damage or loose joints.
- Touch Up Paint: Touch up any chips or scratches in the paint with matching paint.
- Recaulk When Necessary: Recaulk any seams or joints that are cracked or damaged.
FAQ: Frequently Asked Questions
-
What is the best type of crown molding for kitchen cabinets?
The best type depends on your style and budget. Common options include wood, MDF (Medium-Density Fiberboard), and PVC. Wood offers a classic look, MDF is cost-effective and easy to paint, and PVC is moisture-resistant and ideal for kitchens with high humidity.
* Can I install crown molding on cabinets myself?Yes, with the right tools, materials, and instructions, installing crown molding is a manageable DIY project.
* How much does it cost to install crown molding on kitchen cabinets?The cost varies depending on the type of molding, the size of your kitchen, and whether you hire a professional. DIY installation can save you money on labor costs.
* What if my walls aren’t perfectly square?Coping the inside corners is the best solution for walls that aren’t perfectly square. This technique allows for slight variations in wall angles.
* How do I choose the right size of crown molding?Consider the size of your cabinets and the height of your ceiling. Larger cabinets and higher ceilings can accommodate larger crown molding. A general rule is to choose a molding that is proportional to the cabinets and the overall kitchen design.
* Do I need to prime the crown molding before painting?If you’re using wood or MDF crown molding, priming is recommended. Primer helps the paint adhere better and provides a more uniform finish.
By following this comprehensive guide, you can successfully attach crown molding to your kitchen cabinets and transform the look of your kitchen. Remember to take your time, measure accurately, and pay attention to detail for the best results.
Hi, I’m Scott Fischer, the voice behind SliceItRight. My passion for food started in my grandmother’s kitchen, where I learned the art of slicing, dicing, and creating delicious meals. Over the years, I’ve explored everything from the perfect kitchen gadgets to mastering culinary techniques, and I’m here to share all of it with you. Whether you’re a beginner or an experienced home chef, my goal is to make cooking easier, more enjoyable, and a lot more fun. So, let’s slice it right and cook up something amazing together!