Yes, you can repaint kitchen cabinets without sanding. While sanding is often recommended for optimal paint adhesion, advancements in paint technology and surface preparation techniques offer viable alternatives. This guide explores the process, materials, and tips for a successful no-sand cabinet painting project, including information on no-sand cabinet paint, how to paint kitchen cabinets no sanding, how to degloss kitchen cabinets before painting, what is the best paint for cabinets without sanding, and how to use a cabinet paint adhesion promoter. We’ll also discuss effective cleaning cabinets before painting no sanding, alternatives to sanding cabinets before painting, how to prevent how to paint cabinets without sanding chipping, achieving an easy kitchen cabinet makeover without sanding, and the importance of paint cabinets without sanding degreasing.
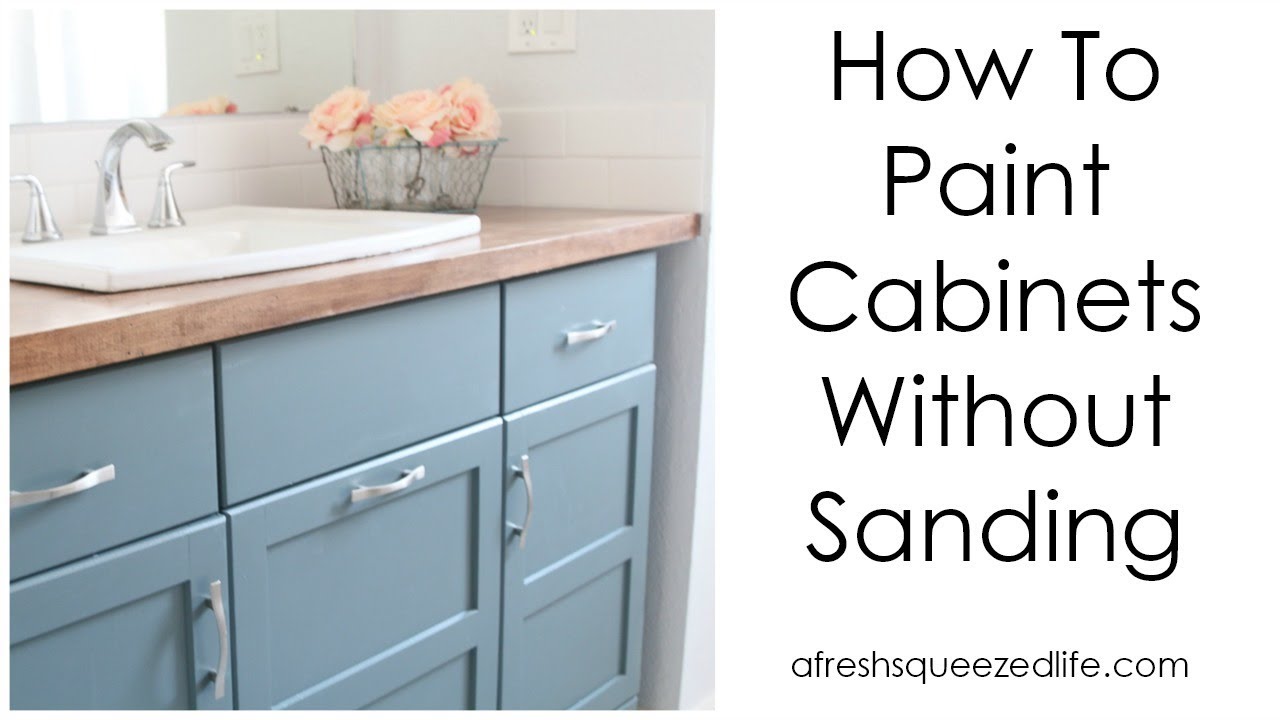
Image Source: i.ytimg.com
Why Consider Painting Cabinets Without Sanding?
Sanding cabinets is a time-consuming and messy process. It creates dust that can be harmful to breathe and requires careful cleanup. Painting without sanding offers several advantages:
- Saves time and effort: Skipping the sanding step significantly reduces project time.
- Reduces mess: No sanding means no dust to clean up.
- Preserves cabinet finish: Sanding can damage the existing finish, especially on older or delicate cabinets.
- Easier for beginners: Painting without sanding simplifies the process for those new to DIY projects.
Is Painting Without Sanding Right For You?
While convenient, painting without sanding isn’t always the best choice. Here’s when it’s appropriate:
- Cabinets are in good condition: If your cabinets have a smooth, intact finish with no major damage, painting without sanding is feasible.
- You’re using the right paint: Certain paints are specifically formulated to adhere to glossy surfaces without sanding.
- You’re willing to prepare the surface thoroughly: Proper cleaning and degreasing are crucial for paint adhesion.
However, if your cabinets have:
- Peeling or chipping paint: Sanding is necessary to create a smooth surface.
- Grease or grime buildup: Thorough cleaning and degreasing are essential, and sanding may be needed in heavily soiled areas.
- Significant damage: Repairs and sanding are required before painting.
Materials You’ll Need
To paint your kitchen cabinets without sanding, gather these supplies:
- No-Sand Cabinet Paint: Choose a paint specifically designed for cabinets and furniture that adheres well to glossy surfaces. Examples include:
- Acrylic latex enamel
- Alkyd enamel
- Chalk paint (requires sealing)
- Degreaser: A strong degreaser to remove grease and grime.
- Cleaner: A household cleaner to remove dirt and dust.
- Adhesion Promoter (Optional): A bonding primer designed to improve paint adhesion.
- Tack Cloth: To remove any remaining dust particles.
- Painter’s Tape: To protect surrounding surfaces.
- Drop Cloths: To protect your floors.
- Screwdriver or Drill: To remove cabinet hardware.
- Paintbrushes: High-quality brushes for smooth application.
- Paint Rollers: Foam rollers for even coverage on larger surfaces.
- Paint Tray: To hold the paint.
- Clean Rags or Sponges: For cleaning and wiping.
- Safety Glasses: To protect your eyes.
- Gloves: To protect your hands.
Step-by-Step Guide: Painting Kitchen Cabinets Without Sanding
Follow these steps for a successful no-sand cabinet painting project:
Step 1: Preparation is Key
- Clear the Area: Remove everything from your countertops and cabinets. Cover floors with drop cloths.
- Remove Hardware: Take off all knobs, pulls, hinges, and other hardware. Store them in a safe place. Label each piece and its corresponding cabinet to simplify reassembly.
- Tape Off Areas: Use painter’s tape to protect walls, countertops, appliances, and any areas you don’t want to paint.
Step 2: Thorough Cleaning and Degreasing
This is the most important step for ensuring proper paint adhesion.
- Initial Cleaning: Wipe down the cabinets with a household cleaner to remove loose dirt and dust.
- Degreasing: Apply a strong degreaser to the cabinets, focusing on areas around the stove and sink. Let it sit for the recommended time (usually 5-10 minutes).
- Scrubbing: Use a non-abrasive sponge or cloth to scrub away the grease and grime. For stubborn areas, use a scrub brush, but be careful not to damage the finish.
- Rinsing: Rinse the cabinets thoroughly with clean water to remove all traces of the degreaser.
- Drying: Allow the cabinets to dry completely before proceeding. This may take several hours or overnight.
- Tack Cloth: Ensure all cabinets are thoroughly cleaned with tack cloth to remove any remaining residue.
Step 3: Deglossing (Optional)
If your cabinets have a very glossy finish, you might want to degloss them. This will help the paint adhere better.
- Liquid Deglosser: Apply a liquid deglosser to the cabinets with a clean cloth. Follow the manufacturer’s instructions. Deglossers essentially “etch” the surface slightly to improve paint adhesion.
Step 4: Applying Adhesion Promoter (Optional)
Using an adhesion promoter, also known as a bonding primer, is a great way to make sure the paint sticks to the cabinets well.
- Application: Apply a thin, even coat of adhesion promoter to the cabinets using a brush or roller.
- Drying Time: Allow the adhesion promoter to dry completely according to the manufacturer’s instructions.
Step 5: Painting
- First Coat: Apply a thin, even coat of paint to the cabinets using a high-quality brush or foam roller. Work in the direction of the wood grain (if applicable). Avoid applying too much paint at once, as this can lead to drips and runs.
- Drying Time: Allow the first coat to dry completely, usually for at least 2-4 hours, or as recommended by the paint manufacturer.
- Second Coat: Apply a second coat of paint using the same technique as the first coat. This will ensure even coverage and a durable finish.
- Drying Time: Allow the second coat to dry completely, usually for at least 24 hours.
Step 6: Reassembly
- Remove Tape: Carefully remove the painter’s tape.
- Reinstall Hardware: Reattach the knobs, pulls, hinges, and other hardware.
- Clean Up: Remove the drop cloths and clean up any spills or splatters.
Choosing the Right Paint
Selecting the right paint is crucial for a long-lasting, beautiful finish. Here’s what to consider:
- Adhesion: Look for paints specifically designed for cabinets and furniture that adhere well to glossy surfaces without sanding. These paints often contain additives that promote adhesion.
- Durability: Choose a paint that is durable and resistant to scratches, chips, and stains. Acrylic latex enamels and alkyd enamels are good choices.
- Finish: Select the finish that best suits your style.
- Matte: Provides a low-sheen, non-reflective finish.
- Eggshell: Offers a slightly higher sheen than matte and is easier to clean.
- Satin: Provides a smooth, velvety finish and is durable and easy to clean.
- Semi-Gloss: Offers a higher sheen and is very durable and easy to clean.
- Gloss: Provides a high-sheen, reflective finish and is very durable and easy to clean.
- Color: Choose a color that complements your kitchen décor. Consider the color of your countertops, backsplash, and appliances.
Here’s a table summarizing paint types and their characteristics:
| Paint Type | Adhesion | Durability | Finish Options | Pros | Cons |
|---|---|---|---|---|---|
| Acrylic Latex Enamel | Good | Good | Matte, Eggshell, Satin | Water-based, low VOC, easy to clean | May require multiple coats, can be less durable than alkyd enamel |
| Alkyd Enamel | Excellent | Excellent | Satin, Semi-Gloss, Gloss | Oil-based, durable, provides a smooth, hard finish | Higher VOCs, requires mineral spirits for cleanup, longer drying time |
| Chalk Paint | Good | Moderate | Matte | Easy to apply, no sanding required, provides a distressed look | Requires sealing with wax or varnish, less durable than enamel paints |
Alternatives to Sanding Cabinets Before Painting
Besides chemical deglossers, other options can improve paint adhesion without traditional sanding:
- Liquid Sandpaper: A chemical solution that dulls the surface of the cabinets, creating a better surface for paint to adhere to. Follow the manufacturer’s instructions carefully.
- Scrubbing with TSP (Trisodium Phosphate): TSP is a strong cleaner that can remove grease and grime and slightly etch the surface of the cabinets. However, TSP can be harsh and requires careful handling. Always wear gloves and safety glasses when using TSP. Rinse thoroughly after scrubbing.
- Using a Scrubbing Pad: Using a non-abrasive scrubbing pad with a cleaner can help to remove the gloss from the cabinets without damaging the finish.
Common Mistakes to Avoid
- Skipping Cleaning: This is the biggest mistake. Paint won’t stick to dirty or greasy surfaces.
- Using the Wrong Paint: Not all paints are created equal. Choose a paint specifically designed for cabinets.
- Applying Too Much Paint: Thick coats of paint are more likely to drip and run. Apply thin, even coats.
- Not Allowing Enough Drying Time: Rushing the drying process can lead to a soft, easily damaged finish.
- Forgetting to Prime: Even with no-sand paint, primer is usually recommended, especially if you’re changing the color of your cabinets dramatically or if they have a dark finish.
Prolonging Your Paint Job
- Avoid Harsh Cleaners: Use mild soap and water to clean your cabinets.
- Touch Up Chips: Address any chips or scratches promptly to prevent further damage.
- Use Protective Pads: Place felt pads on the inside of cabinet doors and drawers to prevent them from slamming shut.
Fathoming Cost Considerations
While painting cabinets yourself saves money, material costs add up. Consider paint, brushes, rollers, cleaner, tape, and potentially primer or a deglosser. Getting professional painting services offers convenience but incurs labor costs. Decide what best fits your budget and time constraints.
Deciphering Between DIY and Professional Painting
DIY painting offers cost savings but demands time, skill, and attention to detail. Professional painters bring experience, specialized tools, and a guarantee of quality. Evaluate your skill level, time availability, and desired finish quality when choosing between DIY and hiring a professional.
Frequently Asked Questions (FAQ)
Q: What is the best way to clean kitchen cabinets before painting without sanding?
A: The best way is to use a strong degreaser followed by a thorough rinse with clean water. Focus on areas around the stove and sink. You can also use TSP (Trisodium Phosphate) for stubborn grease, but handle it with care.
Q: Can I use chalk paint on kitchen cabinets without sanding?
A: Yes, you can use chalk paint without sanding. However, chalk paint is porous and requires sealing with wax or varnish for durability and protection against moisture and stains.
Q: How do I prevent paint from chipping on kitchen cabinets painted without sanding?
A: Prevent chipping by thoroughly cleaning and degreasing the cabinets, using a high-quality no-sand cabinet paint, applying an adhesion promoter, and allowing the paint to dry completely between coats.
Q: What if my cabinets have a lot of grease buildup?
A: For heavy grease buildup, you may need to scrub the cabinets multiple times with a strong degreaser. You can also use a scrub brush to help remove stubborn grease. In some cases, light sanding may be necessary in heavily soiled areas.
Q: Do I need to prime my cabinets before painting without sanding?
A: Priming is generally recommended, especially if you’re changing the color of your cabinets dramatically, if they have a dark finish, or if you want to ensure maximum adhesion. Use a bonding primer designed for glossy surfaces.
Q: How long will it take to paint my kitchen cabinets without sanding?
A: The time it takes to paint your cabinets will depend on the size of your kitchen and the complexity of the project. However, painting without sanding typically takes less time than painting with sanding. Plan for at least 2-3 days to allow for proper cleaning, drying, and painting.
Q: What type of roller should I use?
A: Use a high density foam roller for a smooth, even finish.
Hi, I’m Scott Fischer, the voice behind SliceItRight. My passion for food started in my grandmother’s kitchen, where I learned the art of slicing, dicing, and creating delicious meals. Over the years, I’ve explored everything from the perfect kitchen gadgets to mastering culinary techniques, and I’m here to share all of it with you. Whether you’re a beginner or an experienced home chef, my goal is to make cooking easier, more enjoyable, and a lot more fun. So, let’s slice it right and cook up something amazing together!