Yes, you absolutely can paint Ikea kitchen cabinets! While the smooth, often melamine or laminate surfaces of Ikea cabinets can present a challenge, with the right preparation, primer, and paint, you can achieve a beautiful and durable finish. This comprehensive guide will walk you through the process of Ikea kitchen cabinet painting, covering everything from painting Ikea kitchen doors and painting Ikea cabinet boxes to choosing the best paint for Ikea cabinets. Whether you’re dealing with older Ikea Akurum cabinets or the newer Ikea Sektion cabinets, this DIY Ikea cabinet painting guide will help you achieve a professional-looking Ikea cabinet refinishing result.
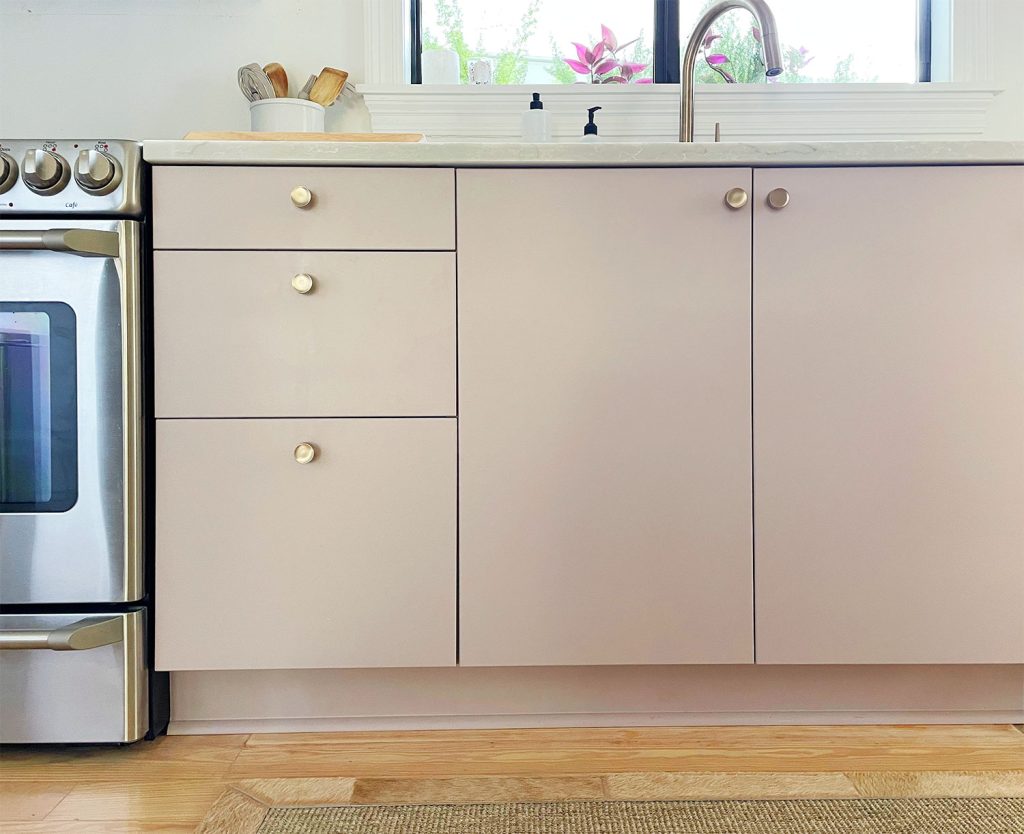
Image Source: www.younghouselove.com
Why Paint Your Ikea Cabinets?
Before diving into the “how-to,” let’s explore the “why.” Painting your Ikea cabinets can be a fantastic way to:
- Update your kitchen’s look: A fresh coat of paint can completely transform your kitchen’s style without the expense of replacing the entire cabinetry.
- Personalize your space: Choose a color that reflects your personality and complements your home’s décor.
- Increase your home’s value: A well-executed paint job can make your kitchen look newer and more appealing to potential buyers.
- Save money: Ikea cabinet refinishing is significantly cheaper than buying new cabinets.
- Fix wear and tear: Cover up scratches, dents, and other imperfections to restore your cabinets to their former glory.
Deciphering Cabinet Materials: A Crucial First Step
Ikea cabinets come in various materials, which impacts the painting process. The most common are:
- Melamine: A paper-thin resin coating bonded to particleboard. Known for its durability and smooth surface, it requires thorough prep for paint adhesion.
- Laminate: Similar to melamine, but generally thicker and more durable.
- Veneer: A thin layer of real wood glued to a core material. While easier to paint than melamine or laminate, it still needs careful preparation.
- Solid Wood: Less common in Ikea cabinets, but the easiest to paint.
It’s important to identify your cabinet material because it helps you determine the best way to prepare and paint the surfaces.
Gathering Your Supplies: The Right Tools for the Job
Having the right supplies will make your DIY Ikea cabinet painting project much smoother and yield better results. Here’s a comprehensive list:
- Cleaning Supplies:
- Degreaser (e.g., TSP or a kitchen degreaser)
- Clean cloths or sponges
- Tack cloth
- Sanding Supplies:
- Sandpaper (120-grit, 220-grit)
- Sanding block or orbital sander
- Priming Supplies:
- Adhesion primer (specifically designed for slick surfaces)
- Paintbrushes (high-quality, angled)
- Paint rollers (foam or microfiber, short nap)
- Paint tray and liners
- Painting Supplies:
- Paint (high-quality cabinet paint – see section below)
- Paintbrushes (high-quality, angled)
- Paint rollers (foam or microfiber, short nap)
- Paint tray and liners
- Other Essentials:
- Screwdriver or drill (for removing hardware)
- Painter’s tape
- Drop cloths or plastic sheeting
- Putty knife and wood filler (for repairing imperfections)
- Safety glasses
- Gloves
- Respirator or mask
Choosing the Best Paint for Ikea Cabinets: Durability is Key
Selecting the right paint is crucial for a long-lasting and beautiful finish. Here are some top considerations for the best paint for Ikea cabinets:
- Type of Paint:
- Acrylic Latex: Water-based, low-VOC, easy to clean, and durable. A good all-around choice. Look for “cabinet and trim” formulas.
- Alkyd (Oil-Based): Provides a very hard and durable finish, but has higher VOCs, stronger odors, and requires mineral spirits for cleanup. Often preferred by professionals.
- Hybrid Alkyd/Acrylic: Combines the benefits of both, offering excellent durability, low VOCs, and easy cleanup.
- Finish:
- Semi-Gloss: Durable and easy to clean, making it a popular choice for kitchens.
- Satin: Offers a slightly softer sheen than semi-gloss, also easy to clean.
- Gloss: Highly durable and reflective, but shows imperfections more easily. Best for a very modern look.
- Matte: Least durable and hardest to clean, but can create a very sophisticated look. Not generally recommended for kitchen cabinets.
Table: Paint Finish Comparison
| Finish | Durability | Cleanability | Sheen Level | Best For |
|---|---|---|---|---|
| Matte | Low | Difficult | Lowest | Low-traffic areas, sophisticated look |
| Satin | Medium | Easy | Medium | General use, hides imperfections |
| Semi-Gloss | High | Very Easy | High | Kitchens, bathrooms |
| Gloss | Very High | Very Easy | Highest | High-traffic areas, modern look |
Paint Recommendations:
- Benjamin Moore Advance: A popular hybrid alkyd/acrylic paint known for its smooth finish and durability.
- Sherwin-Williams Emerald Urethane Trim Enamel: Another excellent hybrid option with self-leveling properties.
- Rust-Oleum Cabinet Transformations Kit: A comprehensive kit specifically designed for painting cabinets.
Step-by-Step Guide: Ikea Kitchen Cabinet Painting
Follow these steps for a successful Ikea kitchen cabinet painting project.
Step 1: Preparation is Paramount
- Remove Hardware: Take off all knobs, pulls, hinges, and other hardware. Label each piece and the corresponding cabinet door to ensure easy reassembly.
- Remove Doors and Drawers: Detach the doors and drawers from the cabinet boxes.
- Clean Thoroughly: Use a degreaser to remove all grease, grime, and dirt from the cabinet doors, drawers, and boxes. Rinse with clean water and let dry completely. This is arguably the most important step! If the surfaces aren’t clean, the paint won’t stick.
- Protect Your Work Area: Cover your floors and countertops with drop cloths or plastic sheeting to protect them from paint splatters.
Step 2: Sanding for Adhesion
- Lightly Sand: Use 120-grit sandpaper to lightly sand all surfaces you plan to paint. The goal isn’t to remove the existing finish entirely, but to create a slightly rough surface that the primer can grip.
- Focus on Edges: Pay special attention to the edges of the cabinet doors and drawers, as these areas are prone to chipping.
- Smooth with Finer Grit: After sanding with 120-grit, smooth the surfaces with 220-grit sandpaper.
- Remove Dust: Use a tack cloth to remove all sanding dust. A vacuum cleaner with a brush attachment can also be helpful.
Step 3: Priming Ikea Cabinets for Paint: The Key to Success
- Apply Adhesion Primer: Use a high-quality adhesion primer specifically designed for slick surfaces like melamine or laminate. This is essential for priming Ikea cabinets for paint. Options include:
- BIN Shellac-Based Primer: Excellent adhesion and stain-blocking properties.
- Stix Waterborne Bonding Primer: A water-based primer that provides excellent adhesion on hard-to-stick surfaces.
- Zinsser 1-2-3 Primer: A versatile primer that works well on a variety of surfaces.
- Apply Thin, Even Coats: Apply the primer in thin, even coats using a high-quality brush or roller. Avoid drips and runs.
- Allow to Dry Completely: Let the primer dry completely according to the manufacturer’s instructions. This may take several hours or even overnight.
- Lightly Sand Again: Once the primer is dry, lightly sand it with 220-grit sandpaper to create an even smoother surface for painting.
- Remove Dust: Use a tack cloth to remove all sanding dust.
- Second Coat of Primer (Optional): For added durability, you can apply a second coat of primer, following the same steps as above.
Step 4: Painting Ikea Kitchen Doors and Boxes: Achieving a Flawless Finish
- Apply Thin, Even Coats: Apply the paint in thin, even coats using a high-quality brush or roller. Again, avoid drips and runs.
- “Cut In” Edges: Use a brush to carefully “cut in” around the edges of the cabinet doors, drawers, and boxes.
- Roll the Surfaces: Use a roller to paint the larger, flat surfaces.
- Maintain a Wet Edge: Overlap each stroke slightly to maintain a wet edge and prevent visible lines.
- Allow to Dry Completely: Let the paint dry completely according to the manufacturer’s instructions.
- Lightly Sand Between Coats: Once the paint is dry, lightly sand it with 320-grit sandpaper to remove any imperfections and create a smooth surface for the next coat.
- Remove Dust: Use a tack cloth to remove all sanding dust.
- Apply Second Coat: Apply a second coat of paint, following the same steps as above.
- Third Coat (Optional): For added durability or a richer color, you can apply a third coat of paint.
Step 5: Reassembly and Finishing Touches
- Allow Paint to Cure: Allow the paint to cure completely before reassembling the cabinets. This may take several days or even a week, depending on the type of paint you used.
- Reinstall Hardware: Reattach all knobs, pulls, hinges, and other hardware.
- Rehang Doors and Drawers: Rehang the doors and drawers on the cabinet boxes.
- Adjust Hinges: Adjust the hinges as needed to ensure that the doors and drawers hang straight and close properly.
- Clean Up: Clean up your work area and dispose of any used paint cans, brushes, and rollers properly.
Tips for Success: Achieving a Professional Look
- Take Your Time: Don’t rush the process. Proper preparation and drying time are crucial for a durable and beautiful finish.
- Use High-Quality Materials: Invest in high-quality brushes, rollers, primer, and paint. This will make a big difference in the final result.
- Practice on a Sample Piece: Before painting your entire kitchen, practice on a spare cabinet door or a piece of scrap wood to get a feel for the paint and technique.
- Ventilation is Key: Work in a well-ventilated area to avoid inhaling harmful fumes.
- Consider Spraying: For an ultra-smooth finish, consider using a paint sprayer instead of a brush and roller. However, spraying requires more preparation and skill.
- Consult a Professional: If you’re not comfortable painting your cabinets yourself, consider hiring a professional painter.
Special Considerations for Painting Ikea Akurum and Sektion Cabinets
- Ikea Akurum Cabinets: These are the older style of Ikea cabinets. The painting process is the same as outlined above, but be extra careful when sanding, as the melamine or laminate may be thinner than on newer cabinets.
- Ikea Sektion Cabinets: These are the current style of Ikea cabinets. They often have a more durable finish than Akurum cabinets, so thorough sanding and a high-quality adhesion primer are even more important.
Fathoming Potential Problems and Solutions
Problem: Paint is chipping or peeling.
Solution: This is usually caused by inadequate preparation. Ensure you thoroughly clean and sand the surfaces before priming and painting. Use a high-quality adhesion primer.
Problem: Brush strokes or roller marks are visible.
Solution: Use a high-quality brush and roller. Apply thin, even coats of paint. Lightly sand between coats. Consider using a paint sprayer for a smoother finish.
Problem: Paint is not drying properly.
Solution: Ensure you are using the correct type of paint and primer for your cabinet material. Allow the paint to dry completely according to the manufacturer’s instructions. Work in a well-ventilated area.
Problem: Color is uneven.
Solution: Apply multiple thin coats of paint rather than one thick coat. Stir the paint thoroughly before each coat.
FAQ: Your Burning Questions Answered
- What is the best way to clean Ikea cabinets before painting? Use a degreaser like TSP or a kitchen degreaser to remove all grease, grime, and dirt. Rinse with clean water and let dry completely.
- Can I paint Ikea cabinet boxes without removing them? Yes, but it’s more difficult. You’ll need to be extra careful with masking and protect your countertops and appliances.
- How much does it cost to paint Ikea cabinets? The cost depends on the size of your kitchen, the type of paint you use, and whether you hire a professional. Expect to spend several hundred dollars on materials for a DIY project.
- Who can I hire to paint my Ikea cabinets? Search for local painters or cabinet refinishers. Be sure to get multiple quotes and check references.
- Can I use chalk paint on Ikea cabinets? While possible, chalk paint typically requires a sealant or wax for durability, which may not be ideal for a high-use area like a kitchen. Consider using a specialized cabinet paint for better results.
With careful planning and execution, painting your Ikea cabinets can be a rewarding DIY project that transforms your kitchen and saves you money. Good luck!
Hi, I’m Scott Fischer, the voice behind SliceItRight. My passion for food started in my grandmother’s kitchen, where I learned the art of slicing, dicing, and creating delicious meals. Over the years, I’ve explored everything from the perfect kitchen gadgets to mastering culinary techniques, and I’m here to share all of it with you. Whether you’re a beginner or an experienced home chef, my goal is to make cooking easier, more enjoyable, and a lot more fun. So, let’s slice it right and cook up something amazing together!