Are you planning a kitchen remodel and need to know how to remove old tile? Tile removal can seem like a daunting task, but with the right tools and a bit of patience, DIY tile removal is achievable. This guide provides a comprehensive, step-by-step process for successful kitchen tile demolition, including kitchen tile removal tips and techniques for removing kitchen floor tile effectively.
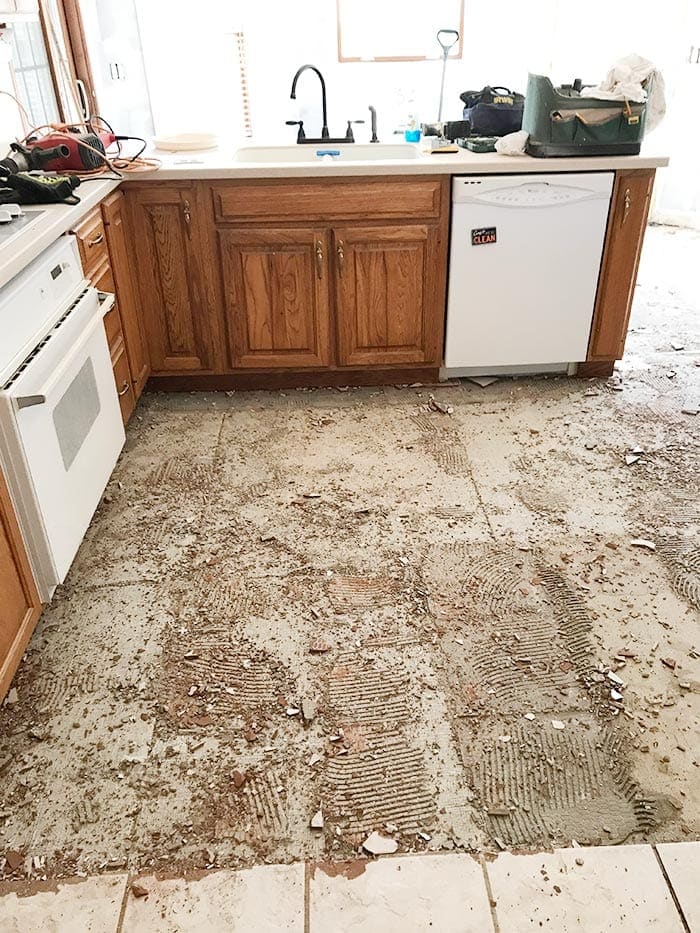
Image Source: www.theharperhouse.com
Preparing for Kitchen Tile Demolition
Before you start swinging that hammer, preparation is key. Proper prep work not only makes the job easier but also safer.
Gathering Your Tile Removal Tools
Having the correct tile removal tools makes a huge difference. Here’s a list of essentials:
- Safety Glasses: Protect your eyes from flying debris.
- Work Gloves: Protect your hands.
- Dust Mask or Respirator: Protect your lungs from dust.
- Hearing Protection: Kitchen tile removal can be loud.
- Chisel: A 3-inch or 4-inch wide chisel works well.
- Hammer or Mallet: For striking the chisel.
- Tile Scraper: A long-handled scraper can save your back.
- Grout Removal Tool: Several options exist (manual grout saw, oscillating tool with grout removal attachment, or a power grout removal tool).
- Shop Vacuum: For cleaning up dust and debris.
- Floor Scraper: For removing tile adhesive residue.
- Putty Knife or Scraper: For scraping away remaining thin-set mortar.
- Buckets or Trash Bags: For disposal of tile and debris.
- Duct Tape or Painter’s Tape: For protecting adjacent surfaces.
- Optional: Knee Pads: For comfort during floor tile removal.
- Optional: Pry Bar: Can be helpful for stubborn tiles.
Safety First: Protecting Yourself and Your Kitchen
- Wear safety gear: Always wear safety glasses, gloves, and a dust mask or respirator.
- Ventilate the area: Open windows and doors to allow for good airflow. A fan can also help.
- Protect surrounding areas: Cover cabinets, appliances, and any other surfaces that you want to protect from dust and debris with plastic sheeting and tape.
- Clear the area: Remove any furniture or objects from the kitchen to give yourself plenty of workspace.
- Turn off power: If you are working near electrical outlets, turn off the power to the circuit.
Assessing the Tile and Subfloor
Before you begin removing kitchen floor tile, take a look at the type of tile you’re dealing with and the subfloor underneath. This assessment helps determine the best approach for tile removal.
- Type of Tile: Ceramic, porcelain, and stone tiles all have different densities and may require slightly different techniques.
- Type of Grout: Epoxy grout is much harder to remove than cement-based grout.
- Subfloor Material: Common subfloor materials include concrete, plywood, and cement board. Different subfloors may react differently to the tile removal process. Understanding your subfloor helps prevent damage during the removal.
Step-by-Step Guide to Kitchen Tile Removal
Here’s a detailed breakdown of the process, from grout removal to cleaning up the subfloor.
Step 1: Grout Removal
The first step is to remove the grout surrounding the tiles. This allows you to more easily break the bond between the tile and the subfloor.
- Using a Manual Grout Saw: This is a low-tech but effective method. Run the saw along the grout lines, applying steady pressure.
- Using an Oscillating Tool: Attach a grout removal blade to the tool. Hold the tool at a slight angle and run it along the grout lines. Be careful not to damage the surrounding tiles.
- Using a Power Grout Removal Tool: These tools are specifically designed for grout removal and can be very efficient. Follow the manufacturer’s instructions.
Table: Grout Removal Tool Comparison
| Tool | Pros | Cons | Best For |
|---|---|---|---|
| Manual Grout Saw | Inexpensive, good for small areas, provides good control. | Time-consuming, requires more physical effort. | Small DIY projects, delicate tile. |
| Oscillating Tool | Versatile, faster than a manual saw. | Can be difficult to control, may damage surrounding tiles if not careful. | Medium-sized projects, standard grout. |
| Power Grout Removal Tool | Fastest method, designed specifically for grout removal. | More expensive, can generate a lot of dust. | Large projects, hard or epoxy grout. |
Step 2: Breaking the Tiles
Now that the grout is removed, you can start breaking the tiles. The goal is to break the bond between the tile and the subfloor without damaging the subfloor.
- Start at an Edge or Corner: It is often easier to start where the tile is already loose or chipped.
- Using a Chisel and Hammer: Place the chisel at a 45-degree angle to the tile, near an edge or corner. Strike the chisel with the hammer. Apply moderate force to avoid damaging the subfloor.
- Using a Tile Scraper: Position the blade of the tile scraper under the tile and apply pressure to lift the tile. This method is best for tiles that are not heavily bonded.
Kitchen tile removal tips: If the tile is particularly stubborn, try breaking it into smaller pieces with the chisel and hammer. This makes it easier to remove individual pieces.
Step 3: Removing the Broken Tile Pieces
Once the tiles are broken, carefully remove the pieces.
- Wear Gloves: Tile shards can be sharp, so wear gloves to protect your hands.
- Use a Putty Knife: A putty knife or scraper can help you pry up the broken pieces.
- Dispose of Debris Properly: Place the broken tile pieces in buckets or trash bags for disposal.
Step 4: Removing Tile Adhesive
After you’ve removed the tiles, you’ll likely be left with tile adhesive (thin-set mortar) residue on the subfloor. This needs to be removed before you can install new flooring. Removing tile adhesive can be a challenging part of the process, but it’s essential for a smooth, even surface.
- Scraping: Use a floor scraper or a wide putty knife to scrape off as much of the adhesive as possible. Apply firm, even pressure.
- Using a Chemical Adhesive Remover: Apply the remover according to the manufacturer’s instructions. Let it sit for the recommended time, then scrape off the softened adhesive.
- Using a Grinder: A concrete grinder with a diamond grinding wheel can be used to remove stubborn adhesive. Be careful not to damage the subfloor. Wear a respirator and safety glasses when using a grinder.
Step 5: Preparing the Subfloor
The final step is to prepare the subfloor for the new flooring. This involves cleaning, leveling, and repairing any damage.
- Cleaning: Vacuum the subfloor thoroughly to remove any remaining dust and debris.
- Leveling: Use a self-leveling compound to fill in any low spots or uneven areas. Follow the manufacturer’s instructions.
- Repairing: Repair any cracks or damage to the subfloor. Use a concrete patch for concrete subfloors and wood filler for plywood subfloors.
- Sealing: Apply a sealant to the subfloor to protect it from moisture.
Troubleshooting Common Tile Removal Problems
Even with the best preparation, you might encounter some challenges during kitchen tile removal. Here are some common issues and how to address them:
- Stubborn Tiles: If a tile is particularly difficult to remove, try using a heat gun to soften the adhesive. You can also try using a pry bar for extra leverage.
- Damaged Subfloor: If you damage the subfloor during tile removal, repair it before installing new flooring. Use a concrete patch for concrete subfloors and wood filler for plywood subfloors.
- Dust: Kitchen tile demolition can generate a lot of dust. Use a shop vacuum to clean up frequently, and wear a dust mask or respirator.
- Adhesive Residue: Some adhesives are more difficult to remove than others. If scraping and chemical removers don’t work, try using a grinder with a diamond grinding wheel.
Best Ways to Remove Different Types of Tiles
The best way to remove tile may depend on the type of tile you are dealing with.
- Ceramic Tile: Ceramic tile is generally easier to remove than porcelain or stone tile. A chisel and hammer are usually sufficient.
- Porcelain Tile: Porcelain tile is denser and more durable than ceramic tile. You may need to use more force when breaking the tiles, or use a pry bar for leverage.
- Stone Tile: Stone tile can be very heavy and difficult to remove. Breaking the tiles into smaller pieces can make the process easier.
- Vinyl Tile (or Linoleum): Often easier than ceramic, but old adhesive can be tough. A heat gun or adhesive remover is helpful.
Table: Tile Type and Removal Tips
| Tile Type | Removal Method | Additional Tips |
|---|---|---|
| Ceramic | Chisel and hammer, tile scraper | Start at edges, break into smaller pieces if stubborn. |
| Porcelain | Chisel and hammer, pry bar | Apply more force, use a pry bar for leverage. |
| Stone | Chisel and hammer, sledgehammer (carefully) | Break into smaller pieces, be careful of subfloor damage. |
| Vinyl (Linoleum) | Heat gun, floor scraper, adhesive remover | Soften adhesive with heat, scrape thoroughly, use appropriate solvent. |
Disposing of Tile and Debris
Properly disposing of the old tile and debris is important.
- Check Local Regulations: Some municipalities have specific regulations for disposing of construction debris.
- Use Heavy-Duty Trash Bags: Use heavy-duty trash bags to prevent tearing.
- Consider a Dumpster Rental: If you have a large amount of debris, consider renting a dumpster.
- Recycle if Possible: Some recycling centers accept tile. Check with your local recycling center.
FAQ: Removing Kitchen Tile
- What is the best way to remove tile without damaging the subfloor? The best way is to take your time, use the right tools (especially a good chisel and grout removal tool), and apply moderate force. Avoid using excessive force, which can damage the subfloor.
- Can I remove tile myself, or should I hire a professional? You can definitely remove tile yourself if you’re comfortable with DIY projects and have the necessary tools. However, if you’re unsure about any part of the process, or if you have a large area to cover, hiring a professional may be a better option.
- Who is responsible for disposing of the tile? You are responsible for disposing of the tile. Check your local regulations for proper disposal methods.
- How long does it take to remove kitchen tile? The time it takes depends on the size of the kitchen, the type of tile, and your experience level. A small kitchen might take a weekend, while a larger kitchen could take several days.
- Is there a way to reduce dust when removing tile? Yes. Wetting the tile slightly before breaking it can help reduce dust. Also, use a shop vacuum with a HEPA filter to clean up frequently. Consider using a dust collection system with your grinder if you choose to grind off adhesive.
- What are the costs of removing kitchen tile yourself versus hiring a professional? DIY costs mainly involve purchasing or renting tools and disposal fees. Professional costs include labor, which can vary depending on your location and the complexity of the job.
- Will removing kitchen tile damage my walls or cabinets? Careful demolition techniques can minimize damage. Use tape and plastic sheeting to protect walls and cabinets. Avoid using excessive force near these areas.
- What do I do if there is asbestos in my tile? If you suspect your old tile contains asbestos, do not attempt to remove it yourself. Contact a qualified asbestos abatement professional. Disturbing asbestos can be hazardous.
Hi, I’m Scott Fischer, the voice behind SliceItRight. My passion for food started in my grandmother’s kitchen, where I learned the art of slicing, dicing, and creating delicious meals. Over the years, I’ve explored everything from the perfect kitchen gadgets to mastering culinary techniques, and I’m here to share all of it with you. Whether you’re a beginner or an experienced home chef, my goal is to make cooking easier, more enjoyable, and a lot more fun. So, let’s slice it right and cook up something amazing together!