Building a kitchen counter frame is a DIY project that provides essential support for your countertop. What is the purpose of a kitchen counter frame? It acts as the foundational structure that holds your countertop in place, whether it’s a heavy granite slab, a custom concrete surface, or a butcher block. This guide will walk you through the entire process of DIY kitchen countertop support, from selecting the right countertop frame materials to understanding kitchen countertop frame dimensions.
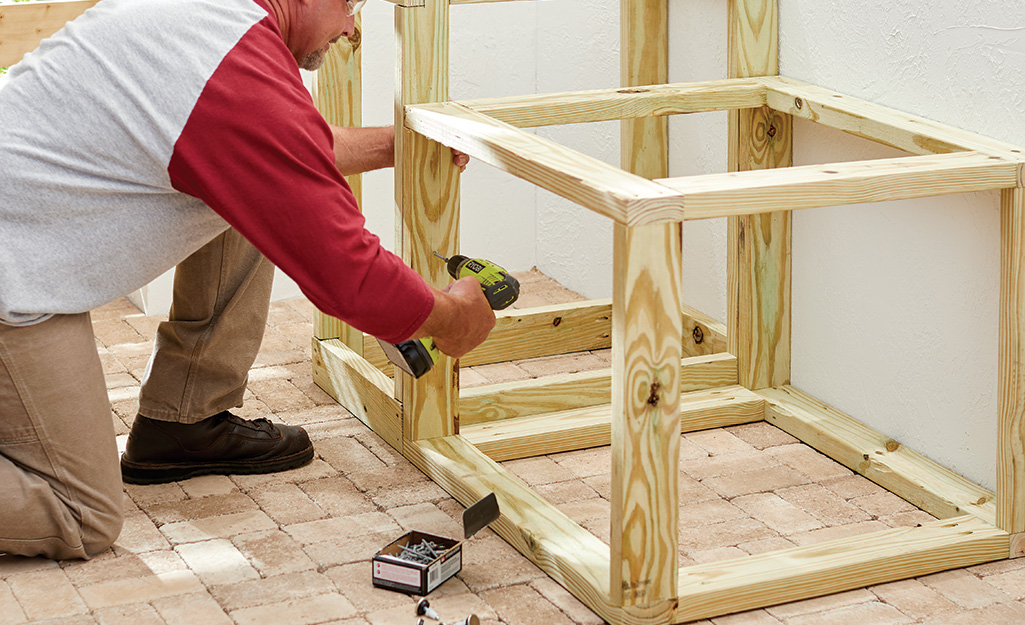
Image Source: contentgrid.homedepot-static.com
Why Build a Kitchen Counter Frame?
A well-built counter frame is crucial for several reasons:
- Structural Support: It bears the weight of the countertop and anything placed on it.
- Level Surface: Ensures the countertop is even, preventing wobbling or instability.
- Overhang Support: Provides the necessary support for any overhang, crucial for comfortable seating at a kitchen bar or island.
- Customization: Allows you to create custom dimensions and designs that perfectly fit your kitchen layout.
- Cost Savings: Building your own frame can save a significant amount of money compared to purchasing a pre-made one.
Planning Your Kitchen Counter Frame
Before you start building, careful planning is essential. This includes:
Measuring Your Space
Accuracy is key. Measure the length, width, and height where the countertop will be installed. Account for any existing cabinets or walls. Remember to consider any desired overhang.
Deciding on Countertop Frame Dimensions
Standard kitchen countertop height is around 36 inches. Adjust the frame height based on your existing cabinetry and desired countertop thickness. For example, if your cabinets are 34.5 inches tall and your countertop is 1.5 inches thick, your frame should add minimal height, focusing instead on providing a solid surface. Consider kitchen countertop frame dimensions, especially if adding seating.
Determining Overhang Needs
How to frame a kitchen bar with an overhang? A comfortable overhang for seating is typically between 12-15 inches. The frame needs to extend far enough to properly support this overhang. You’ll need to add support braces to the frame for anything beyond 8 inches of overhang. This is critical for kitchen counter overhang support.
Selecting Countertop Frame Materials
The best wood for kitchen countertop frame depends on several factors:
- Strength: Choose a sturdy wood that can handle the weight of the countertop.
- Durability: Opt for a wood that resists warping, twisting, and moisture.
- Cost: Balance your needs with your budget.
- Appearance: While the frame is typically hidden, consider the wood’s appearance if any part will be visible.
Common choices include:
- Plywood: Affordable and strong, especially when layered. It is important when building a plywood countertop frame.
- Pine: Relatively inexpensive and easy to work with, but softer than other options.
- Poplar: A good balance of strength, affordability, and workability.
- Hardwoods (Oak, Maple): Strongest and most durable, but also the most expensive.
Table: Wood Selection Guide
| Wood Type | Strength | Durability | Cost | Pros | Cons |
|---|---|---|---|---|---|
| Plywood | High | Moderate | Low | Affordable, readily available | Can splinter |
| Pine | Moderate | Low | Low | Easy to work with | Softer, prone to dents |
| Poplar | Moderate | Moderate | Moderate | Good balance, paintable | Can be prone to tear-out |
| Oak | High | High | High | Very strong, durable | Expensive, harder to work with |
| Maple | High | High | High | Very strong, beautiful grain | Expensive, harder to work with |
Developing Countertop Frame Construction Plans
Before cutting any wood, create detailed plans. This can be a simple sketch or a more elaborate CAD drawing. Your plans should include:
- Overall frame dimensions
- Placement of support braces
- Location of attachment points to cabinets or walls
- Details for overhang support
Tools and Materials
Here’s a list of what you’ll need:
Tools
- Measuring Tape
- Pencil
- Safety Glasses
- Ear Protection
- Circular Saw or Table Saw
- Miter Saw (optional, but helpful for accurate cuts)
- Drill/Driver
- Level
- Square
- Screws (various sizes)
- Wood Glue
- Clamps
- Sander (optional)
- Stud Finder
Materials
- Lumber (based on your chosen wood and frame dimensions)
- Plywood (for the frame top, if desired)
- Screws (wood screws, construction screws)
- Wood Glue
- Construction Adhesive (optional)
- Sandpaper (various grits, optional)
- Wood Finish (optional, for exposed frame parts)
Step-by-Step Guide: Building Your Kitchen Counter Frame
Step 1: Cutting the Wood
Carefully measure and cut all the wood pieces according to your plans. Use a miter saw for accurate angles, if possible. Double-check all measurements before cutting. Always wear safety glasses and ear protection.
Step 2: Assembling the Frame
Start by assembling the outer frame. Apply wood glue to the joints and secure with screws. Use clamps to hold the pieces together while the glue dries. Ensure the frame is square by checking the diagonals. They should be equal.
Step 3: Adding Support Braces
Internal support braces are crucial for distributing the weight of the countertop. Place them every 12-16 inches, or closer for heavier countertops. Attach the braces using wood glue and screws.
Step 4: Building a Plywood Top (Optional)
For extra support and a smooth surface, you can add a plywood top to the frame. Cut the plywood to the frame’s dimensions and attach it with construction adhesive and screws. This is especially important if you’re building a plywood countertop frame.
Step 5: Reinforcing Overhangs
If you have an overhang, reinforce it with additional support braces that extend beyond the main frame. These braces should be securely attached to the frame and the floor or wall. Use heavy-duty brackets for added strength. This addresses how to frame a kitchen bar with confidence.
Step 6: Sanding and Finishing (Optional)
If any part of the frame will be exposed, sand it smooth and apply a wood finish. This will protect the wood and enhance its appearance.
Step 7: Installing the Frame
Position the frame in its final location. Use a level to ensure it’s perfectly even. Secure the frame to the cabinets or walls using screws. Use a stud finder to locate studs in the walls for maximum support.
Building Countertop Base Cabinet Considerations
If your frame is not resting on existing cabinets, you’ll essentially be building countertop base cabinet structure from scratch. This means:
- Creating legs or supports for the frame to rest on. These must be strong and stable.
- Ensuring the entire structure is level and plumb.
- Potentially adding a back panel for additional stability.
Tips for Success
- Accuracy is paramount: Double-check all measurements and cuts.
- Use quality materials: Don’t skimp on lumber or hardware.
- Take your time: Rushing can lead to mistakes.
- Use clamps: They’re essential for strong, square joints.
- Pre-drill holes: This prevents the wood from splitting when screwing.
- Consult with a professional: If you’re unsure about any step, seek expert advice.
Safety Precautions
- Always wear safety glasses and ear protection when cutting or drilling.
- Use power tools according to the manufacturer’s instructions.
- Work in a well-ventilated area.
- Be aware of your surroundings and avoid distractions.
- Unplug power tools when not in use.
Countertop Options to Consider
- Granite/Quartz: Durable, heat resistant, and beautiful, but heavy. Requires a strong frame.
- Butcher Block: Warm, inviting, and relatively easy to maintain.
- Concrete: Can be custom-made to any shape or size, but heavy and porous.
- Laminate: Affordable and easy to clean, but less durable than other options.
- Solid Surface: Non-porous and seamless, but can be scratched.
Table: Countertop Material Comparison
| Material | Durability | Cost | Maintenance | Pros | Cons |
|---|---|---|---|---|---|
| Granite | High | High | Moderate | Heat resistant, beautiful | Heavy, can stain |
| Quartz | High | High | Low | Non-porous, low maintenance | Expensive |
| Butcher Block | Moderate | Moderate | High | Warm, natural look | Requires regular oiling |
| Concrete | Moderate | Moderate | Moderate | Customisable, unique | Porous, can crack |
| Laminate | Low | Low | Low | Affordable, easy to clean | Not very durable |
| Solid Surface | Moderate | Moderate | Low | Non-porous, seamless | Can scratch |
Troubleshooting Common Issues
- Frame is not level: Use shims to level the frame.
- Joints are weak: Add more screws or use stronger glue.
- Overhang is sagging: Reinforce the overhang with additional support.
- Frame is wobbly: Ensure the frame is securely attached to the cabinets or walls.
- Countertop is not fitting: Double-check your measurements and make adjustments to the frame as needed.
Frequently Asked Questions (FAQ)
- Can I use screws only, or do I need glue? Glue adds significant strength to the joints. It’s best to use both glue and screws.
- What is the best screw size for building a kitchen counter frame? Use screws that are long enough to penetrate deeply into the wood but not so long that they poke through the other side. 2-3 inch screws are usually appropriate.
- Who is qualified to install a kitchen countertop? While this guide can help, professional installers have experience with various countertop materials and can ensure a perfect fit and finish.
- What type of plywood is best for a countertop frame? Use construction-grade plywood that is at least ¾ inch thick.
- How do I attach the countertop to the frame? Use construction adhesive and screws. Predrill holes to prevent splitting.
- Can I build a frame for an outdoor kitchen countertop? Yes, but you’ll need to use weather-resistant materials and construction techniques.
- What is the standard depth of a kitchen countertop? 25 inches is standard.
- Can I build a kitchen island frame construction myself? Yes, with careful planning and the right tools, building a kitchen island frame is a manageable DIY project.
- What if my kitchen floor is uneven? Use adjustable feet on the frame legs to compensate for the uneven floor.
Building a kitchen counter frame is a rewarding DIY project that can save you money and allow you to create a custom look for your kitchen. By following these steps and tips, you can build a sturdy and reliable frame that will support your countertop for years to come.
Hi, I’m Scott Fischer, the voice behind SliceItRight. My passion for food started in my grandmother’s kitchen, where I learned the art of slicing, dicing, and creating delicious meals. Over the years, I’ve explored everything from the perfect kitchen gadgets to mastering culinary techniques, and I’m here to share all of it with you. Whether you’re a beginner or an experienced home chef, my goal is to make cooking easier, more enjoyable, and a lot more fun. So, let’s slice it right and cook up something amazing together!