How do you remove a Delta kitchen faucet? Removing a Delta kitchen faucet involves shutting off the water supply, disconnecting the water lines, and then detaching the faucet from the sink. This guide provides detailed, step-by-step instructions to help you complete this plumbing repair task safely and efficiently, whether for a faucet replacement or kitchen plumbing maintenance.
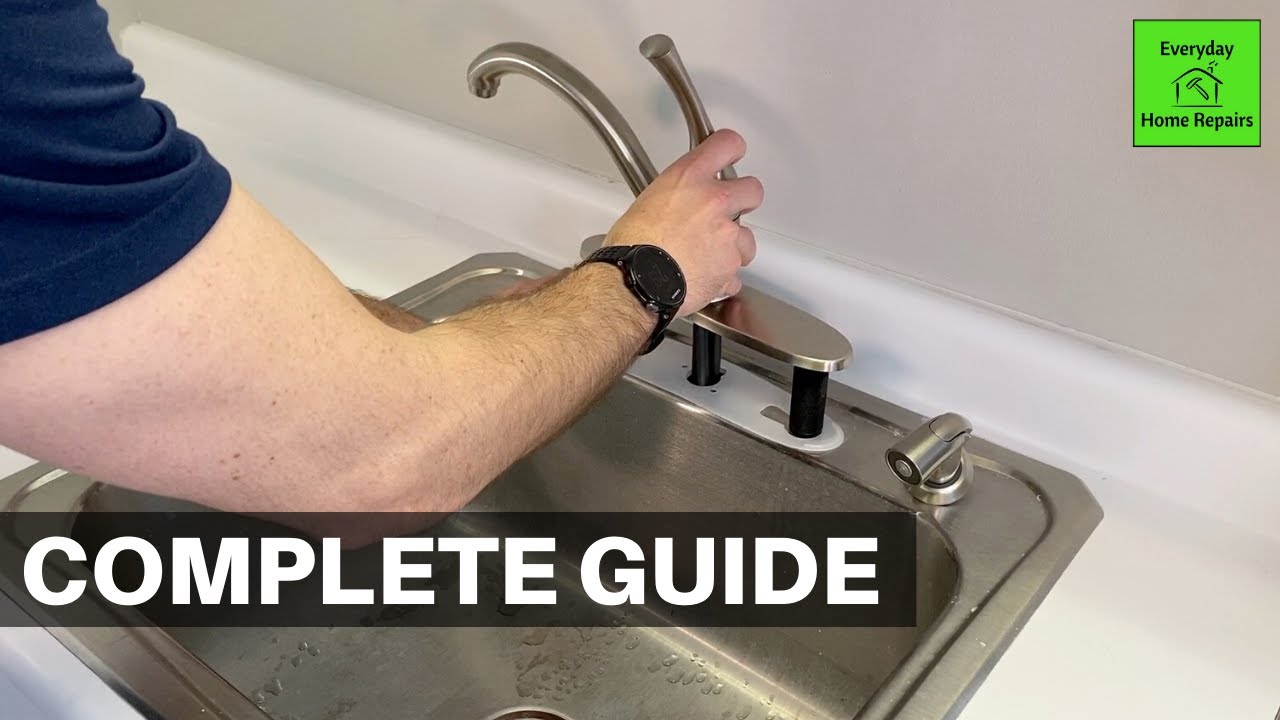
Image Source: i.ytimg.com
Preparing for Delta Kitchen Faucet Removal
Before you start any plumbing project, good preparation is key. This will help ensure a smooth and safe Delta kitchen faucet removal. Let’s look at what you need to do.
Gathering Your Tools and Materials
Having the right tools will make the job easier and faster. Here’s what you’ll need for Delta kitchen faucet removal:
- Adjustable wrench
- Basin wrench (also called a faucet wrench)
- Pliers
- Screwdrivers (both Phillips and flathead)
- Penetrating oil (like WD-40)
- Towels or a bucket
- Safety glasses
- Gloves
- Flashlight or headlamp
- Old cloths or cardboard to protect the sink
- Optional: New supply lines and plumber’s putty (if you’re installing a new faucet)
Shutting Off the Water Supply
This is the most important step! Find the shut-off valves under your kitchen sink. There should be one for hot water and one for cold water.
- Turn both valves clockwise until they are completely closed.
- If you can’t find shut-off valves under the sink, you may need to turn off the main water supply to your house. The main shut-off is usually in the basement, garage, or near the water meter.
- Once the water is off, turn on the kitchen faucet to release any remaining pressure in the lines. Have a bucket or towels ready to catch any water that comes out.
Protecting Your Work Area
- Place old cloths or cardboard around the base of the faucet to protect your sink from scratches.
- Clear the area under the sink so you have enough room to work.
Step-by-Step: Delta Kitchen Faucet Removal
Now that you’re prepared, let’s walk through the Delta kitchen faucet removal process.
1. Disconnecting the Water Supply Lines
This step involves detaching the water lines that connect the faucet to the water supply valves.
- Place a bucket or towels under the connections to catch any drips.
- Use an adjustable wrench to loosen the nuts connecting the water supply lines to the faucet tailpieces. Turn the wrench counterclockwise.
- If the nuts are stuck, apply penetrating oil and let it sit for a few minutes before trying again.
- Once the nuts are loose, carefully disconnect the water supply lines from the faucet.
- Inspect the supply lines for wear and tear. If they look old or damaged, now is a good time to replace them.
2. Disconnecting the Sprayer Hose (If Applicable)
Many Delta kitchen faucets have a sprayer hose. Here’s how to disconnect it:
- Locate the point where the sprayer hose connects to the faucet under the sink. This connection is usually a clip or a quick-connect fitting.
- If it’s a clip, squeeze the clip and gently pull the hose to disconnect it.
- If it’s a quick-connect fitting, you may need to push in on the fitting while pulling the hose.
- Carefully pull the sprayer hose down through the hole in the sink.
3. Removing the Mounting Hardware
This is often the trickiest part, as the mounting hardware can be hard to reach and may be corroded.
- Identify the Mounting Mechanism: Delta faucets often use one of two types of mounting mechanisms:
- Mounting Nuts: These are located under the sink and hold the faucet in place.
- Mounting Plate with Screws: Some faucets have a mounting plate that is secured to the sink with screws.
- Loosening the Mounting Nuts:
- Use a basin wrench to loosen the mounting nuts. A basin wrench is designed to reach up into tight spaces.
- Place the jaws of the basin wrench around the nut and turn it counterclockwise.
- If the nuts are stuck, apply penetrating oil and let it sit for a few minutes.
- It might be easier to loosen the nuts by hand after using a basin wrench for the initial loosening.
- Removing the Mounting Plate:
- If your faucet has a mounting plate, use a screwdriver to remove the screws that hold it in place.
- Be careful not to drop the screws down the drain.
- Removing the Faucet: Once the mounting hardware is removed, the faucet should be loose. Carefully lift the faucet up and out of the sink.
4. Cleaning the Sink Area
With the faucet removed, now’s a good time to clean the sink area.
- Scrape away any old plumber’s putty or sealant.
- Use a cleaner to remove any dirt or grime.
- Dry the area thoroughly.
Delta Faucet Troubleshooting During Removal
Sometimes, things don’t go as planned. Here are some common problems you might encounter during Delta kitchen faucet removal and how to fix them.
| Problem | Possible Cause | Solution |
|---|---|---|
| Stuck Mounting Nuts | Corrosion, mineral buildup | Apply penetrating oil and let it sit for a while. Use a basin wrench for extra leverage. If necessary, you can carefully try to cut the nut with a Dremel tool or similar rotary tool. |
| Stripped Screws | Overtightening, corrosion | Try using a rubber band or steel wool between the screwdriver and the screw head to get a better grip. As a last resort, you may need to use a screw extractor. |
| Water Won’t Shut Off Completely | Faulty shut-off valve | If a shut-off valve is leaking, try tightening the packing nut behind the handle. If that doesn’t work, you may need to replace the valve. Otherwise shut off main water supply for the house. |
| Difficulty Disconnecting Hoses | Corroded connections, stiff hoses | Apply penetrating oil to the connections and let it sit for a few minutes. Use pliers to gently wiggle the hoses loose. If necessary, cut the hoses with a utility knife. |
Grasping Delta Faucet Handle Removal
Sometimes you need to remove just the handle, not the entire faucet. Delta faucet handle removal is usually straightforward.
- Identify the Handle Type: Delta faucets have different handle designs. Some have a set screw, while others have a cap that hides the screw.
- Locate and Remove the Set Screw or Cap:
- For faucets with a set screw, look for a small hole on the side of the handle. Use an Allen wrench to loosen the set screw.
- For faucets with a cap, gently pry off the cap with a small flathead screwdriver. Underneath, you’ll find a screw.
- Remove the Screw: Once you’ve removed the cap or loosened the set screw, remove the screw that holds the handle in place.
- Pull Off the Handle: Gently pull the handle straight off the faucet. If it’s stuck, try wiggling it slightly.
Faucet Replacement Guide: Installing a New Delta Kitchen Faucet
Now that you’ve removed the old faucet, you’re ready for faucet installation. Here’s a quick overview:
- Prepare the New Faucet: Follow the manufacturer’s instructions to assemble the new faucet. This may involve attaching the supply lines and sprayer hose.
- Apply Plumber’s Putty: Roll a rope of plumber’s putty and place it around the base of the new faucet.
- Insert the Faucet: Carefully insert the new faucet into the hole in the sink.
- Secure the Mounting Hardware: Go under the sink and tighten the mounting nuts or screws. Make sure the faucet is centered and level.
- Connect the Water Supply Lines: Connect the water supply lines to the faucet tailpieces. Tighten the nuts with an adjustable wrench.
- Connect the Sprayer Hose: Connect the sprayer hose to the faucet.
- Turn on the Water: Slowly turn on the water supply valves.
- Check for Leaks: Inspect all connections for leaks. If you find any leaks, tighten the connections or apply more plumber’s putty.
- Test the Faucet: Turn the faucet on and off and test the sprayer to make sure everything is working properly.
Kitchen Plumbing Maintenance Tips
Regular kitchen plumbing maintenance can prevent problems and extend the life of your faucet. Here are some tips:
- Clean Your Faucet Regularly: Wipe down your faucet with a mild cleaner to prevent mineral buildup.
- Check for Leaks: Periodically check under the sink for leaks. Address any leaks promptly to prevent water damage.
- Replace Worn Parts: Replace worn-out washers, O-rings, and cartridges to prevent drips and leaks.
- Flush Your Water Heater: Flush your water heater annually to remove sediment and improve efficiency.
- Avoid Pouring Grease Down the Drain: Grease can clog your drains. Dispose of grease in the trash.
Deciphering Delta Faucet Troubleshooting
Having issues with your Delta faucet? Here are some common problems and solutions:
| Problem | Possible Cause | Solution |
|---|---|---|
| Dripping Faucet | Worn-out washer, O-ring, or cartridge | Replace the worn part. Refer to your faucet’s parts diagram to identify the correct part. |
| Low Water Pressure | Clogged aerator, debris in the supply lines | Clean the aerator by unscrewing it and rinsing it with water. Check the supply lines for kinks or obstructions. Flush the supply lines to remove any debris. |
| No Hot Water | Faulty water heater, closed shut-off valve | Check your water heater to make sure it’s working properly. Make sure the hot water shut-off valve is open. |
| Leaky Sprayer | Worn-out O-ring, damaged sprayer head | Replace the O-ring or the sprayer head. |
| Stiff Handle | Mineral buildup, corrosion | Apply penetrating oil to the handle mechanism. Clean the faucet with a mild cleaner. |
| ## Frequently Asked Questions (FAQ) |
-
Can I remove a kitchen faucet myself? Yes, with the right tools and instructions, you can remove a kitchen faucet yourself. However, if you’re not comfortable with plumbing work, it’s best to hire a professional.
-
What is a basin wrench? A basin wrench is a specialized tool designed to reach and loosen or tighten nuts in tight spaces, such as under a sink. It’s essential for faucet removal and installation.
-
Why is my kitchen faucet leaking? Leaks are often caused by worn-out washers, O-rings, or cartridges. Replacing these parts can usually fix the problem.
-
How do I find the right replacement parts for my Delta faucet? Refer to your faucet’s parts diagram or contact Delta customer service. You can also find parts at most hardware stores.
-
Is it necessary to use plumber’s putty when installing a new faucet? Yes, plumber’s putty helps to create a watertight seal between the faucet and the sink.
- How do I stop the water when my shut-off valve is broken? If the shut-off valve under your sink is broken or leaking, you’ll need to shut off the main water supply to your house.
Removing a Delta kitchen faucet is a manageable DIY project if you follow these steps and take your time. By being prepared, using the right tools, and following the proper procedures, you can successfully remove your old faucet and install a new one. Remember to always prioritize safety and don’t hesitate to call a professional if you encounter any difficulties. This comprehensive faucet replacement guide, with DIY faucet removal steps and essential plumbing repair tips, should give you the confidence to tackle this task successfully. Good luck with your kitchen plumbing maintenance!
Hi, I’m Scott Fischer, the voice behind SliceItRight. My passion for food started in my grandmother’s kitchen, where I learned the art of slicing, dicing, and creating delicious meals. Over the years, I’ve explored everything from the perfect kitchen gadgets to mastering culinary techniques, and I’m here to share all of it with you. Whether you’re a beginner or an experienced home chef, my goal is to make cooking easier, more enjoyable, and a lot more fun. So, let’s slice it right and cook up something amazing together!