Are you planning a kitchen remodel and wondering how to measure for kitchen countertops? The answer is, carefully and methodically. Measuring for new countertops is a critical step in any kitchen renovation project. Accurate kitchen countertop measurement ensures a perfect fit, prevents costly errors, and ultimately saves you time and money. This guide provides detailed instructions and tips to help you get it right.
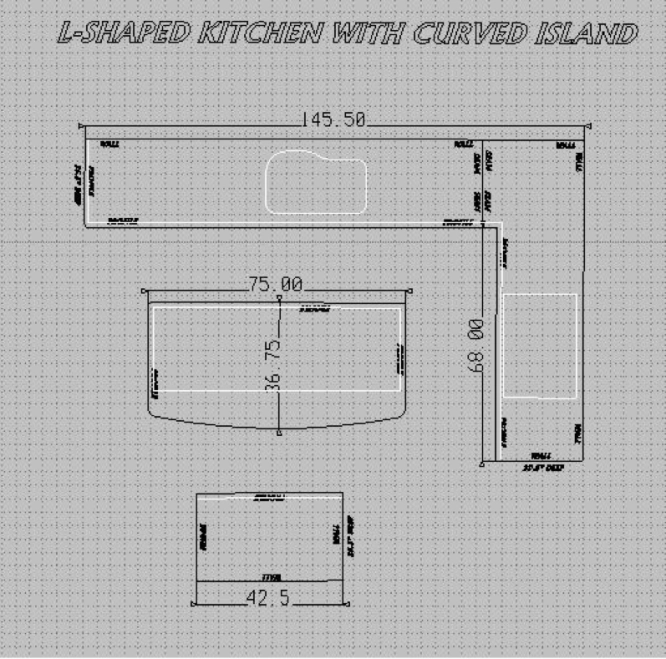
Image Source: www.archcitygranite.com
Importance of Accurate Measurements
Before we dive into the specifics, let’s emphasize why accurate measurements are so vital:
- Cost Savings: A mistake in granite countertop sizing or any other material can lead to unusable slabs, meaning wasted money.
- Perfect Fit: Precise kitchen layout dimensions mean your countertops will seamlessly integrate into your kitchen.
- Time Efficiency: Avoiding remakes and adjustments saves valuable time during the installation process.
- Reduced Stress: Getting it right the first time minimizes the stress associated with kitchen renovations.
Tools You’ll Need
Before you start, gather the following tools:
- Measuring Tape: A long, flexible steel measuring tape (at least 25 feet).
- Pencil & Paper: For recording all measurements clearly. Use a separate sheet for each countertop section.
- Laser Measuring Tool (Optional): Can provide quicker and more accurate readings, especially for long distances.
- Level: To ensure surfaces are level when taking height measurements.
- Straight Edge: A long, straight piece of wood or metal for checking straightness.
- Digital Camera: To take photos of your existing kitchen layout dimensions and any potential problem areas.
- Graph Paper (Optional): Useful for sketching your kitchen layout to scale.
- Calculator: For countertop square footage calculation.
Step-by-Step Guide to Measuring
Follow these steps carefully to ensure accurate measurements.
1. Prepare the Area
- Clear the Countertops: Remove everything from your existing countertops: appliances, dishes, décor, etc.
- Inspect Cabinets: Check for any damage or unevenness in your measuring kitchen cabinets. Address any issues before measuring. Make sure the cabinets are level and securely fastened to the wall. This provides a stable base for the countertops.
- Remove Old Countertops (If Applicable): If you’re replacing existing countertops, remove them carefully. This gives you a clear view of the cabinet layout.
2. Measuring Base Cabinets
Accurate cabinet measurements are the foundation for good kitchen countertop measurement.
- Measure Width: Measure the width of each base cabinet along the wall, from outer edge to outer edge. Record these measurements clearly, labeling each measurement with the corresponding cabinet.
- Measure Depth: Measure the depth of each base cabinet, from the wall to the front edge. Standard base cabinet depth is typically 24 inches, but verify this measurement.
- Measure Height: While less critical for countertop measurements, note the height of the base cabinets from the floor. Standard height is 36 inches. This is important for ADA compliance or custom designs.
3. Measuring the Countertop Surface
This is where you determine the actual size and shape of the countertops.
- Measure Length: Measure the length of each countertop section along the wall, including any overhangs. For example, a countertop might run from one wall to another, covering multiple cabinets.
- Measure Depth (Including Overhang): This is crucial. Measure the depth of the countertop, including the desired countertop overhang. A standard overhang is 1.5 inches beyond the cabinet face, but this can vary based on your preference and the location (e.g., a breakfast bar might have a larger overhang).
- Measure the Overhang: Measure the distance from the front of the cabinet to the desired edge of the countertop. This ensures enough space for seating or knee room.
Detailed Instructions for Specific Areas:
- Straight Runs: For straight countertop runs, simply measure the length and depth as described above.
-
Corner Countertops: Corner countertops are a bit trickier.
- Measure Each Leg: Measure the length of each leg of the corner countertop.
- Measure the Angle: Determine if the corner is a true 90-degree angle. Walls aren’t always perfectly square. Use a speed square to check the angle. If it’s not square, note the difference.
- Diagonal Measurement: Measure diagonally across the corner to double-check accuracy.
Measurement Description Example Leg 1 Length Length of the first side of the corner 48 inches Leg 2 Length Length of the second side of the corner 60 inches Angle Angle between the two legs (ideally 90 degrees) 90 degrees Diagonal Distance across the corner from end to end Should Calculate * Island Countertops: Island countertops require careful measurement of the entire perimeter, including any overhangs. * Measure Length and Width: Measure the overall length and width of the island. * Measure Overhangs: Measure the overhang on all sides. Remember that different sides might have different overhangs (e.g., a seating area might have a larger overhang). * Account for Obstacles: Note any columns, posts, or other obstacles that need to be accommodated.
4. Measure for Cutouts
Cutouts are necessary for sinks, cooktops, and other fixtures.
- Sink Cutout:
- Determine Sink Type: Undermount, drop-in, or farmhouse? This affects the cutout size and shape.
- Measure the Sink: Measure the outer dimensions of the sink (length and width).
- Review Manufacturer’s Specifications: Always refer to the sink manufacturer’s specifications for the recommended cutout size. These are typically available online.
- Position the Sink: Determine the precise location of the sink within the countertop. Consider factors like centering and faucet placement.
- Cooktop Cutout:
- Measure the Cooktop: Measure the outer dimensions of the cooktop.
- Review Manufacturer’s Specifications: As with sinks, consult the cooktop manufacturer’s specifications for the recommended cutout size.
- Position the Cooktop: Determine the precise location of the cooktop within the countertop.
- Other Cutouts: Measure and note the location and dimensions of any other cutouts needed (e.g., for electrical outlets, downdraft vents).
5. Account for Obstacles and Irregularities
Pay close attention to any obstacles or irregularities in your kitchen.
- Walls That Aren’t Straight: Walls are rarely perfectly straight. Use a straight edge to identify any deviations and note them on your sketch. You may need to create a countertop template to accurately capture the shape.
- Pipes and Electrical Outlets: Note the location of any pipes or electrical outlets that might interfere with the countertop installation.
- Appliances: Consider the dimensions of your appliances (refrigerator, dishwasher, stove) and ensure that the countertops will fit around them properly.
6. Countertop Edge Profile Measurement
The countertop edge profile measurement contributes significantly to the final look. There are many edge options.
- Determine the Edge Profile: Choose the edge profile you want (e.g., bullnose, ogee, eased edge). This affects the overall dimensions of the countertop.
- Communicate with Fabricator: Discuss the edge profile with your countertop fabricator to ensure they understand your preference and can accommodate it in their measurements.
7. Countertop Square Footage Calculation
Calculating the countertop square footage calculation helps you estimate the material cost.
- Calculate Area of Each Section: Multiply the length and width (in feet) of each countertop section to get the area in square feet.
- Add All Areas: Add up the areas of all the sections to get the total square footage.
-
Account for Waste: Add extra square footage (typically 10-15%) to account for waste during fabrication and installation.
Formula: (Length in Feet x Width in Feet) = Area in Square Feet
8. Creating a Countertop Template
For complex shapes or irregular walls, consider creating a countertop template.
- Materials: Use cardboard, plywood, or plastic sheeting to create the template.
- Trace the Outline: Carefully trace the outline of the countertop area onto the template material.
- Mark Cutouts: Mark the location of all cutouts (sink, cooktop, etc.) on the template.
- Double-Check: Double-check the template against the actual countertop area to ensure accuracy.
9. Final Review and Communication
- Review All Measurements: Double-check all measurements for accuracy.
- Sketch Your Kitchen Layout: Create a detailed sketch of your kitchen layout dimensions, including all measurements, cutouts, and obstacles.
- Communicate with the Fabricator: Provide the fabricator with your measurements, sketch, and template (if applicable). Discuss any specific requirements or concerns you have. Clear communication is essential for a successful project.
Common Mistakes to Avoid
- Not Measuring Overhangs: Forgetting to include overhangs in your measurements.
- Ignoring Wall Irregularities: Failing to account for walls that aren’t perfectly straight.
- Using the Wrong Cutout Sizes: Using incorrect cutout sizes for sinks and cooktops.
- Not Accounting for Obstacles: Overlooking pipes, electrical outlets, or other obstacles.
- Rounding Incorrectly: Rounding measurements too early can lead to inaccuracies.
- Skipping the Template: Not creating a template for complex shapes.
- Poor Communication: Failing to communicate clearly with the countertop fabricator.
DIY Countertop Installation vs. Professional Installation
While DIY countertop installation is possible, it’s generally recommended to hire a professional, especially for materials like granite or quartz. Professionals have the experience, tools, and expertise to ensure a proper installation.
DIY Considerations:
- Experience: Do you have experience with carpentry and plumbing?
- Tools: Do you have the necessary tools (e.g., diamond saw, grinder, level)?
- Time: Do you have the time to dedicate to the project?
- Material Handling: Can you safely handle heavy countertop slabs?
Professional Installation Benefits:
- Expertise: Professionals have the knowledge and experience to handle any challenges that may arise.
- Proper Tools: Professionals have the right tools for the job, ensuring a clean and precise installation.
- Warranty: Professional installations often come with a warranty, protecting you against defects or installation errors.
- Time Savings: Hiring a professional saves you time and effort.
- Peace of Mind: You can rest assured that the job will be done correctly.
Frequently Asked Questions (FAQ)
-
What is the standard countertop overhang?
The standard countertop overhang is typically 1.5 inches beyond the cabinet face.
* Can I measure for countertops myself?Yes, you can measure for countertops yourself.
* Who is responsible for the final measurements?Ultimately, the homeowner is responsible for ensuring that the final measurements are accurate. However, it’s best practice to have the countertop fabricator verify the measurements before fabrication begins.
Conclusion
Accurate accurate countertop measurements are the cornerstone of a successful kitchen renovation. By following these steps and avoiding common mistakes, you can ensure a perfect fit and a beautiful, functional kitchen for years to come. Whether you choose to tackle the project yourself or hire a professional, careful planning and precise measurements will save you time, money, and stress. Remember to double-check everything, communicate clearly with your fabricator, and enjoy the process of creating your dream kitchen!
Hi, I’m Scott Fischer, the voice behind SliceItRight. My passion for food started in my grandmother’s kitchen, where I learned the art of slicing, dicing, and creating delicious meals. Over the years, I’ve explored everything from the perfect kitchen gadgets to mastering culinary techniques, and I’m here to share all of it with you. Whether you’re a beginner or an experienced home chef, my goal is to make cooking easier, more enjoyable, and a lot more fun. So, let’s slice it right and cook up something amazing together!