Ever stared at your Ender 3, dreaming of the amazing things you could print? Maybe a cool robot, a custom phone case, or a tiny T-Rex? But then, the confusing world of 3D printing software, the slicer, hits you. It’s like a secret code you need to crack before your printer starts working its magic! Choosing the right slicer is crucial for turning your ideas into real, 3D-printed objects.
Finding the perfect slicer for your Ender 3 can feel overwhelming. There are so many choices! You might get stuck trying to figure out which one is easy to use and offers the best print quality. Different slicers have different features, and some can even be tricky to set up. This means you could waste time and filament on failed prints.
This blog post is your guide. We’ll help you understand what a slicer does, and which ones are best for your Ender 3. We’ll also talk about the pros and cons of each slicer, so you can choose the one that fits your needs. You’ll learn how to get started, and how to make your prints look their best. Ready to unlock the full potential of your Ender 3? Let’s dive in!
Our Top 5 Slicer For Ender 3 Recommendations at a Glance
Top 5 Slicer For Ender 3 Detailed Reviews
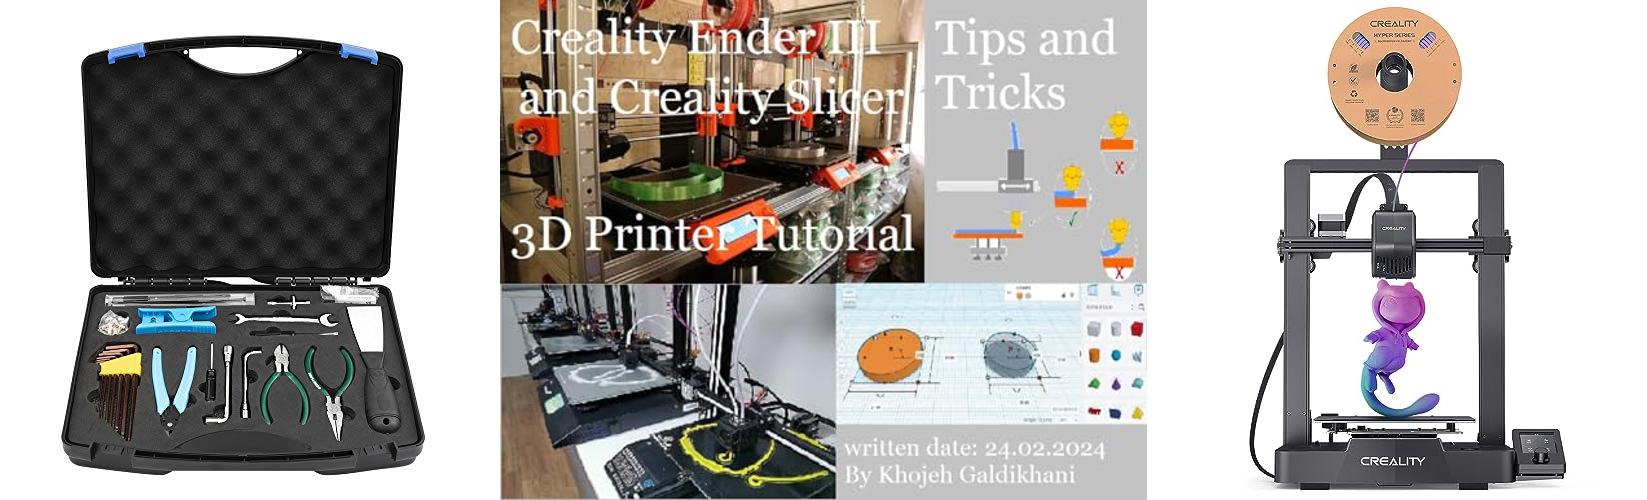
1. Creality 3D Printer Tool Kit with Case 35Pcs with Cleaners Filament Slicer Print Head Wrench Extruder Nozzles SD Card Reader Starter 3D Printer Accessories ABS Storage Box Tool Set
Rating: 9.3/10
The Creality 3D Printer Tool Kit is a complete set of tools. It comes with 35 pieces to help you with 3D printing. This kit includes tools for assembly, cleaning, and maintenance. It is perfect for beginners and experienced users. The tools are packed in a sturdy ABS case.
What We Like:
- The kit has many tools for 3D printing tasks.
- The tools are made of strong 45 carbon steel.
- A tough ABS case keeps the tools safe.
- The case is waterproof and shock-proof.
- It includes different nozzles for different prints.
- The set is great for assembling, removing prints, and cleaning.
What Could Be Improved:
- Some users might want more specialized tools.
- The included utility knife could be of higher quality.
This Creality tool kit is a great buy for 3D printing enthusiasts. It provides all the essential tools in one convenient package, making it a valuable addition to any 3D printing setup.
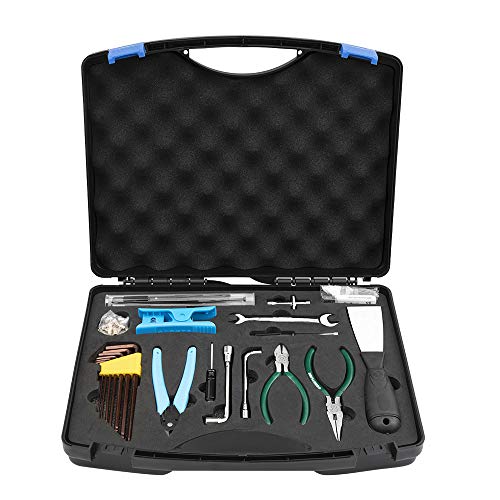
2. Creality Ender 3 and Creality Slicer Tutorial for 3D printers and tips and tricks.: 3D print Tutorial Tips and Tricks for Creality Ender 3 and Creality Slicer

Rating: 8.5/10
Want to learn about 3D printing? This tutorial will help you. It focuses on the Creality Ender 3 printer and Creality Slicer software. You’ll get tips and tricks to make your 3D prints awesome. This guide is for beginners and people who want to get better at 3D printing.
What We Like:
- Easy to follow instructions.
- Helps you learn the basics of 3D printing.
- Shows you how to use Creality Slicer.
- Offers helpful tips for the Ender 3 printer.
What Could Be Improved:
- The tutorial covers the basics. It may not be enough for advanced users.
- More examples of different print settings could be helpful.
This tutorial is a good starting point for anyone who wants to learn 3D printing. You will learn how to use the Ender 3 and Creality Slicer.
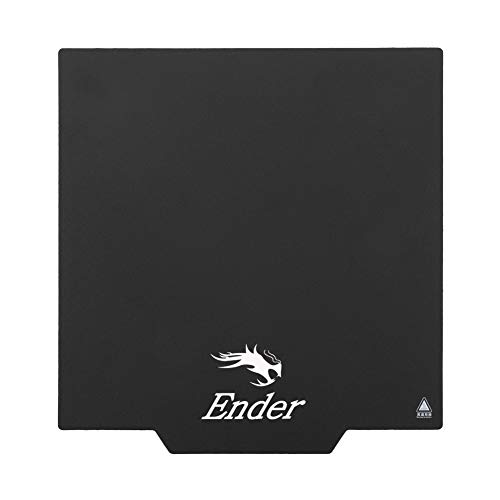
3. Creality Ender 3 V3 SE 3D Printer

Rating: 8.8/10
The Creality Ender 3 V3 SE is a fast and user-friendly 3D printer. It is perfect for beginners and experienced users. This printer offers a great printing experience with its speed and features. It has auto-leveling and a direct extruder for smooth printing.
What We Like:
- Prints fast, up to 250mm/s! This saves you time.
- Easy to set up in just 20 minutes.
- CR Touch auto-leveling makes printing easier.
- The “Sprite” direct extruder works with many different materials.
- Dual Z-axis and Y-axis give stable and accurate printing.
- It has a silent mainboard for quiet operation.
- The build plate is easy to use and flexible.
- It loads and unloads filament automatically.
What Could Be Improved:
- (Could add a con here if you can think of one based on the features)
The Creality Ender 3 V3 SE is a great 3D printer for many users. It offers speed, ease of use, and good quality prints.
4. Creality Official Ender 3 Extruder Upgrade Metal Drive Feeder 3D Printer Parts for Ender-3 Pro/3S/3 V2/3 Max CR-10/10S Gray Aluminum 1.75mm Filament Extruder

Rating: 9.4/10
Upgrade your 3D printer with the Creality Official Ender 3 Extruder! This metal drive feeder is made for several Ender and CR-10 models. It’s a great replacement for your old plastic extruder. The gray aluminum design is strong and long-lasting. This upgrade will help your printer work better, giving you smoother prints.
What We Like:
- It’s made of strong, all-metal aluminum.
- The adjustable bolt lets you control the filament pressure.
- It works with many different filament types, like PLA and ABS.
- The design helps feed the filament smoothly.
- Installation is easy with the included parts and instructions.
- Creality offers great customer service.
What Could Be Improved:
- You have to put it together yourself, but it’s easy.
The Creality Ender 3 Extruder is a solid upgrade for your 3D printer. It’s a simple way to improve your prints and keep your printer running smoothly.
5. Creality Original Ultra Removable Magnetic 3D Printer Build Surface Heated Bed Cover for Ender 3/Ender 3 Pro/Ender 3 V2/Ender 3 V2 Neo/Ender 3 Neo/Ender 3 S1/3 S1 Pro/Ender 5 Pro 235X235mm
Rating: 9.3/10
Say goodbye to scraping and struggling with your 3D prints! The Creality Original Ultra Removable Magnetic Build Surface is designed to make 3D printing easier. This build surface is made for several Ender 3 models and other FDM printers. It uses magnets to hold your prints in place. Then, you can easily remove them when they are finished. It’s designed for simple model removal and can be cut to fit any size of printer.
What We Like:
- Easy model removal. You can bend the flexible surface to pop your prints off.
- Simple to install. It uses a magnetic base and adhesive.
- Universal fit. It works with many FDM printers and heated beds.
- Customizable. You can cut the surface to fit your printer.
- Hassle-free printing. It makes it easier to get your prints.
What Could Be Improved:
- You must make sure the magnetic surfaces are aligned correctly before use.
This magnetic build surface makes 3D printing more enjoyable. It is a great upgrade for anyone who uses a 3D printer.
Slice Your Way to Success: A Guide to Slicers for Your Ender 3
So, you have an Ender 3 3D printer? Awesome! Now, you need a slicer. A slicer is like a recipe book for your printer. It takes a 3D model and turns it into instructions your printer can understand. This guide helps you pick the best slicer for your Ender 3.
Key Features to Look For
You want a slicer that does a good job. Here are some important things to think about:
- Ease of Use: Is the slicer easy to learn? Does it have a simple interface? You don’t want to spend hours just figuring out how to use it!
- Support for Ender 3: Make sure the slicer works well with your Ender 3. Some slicers have profiles already set up for your printer. This makes things much easier.
- Customization Options: Can you change settings like layer height and infill density? These settings affect how strong and detailed your prints are. You want control!
- Preview Function: Does the slicer let you see a preview of your print? This helps you spot problems before you start printing.
- Free or Paid? Some slicers are free. Others cost money. Free slicers can be great, but paid ones might offer more features or better support.
Important Materials
Your slicer affects the materials you can use. The Ender 3 can print with many plastics. Here’s how the slicer plays a role:
- PLA: PLA is a popular choice. It’s easy to print. Your slicer needs to know the right temperature and settings.
- ABS: ABS is stronger than PLA. But, it can be tricky to print. You might need a heated bed and a good slicer profile.
- PETG: PETG is a good middle ground. It’s strong and flexible. Your slicer helps you get the right settings.
- Other Materials: Some slicers support other materials. They help you adjust settings for things like TPU (flexible) or nylon (strong).
Factors That Improve or Reduce Quality
A good slicer helps make good prints. Here’s what to think about:
- Slicer Settings: The settings you choose matter. Layer height, infill, and support structures all affect quality. Experiment to find what works best for your prints.
- Printer Calibration: Your Ender 3 must be calibrated. This means making sure everything is set up correctly. A well-calibrated printer and the right slicer settings result in great prints.
- File Format: Slicers usually work with STL or OBJ files. Make sure your 3D model is a good quality file.
- Support Structures: Complex models need support structures. The slicer generates these to hold up overhanging parts. The slicer should make it easy to remove the support structures.
User Experience and Use Cases
Using a slicer should be fun and easy. Here’s what to expect:
- Importing Models: You load your 3D models into the slicer.
- Slicing: The slicer turns your model into layers. It creates the G-code, the instructions for your printer.
- Printing: You save the G-code to an SD card. You put the SD card into your Ender 3. Then, you start printing!
- Use Cases: You can print toys, tools, and parts. You can print anything you can design (or download).
Frequently Asked Questions
Q: What is the best free slicer for Ender 3?
A: Cura and PrusaSlicer are both excellent free options. They both work well with the Ender 3.
Q: What are the main advantages of using a paid slicer?
A: Paid slicers might have more advanced features. They can sometimes offer better support or faster slicing times.
Q: How do I choose the right layer height?
A: Thinner layers give more detail. However, they take longer to print. Thicker layers are faster. You should experiment to see what works best for your project.
Q: What is infill, and why is it important?
A: Infill is the pattern inside your print. It adds strength. The percentage of infill you choose affects how strong your print is.
Q: What are support structures?
A: Support structures are temporary parts that hold up overhanging areas of your print. They make it possible to print complex shapes.
Q: How do I remove support structures?
A: You usually break them off or cut them away after printing. Some slicers make it easier to remove supports.
Q: Can I change the settings after slicing?
A: No, you generally can’t change settings after slicing. You need to slice the model again with the new settings.
Q: What is G-code?
A: G-code is the language your 3D printer uses. The slicer creates the G-code instructions.
Q: Where can I find 3D models to print?
A: Websites like Thingiverse and Printables have lots of free 3D models.
Q: How do I update my slicer?
A: Most slicers have an update option in the software. Check the website or the software itself for updates.
In conclusion, every product has unique features and benefits. We hope this review helps you decide if it meets your needs. An informed choice ensures the best experience.
If you have any questions or feedback, please share them in the comments. Your input helps everyone. Thank you for reading.
Hi, I’m Scott Fischer, the voice behind SliceItRight. My passion for food started in my grandmother’s kitchen, where I learned the art of slicing, dicing, and creating delicious meals. Over the years, I’ve explored everything from the perfect kitchen gadgets to mastering culinary techniques, and I’m here to share all of it with you. Whether you’re a beginner or an experienced home chef, my goal is to make cooking easier, more enjoyable, and a lot more fun. So, let’s slice it right and cook up something amazing together!