Are you wondering how to install a new Moen kitchen faucet with a sprayer? Yes, you can install a Moen kitchen faucet with a sprayer yourself with the right tools, preparation, and by following these step-by-step instructions. This comprehensive guide will walk you through the entire process of Moen kitchen faucet installation, from removing the old faucet to connecting the faucet sprayer hose. This kitchen faucet replacement guide is designed to help even those with limited plumbing experience achieve professional-looking results.
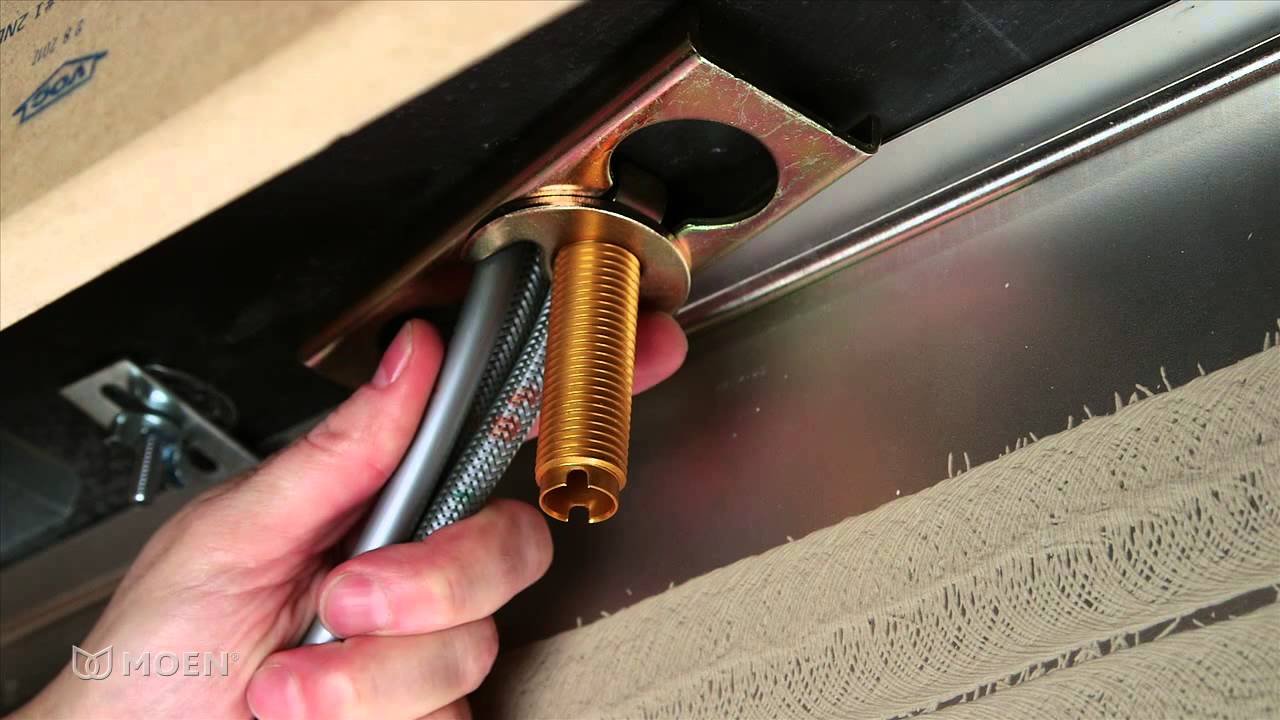
Image Source: i.ytimg.com
Preparing for Your Moen Kitchen Faucet Installation
Before you begin installing your Moen kitchen faucet, proper preparation is essential. This includes gathering the necessary tools and materials, as well as taking safety precautions.
Gathering Your Tools and Materials
Having the right tools on hand will make the Moen kitchen faucet installation process much smoother. Here’s a comprehensive list of what you’ll need:
- New Moen Kitchen Faucet with Sprayer: Ensure you have the complete kit with all necessary parts.
- Basin Wrench: Essential for loosening and tightening faucet nuts in tight spaces.
- Adjustable Wrench: For various plumbing connections.
- Pliers: Useful for gripping and manipulating small parts.
- Screwdrivers (Phillips and Flathead): For removing and installing screws.
- Plumber’s Putty or Silicone Sealant: To create a watertight seal between the faucet base and the sink.
- Teflon Tape: To seal threaded connections and prevent leaks.
- Bucket: To catch any water during disconnection.
- Towels or Rags: To clean up spills and protect the sink surface.
- Work Light: To illuminate the area under the sink.
- Safety Glasses: To protect your eyes from debris.
- Gloves: To protect your hands.
- Pen or Marker: For labeling water lines.
- Optional: Penetrating Oil: To help loosen stubborn nuts and bolts.
- Optional: Faucet Supply Lines: It’s often a good idea to replace these when replacing the faucet.
Safety First: Shutting Off the Water Supply
The most important step before starting any plumbing work is to shut off the water supply to your kitchen faucet. Here’s how:
- Locate the Shut-Off Valves: These are typically located under the sink, one for hot water and one for cold water.
- Turn Off the Valves: Turn both valves clockwise until they are completely closed.
- Test the Water: Turn on the old faucet briefly to ensure the water is completely shut off. If water continues to flow, locate the main water shut-off valve for your home and turn it off.
- Disconnect the Sprayer Hose: Disconnect the sprayer hose by unscrewing it at the connection point. Be ready with a bucket to catch any water.
Removing the Old Faucet
Removing the old faucet can sometimes be the most challenging part of the entire Moen kitchen faucet installation process. Here’s a systematic approach:
- Disconnect Water Supply Lines: Use your wrenches to disconnect the hot and cold water supply lines from the old faucet. Have your bucket ready to catch any remaining water in the lines.
- Loosen the Mounting Nuts: Use a basin wrench to loosen the nuts that secure the old faucet to the sink. These nuts are usually located in a hard-to-reach area under the sink. Penetrating oil can be helpful if the nuts are corroded or stuck.
- Remove the Old Faucet: Once the nuts are loosened, carefully remove the old faucet from the sink.
- Clean the Sink Surface: Thoroughly clean the sink surface around the faucet hole to remove any old putty, sealant, or debris. A scraper and some cleaning solution can be helpful.
Installing Your New Moen Kitchen Faucet
Now that the old faucet is removed and the area is clean, you can begin installing your new Moen kitchen faucet. Follow these steps carefully for a successful DIY faucet installation.
Assembling the Faucet
Many Moen faucets require some assembly before installation. Refer to the Moen faucet installation instructions included with your faucet for specific details, but here are some general steps:
- Attach the Faucet Base: Some faucets have a separate base that needs to be attached to the faucet body.
- Connect the Water Supply Lines: Attach the water supply lines to the faucet body. Ensure they are securely tightened, but don’t overtighten.
- Install the Mounting Hardware: Attach the mounting hardware (washers, nuts, and brackets) to the faucet body.
Mounting the Faucet to the Sink
- Apply Plumber’s Putty or Silicone Sealant: Apply a bead of plumber’s putty or silicone sealant around the base of the faucet where it will contact the sink. This will create a watertight seal.
- Plumber’s Putty: Roll the putty into a rope and apply it evenly around the base.
- Silicone Sealant: Apply a thin, even bead of sealant around the base.
- Insert the Faucet into the Hole: Carefully insert the faucet into the faucet hole in the sink.
- Secure the Faucet: From under the sink, tighten the mounting nuts to secure the faucet in place. Use your basin wrench to reach the nuts. Tighten them evenly to ensure the faucet is stable and properly aligned.
- Remove Excess Putty or Sealant: Wipe away any excess plumber’s putty or silicone sealant from around the base of the faucet.
Faucet Sprayer Installation
A crucial part of the installing Moen kitchen faucet is connecting the faucet sprayer. Here’s how to handle faucet sprayer installation:
- Connect the Sprayer Hose to the Faucet: Locate the connection point for the sprayer hose on the faucet body. Attach the sprayer hose according to the Moen faucet installation instructions. This usually involves a threaded connection or a quick-connect fitting. Ensure it is securely connected.
- Install the Sprayer Holder: Install the sprayer holder onto the sink or countertop. This may involve drilling a hole or using an existing hole. Follow the Moen faucet installation instructions for the specific holder type.
- Thread the Sprayer Hose Through the Holder: Thread the sprayer hose through the sprayer holder.
- Attach the Sprayer Head: Attach the sprayer head to the end of the sprayer hose. This usually involves a threaded connection.
- Connect the Sprayer Hose Weight: Some Moen faucets include a weight that attaches to the sprayer hose. This weight helps the sprayer hose retract smoothly. Attach the weight according to the Moen faucet installation instructions.
Connecting the Water Supply Lines
- Wrap the Threads with Teflon Tape: Wrap the threads of the faucet supply line connections with Teflon tape. This will help create a watertight seal.
- Connect the Supply Lines to the Shut-Off Valves: Connect the hot and cold water supply lines to the shut-off valves under the sink. Use your adjustable wrench to tighten the connections.
- Turn on the Water Supply: Slowly turn on the hot and cold water shut-off valves.
- Check for Leaks: Carefully check all connections for leaks. If you find any leaks, tighten the connections further. If the leak persists, you may need to reapply Teflon tape or replace the supply lines.
| Step | Description |
|---|---|
| 1. Shut Off Water Supply | Locate and turn off the hot and cold water shut-off valves under the sink. |
| 2. Disconnect Old Faucet | Disconnect water supply lines, loosen mounting nuts with a basin wrench, and remove the old faucet. |
| 3. Clean Sink Area | Thoroughly clean the sink surface around the faucet hole to remove old putty and debris. |
| 4. Assemble New Faucet | Attach faucet base, connect water supply lines to the faucet body, and install mounting hardware according to instructions. |
| 5. Apply Sealant | Apply a bead of plumber’s putty or silicone sealant around the base of the faucet. |
| 6. Mount New Faucet | Insert the faucet into the hole, tighten mounting nuts evenly, and wipe away excess sealant. |
| 7. Connect Sprayer | Connect the sprayer hose to the faucet, install the sprayer holder, thread the hose through the holder, and attach the sprayer head. |
| 8. Connect Water Supply Lines | Wrap threads with Teflon tape and connect supply lines to shut-off valves. |
| 9. Turn on Water & Check for Leaks | Slowly turn on the water supply, check all connections for leaks, and tighten further if necessary. |
Final Checks and Adjustments
After completing the installation, perform these final checks and adjustments to ensure everything is working properly.
- Check for Leaks Again: Double-check all connections for leaks, including the faucet base, supply line connections, and sprayer hose connections.
- Test the Sprayer: Test the faucet sprayer to ensure it is working correctly. Check for proper water flow and retraction.
- Adjust Water Flow and Temperature: Adjust the hot and cold water mix to your desired temperature. Check the water flow rate and adjust as needed.
- Clean Up: Clean up any tools, materials, and debris from the work area.
Troubleshooting Common Issues During Moen Kitchen Faucet Installation
Even with careful preparation and following the instructions, you may encounter some issues during the Moen kitchen faucet installation process. Here are some common problems and how to solve them:
- Leaking Connections: If you have leaking connections, try tightening the connections further. If the leak persists, reapply Teflon tape or replace the supply lines. Ensure all connections are snug but not overtightened, as overtightening can damage the fittings.
- Stuck Mounting Nuts: If the mounting nuts are stuck, apply penetrating oil and let it sit for a while before attempting to loosen them with a basin wrench. You may need to use some force, but be careful not to damage the sink or faucet.
- Low Water Pressure: If you have low water pressure after installing the new faucet, check the supply lines for kinks or obstructions. Also, check the faucet aerator for debris. Cleaning the aerator can often improve water flow.
- Sprayer Not Retracting Properly: If the sprayer is not retracting properly, check the sprayer hose for kinks or obstructions. Also, ensure the sprayer hose weight is properly attached and positioned.
- Faucet is Loose: If the faucet feels loose after installation, tighten the mounting nuts under the sink. Make sure they are evenly tightened to ensure the faucet is stable.
Tips for a Smooth Installation
Here are some additional tips to make your Moen kitchen faucet installation go smoothly:
- Read the Instructions Carefully: Before you start, read the Moen faucet installation instructions thoroughly. Familiarize yourself with the parts and the installation process.
- Take Pictures: Take pictures of the existing plumbing before you disconnect anything. This can be helpful if you need to refer back to the original setup.
- Have a Helper: Having a helper can make the installation process easier, especially when dealing with tight spaces or heavy components.
- Take Your Time: Don’t rush the installation process. Take your time and pay attention to detail.
- Don’t Be Afraid to Ask for Help: If you’re not comfortable with any part of the installation process, don’t hesitate to ask a professional plumber for help.
Frequently Asked Questions (FAQ)
Here are some frequently asked questions about installing a Moen kitchen faucet:
Q: What is the purpose of plumber’s putty when installing a faucet?
A: Plumber’s putty creates a watertight seal between the faucet base and the sink, preventing water from leaking into the cabinet below.
Q: Can I reuse the old water supply lines when installing a new faucet?
A: It’s generally recommended to replace the water supply lines when installing a new faucet to ensure a reliable and leak-free connection. Old supply lines may be corroded or damaged, which can lead to leaks.
Q: How do I know if I need to call a plumber to install my faucet?
A: If you’re not comfortable with basic plumbing tasks or if you encounter significant challenges during the installation process, it’s best to call a plumber. Common signs that you need professional help include persistent leaks, difficulty disconnecting the old faucet, or uncertainty about the plumbing connections.
Q: What is the Moen faucet sprayer hose connection type?
A: The Moen faucet sprayer hose connection type varies depending on the model, but it often involves a threaded connection or a quick-connect fitting. The Moen faucet installation instructions will provide specific details for your faucet.
Q: What should I do if I overtighten the connections?
A: If you overtighten the connections, you risk damaging the fittings and causing leaks. If you suspect you’ve overtightened a connection, carefully loosen it and inspect the fitting for damage. If the fitting is damaged, you may need to replace it.
Conclusion
Installing a Moen kitchen faucet with a sprayer can be a rewarding DIY project. By following this detailed kitchen faucet replacement guide and taking your time, you can achieve professional-looking results and save money on plumber fees. Remember to prioritize safety, gather the necessary tools, and read the Moen faucet installation instructions carefully. With a little patience and effort, you’ll be enjoying your new Moen kitchen faucet in no time. This comprehensive guide has covered everything from faucet sprayer installation to Moen kitchen faucet installation, ensuring you have all the information you need for a successful DIY faucet installation.
Hi, I’m Scott Fischer, the voice behind SliceItRight. My passion for food started in my grandmother’s kitchen, where I learned the art of slicing, dicing, and creating delicious meals. Over the years, I’ve explored everything from the perfect kitchen gadgets to mastering culinary techniques, and I’m here to share all of it with you. Whether you’re a beginner or an experienced home chef, my goal is to make cooking easier, more enjoyable, and a lot more fun. So, let’s slice it right and cook up something amazing together!