Can I replace a kitchen faucet hose myself? Yes, you absolutely can! This guide provides a step-by-step walkthrough on how to tackle this common plumbing repair. Replacing a kitchen faucet hose is a manageable DIY project that can save you money on plumber fees. If you’re dealing with a leaking faucet hose fix or simply want to upgrade your existing setup, this guide will provide you with everything you need to know. This tutorial walks you through the entire process, including disconnecting kitchen faucet hose, choosing the right kitchen faucet hose types, understanding kitchen faucet hose connector mechanisms, and providing a complete faucet hose installation guide. You will also discover useful information about faucet supply hose repair, and how to carry out under sink faucet hose replacement with confidence. Keep reading to find out how to change faucet hose quickly and correctly.
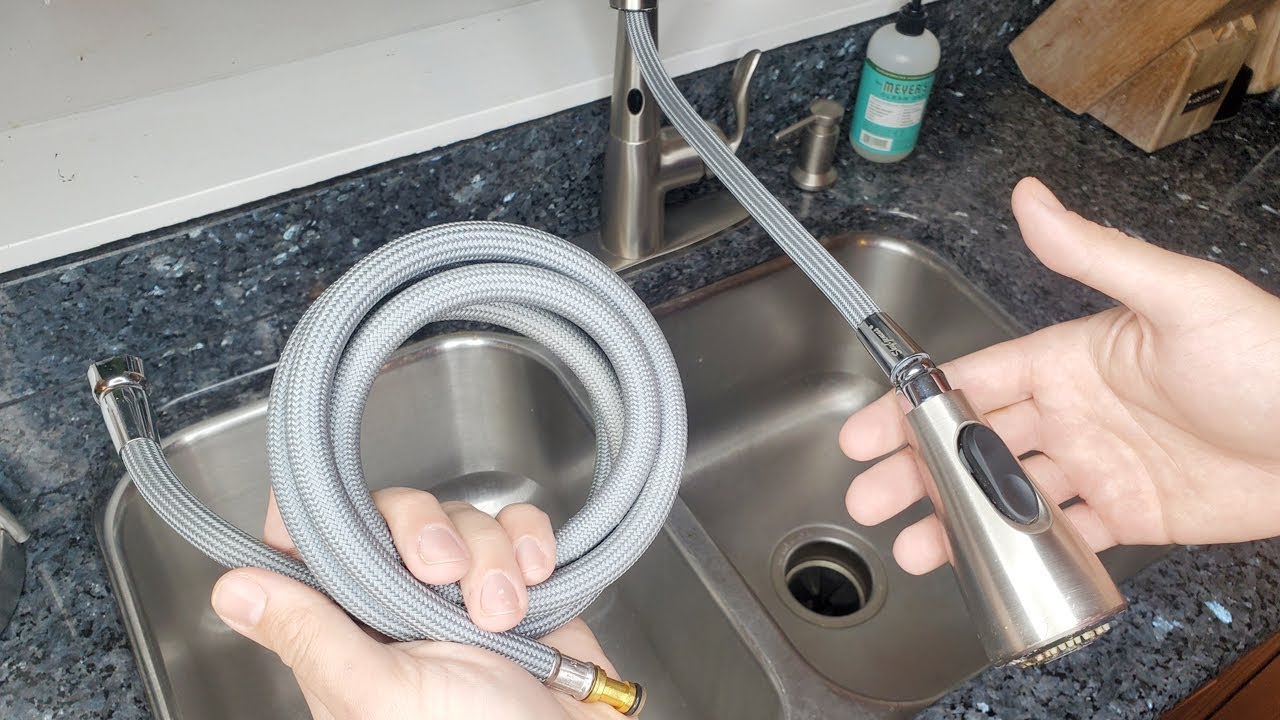
Image Source: i.ytimg.com
What You’ll Need Before Starting
Before you begin the kitchen faucet hose replacement, make sure you have all the necessary tools and materials on hand. This will save you time and prevent frustration mid-project.
Tools and Materials List
Here’s a comprehensive list of what you’ll need:
- New kitchen faucet hose: Be sure to select the correct type and length for your faucet. Take the old hose with you to the store for easy comparison.
- Adjustable wrench: For loosening and tightening connections.
- Basin wrench (faucet wrench): Useful for reaching tight spaces under the sink.
- Channel-lock pliers: For gripping and turning.
- Screwdriver (Phillips and flathead): Depending on your faucet model.
- Bucket: To catch any residual water.
- Towels or rags: For cleanup and protecting surfaces.
- Penetrating oil (optional): For loosening stubborn connections.
- Plumber’s tape (Teflon tape): For sealing threaded connections.
- Work gloves: To protect your hands.
- Flashlight or headlamp: For better visibility under the sink.
Ensuring Safety
Safety should always be your top priority when working with plumbing.
- Turn off the water supply: Locate the shut-off valves under the sink (hot and cold) and turn them off completely. If you don’t have individual shut-off valves, you’ll need to turn off the main water supply to your house.
- Release water pressure: After turning off the water supply, turn on the faucet to release any remaining water pressure in the lines.
- Protect your eyes: Wear safety glasses to prevent any debris or water from getting into your eyes.
Step-by-Step Guide to Replacing Your Kitchen Faucet Hose
With your tools and materials ready and safety measures in place, follow these steps to successfully replace your kitchen faucet hose.
Step 1: Accessing the Old Faucet Hose
The first step involves getting to the old hose that needs to be replaced.
- Clear the area under the sink: Remove any items stored under the sink to provide yourself with ample working space.
- Protect the cabinet floor: Place towels or a bucket under the sink to catch any drips or spills.
- Locate the faucet hose connections: Identify where the faucet hose connects to the faucet body and the water supply lines. These connections are usually located under the sink.
Step 2: Disconnecting the Old Faucet Hose
This is where you’ll need your wrenches and pliers.
- Disconnect from the faucet body: Use an adjustable wrench or basin wrench to loosen the nut connecting the faucet hose to the faucet body. If the nut is stuck, apply penetrating oil and let it sit for a few minutes before trying again. Be prepared for some water to spill out when you disconnect the hose.
- Disconnect from the water supply line: Similarly, use an adjustable wrench to loosen the nut connecting the faucet hose to the water supply line. Again, expect some residual water.
- Remove the old hose: Carefully remove the old faucet hose from the faucet body and the water supply line. Inspect the old hose for any signs of damage or wear. This can help you understand why it was leaking.
Step 3: Preparing the New Faucet Hose
Before installing the new hose, give it a quick check.
- Inspect the new hose: Ensure that the new kitchen faucet hose is the correct length and type for your faucet. Check for any defects or damage.
- Apply plumber’s tape: Wrap plumber’s tape (Teflon tape) clockwise around the threads of the faucet body and water supply line connections. This will help create a watertight seal. Usually 2-3 wraps will suffice.
Step 4: Installing the New Faucet Hose
Now, it’s time to connect the new hose.
- Connect to the faucet body: Attach one end of the new kitchen faucet hose to the faucet body. Hand-tighten the nut first, then use an adjustable wrench to tighten it securely. Be careful not to overtighten, as this can damage the connection.
- Connect to the water supply line: Attach the other end of the new kitchen faucet hose to the water supply line. Again, hand-tighten the nut first, then use an adjustable wrench to tighten it securely.
- Check the connections: Make sure both connections are tight and secure. Gently tug on the hose to ensure it’s properly connected.
Step 5: Testing for Leaks
This is a critical step to ensure your faucet supply hose repair is successful.
- Turn on the water supply: Slowly turn on the shut-off valves under the sink.
- Check for leaks: Carefully inspect the connections for any signs of leaks. Use a flashlight to get a better view.
- Tighten connections if necessary: If you detect any leaks, tighten the connections slightly with an adjustable wrench. Be careful not to overtighten.
- Run the faucet: Turn on the faucet and let the water run for a few minutes. Check again for any leaks under the sink.
Step 6: Final Touches
Once you’re confident that there are no leaks, you can finish up.
- Dry the area: Use towels or rags to dry any water around the connections.
- Organize the space: Replace any items you removed from under the sink.
- Dispose of the old hose: Discard the old leaking faucet hose properly.
Different Kitchen Faucet Hose Types
There are several kitchen faucet hose types available. Choosing the right one ensures compatibility and longevity.
| Hose Type | Material | Advantages | Disadvantages | Best Used For |
|---|---|---|---|---|
| Braided Stainless Steel | Stainless Steel, Rubber | Durable, flexible, resists kinks and corrosion | More expensive than other types | High-pressure water lines, heavy use |
| PEX (Cross-linked Polyethylene) | Plastic | Flexible, durable, resists high temperatures and pressure | Can be more difficult to connect without specialized tools | Hot and cold water lines, durable option |
| Rubber | Rubber | Inexpensive, readily available | Less durable than other types, prone to cracking and leaks over time | Low-pressure applications, temporary fixes |
| Corrugated Metal | Metal | Strong, resists kinks | Less flexible than other types, can be noisy | Tight spaces where flexibility isn’t needed |
Troubleshooting Common Issues
Even with careful installation, you might encounter some common problems.
- Leaks after installation:
- Solution: Tighten the connections slightly. Make sure you’ve used plumber’s tape properly. If the leak persists, the hose or connection may be damaged.
- Difficulty disconnecting the old hose:
- Solution: Apply penetrating oil and let it sit for a while. Use a basin wrench for hard-to-reach nuts.
- Incorrect hose size:
- Solution: Double-check the specifications of your faucet and purchase the correct size hose. Take the old hose to the store for comparison.
- Low water pressure:
- Solution: Check for kinks in the hose. Ensure the shut-off valves are fully open.
When to Call a Professional
While replacing a kitchen faucet hose is generally a DIY-friendly project, there are situations where it’s best to call a professional plumber.
- Extensive corrosion: If the connections are heavily corroded and difficult to remove without causing further damage.
- No shut-off valves: If you don’t have individual shut-off valves under the sink and are uncomfortable turning off the main water supply.
- Persistent leaks: If you’ve tried troubleshooting the leaks and they continue to persist.
- Unfamiliar plumbing: If you’re not comfortable working with plumbing or are unsure about any aspect of the under sink faucet hose replacement process.
Benefits of Replacing Your Faucet Hose
Replacing your leaking faucet hose fix isn’t just about stopping the drip. It offers several benefits:
- Saves water: Prevents water waste and reduces your water bill.
- Prevents water damage: Avoids potential damage to your cabinets and flooring from leaks.
- Improves water pressure: A new hose can restore optimal water pressure.
- Extends faucet life: Prevents further damage to your faucet from leaks and corrosion.
- Peace of mind: Knowing you’ve addressed the issue and prevented future problems.
Fathoming Kitchen Faucet Hose Connectors
Understanding the different types of connectors is crucial for a successful kitchen faucet hose replacement. The kitchen faucet hose connector ensures a watertight seal and proper connection between the faucet, hose, and water supply lines.
Common Connector Types
- Compression Fittings: These fittings use a compression nut and ferrule to create a tight seal around the hose. They are commonly used for connecting the hose to the water supply lines.
- Threaded Fittings: These fittings have male or female threads that screw into corresponding threads on the faucet or supply line. Plumber’s tape is essential for sealing these connections.
- Quick Connect Fittings: These fittings allow for easy connection and disconnection without the need for tools. They are often used for connecting the hose to the faucet body. However, make sure you have the right size for the right faucet or it will cause more problems.
Choosing the Right Connector
When selecting a connector, consider the following factors:
- Compatibility: Ensure that the connector is compatible with the type of hose and the faucet or supply line.
- Material: Choose a connector made of durable materials such as brass or stainless steel.
- Ease of Use: Select a connector that is easy to install and disconnect, especially if you anticipate future maintenance.
By understanding the different types of connectors and how they work, you can ensure a successful and leak-free faucet hose replacement.
Interpreting the Kitchen Faucet Hose Installation Guide
A comprehensive faucet hose installation guide is essential for a successful DIY project. Here are some key elements to look for in a guide:
- Step-by-Step Instructions: The guide should provide clear, concise instructions with illustrations or diagrams.
- Tool List: A complete list of the tools and materials required for the project.
- Safety Precautions: Detailed safety guidelines to protect yourself and your property.
- Troubleshooting Tips: Solutions for common problems that may arise during installation.
- Warranty Information: Details about the warranty on the new faucet hose.
FAQ: Kitchen Faucet Hose Replacement
Here are some frequently asked questions about replacing a kitchen faucet hose:
-
How often should I replace my kitchen faucet hose?
- It is generally recommended to replace your kitchen faucet hose every 5-10 years, or sooner if you notice any signs of wear or leaks.
-
Can I use any type of hose for my kitchen faucet?
- No, it is important to use a hose that is specifically designed for kitchen faucets and is compatible with your faucet model.
-
What is the best material for a kitchen faucet hose?
- Braided stainless steel hoses are generally considered the best option due to their durability and resistance to corrosion.
-
Do I need to hire a plumber to replace my kitchen faucet hose?
- No, if you are comfortable with basic plumbing tasks, you can replace your kitchen faucet hose yourself. However, if you are unsure or encounter any difficulties, it is best to call a professional plumber.
-
What do I do if the new hose leaks after installation?
- Check the connections to ensure they are tight and properly sealed with plumber’s tape. If the leak persists, the hose or connections may be damaged.
By following this comprehensive guide, you can confidently tackle your kitchen faucet hose replacement project and enjoy a leak-free kitchen faucet for years to come!
Hi, I’m Scott Fischer, the voice behind SliceItRight. My passion for food started in my grandmother’s kitchen, where I learned the art of slicing, dicing, and creating delicious meals. Over the years, I’ve explored everything from the perfect kitchen gadgets to mastering culinary techniques, and I’m here to share all of it with you. Whether you’re a beginner or an experienced home chef, my goal is to make cooking easier, more enjoyable, and a lot more fun. So, let’s slice it right and cook up something amazing together!