Are you trying to take a Moen kitchen faucet apart to fix a leak? Yes, you can! This comprehensive faucet repair guide will show you how, step-by-step. We’ll cover everything from faucet parts identification to faucet maintenance tips, ensuring you can tackle this DIY project with confidence. This article will show you all about Moen kitchen faucet disassembly, kitchen faucet cartridge replacement, and how to handle Moen faucet troubleshooting effectively.
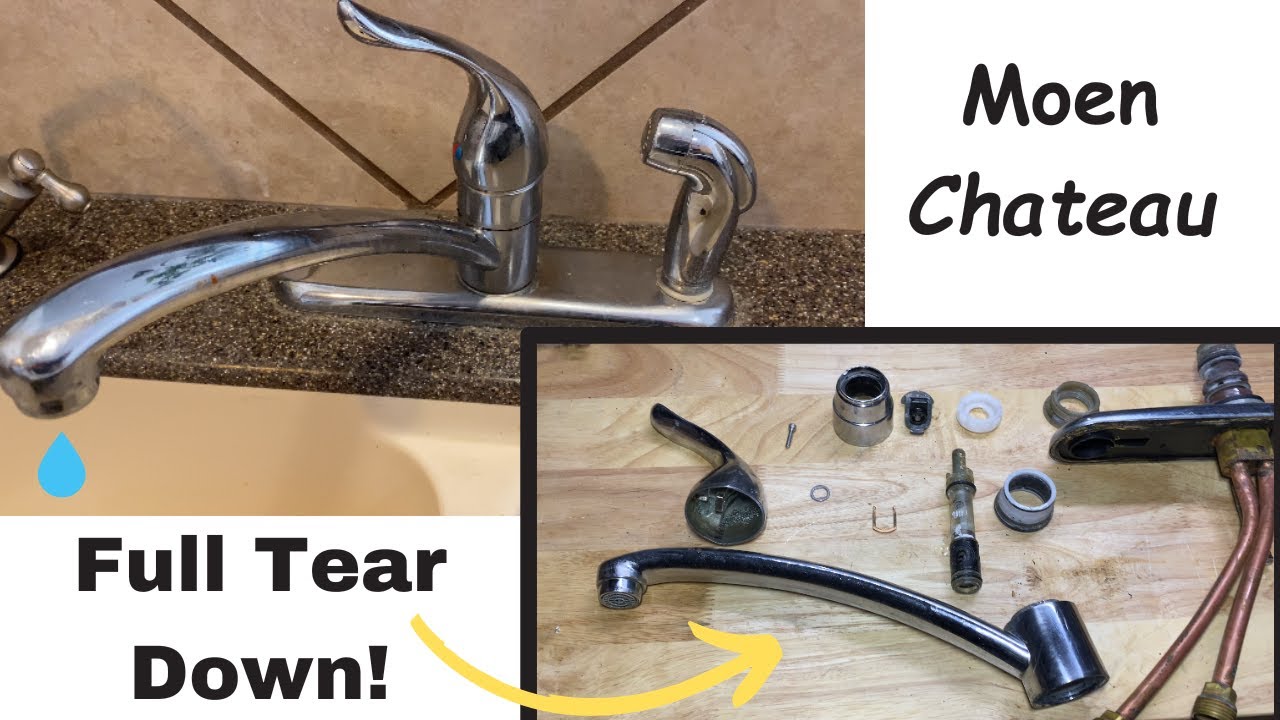
Image Source: i.ytimg.com
Deciphering Your Leaking Moen Faucet Fix
Before diving into the Moen kitchen faucet disassembly, it’s important to understand why your faucet is leaking. Leaks often stem from worn-out parts like O-rings, cartridges, or the faucet aerator. Correctly diagnosing the issue is the first step in a successful faucet repair guide.
Common Causes of Leaks
- Worn-Out O-Rings: These small rubber rings create a watertight seal. Over time, they can dry out and crack, leading to leaks.
- Damaged Cartridge: The cartridge controls the water flow and temperature. A faulty cartridge can cause drips or inconsistent water pressure. This is crucial for kitchen faucet cartridge replacement.
- Loose Connections: Check all connections for tightness. Sometimes, a simple tightening is all that’s needed.
- Corroded Valve Seats: Valve seats can corrode over time, preventing a tight seal.
- Faulty Faucet Aerator: A clogged or damaged aerator can cause splashing and leaks around the faucet spout.
Tools and Materials Needed
Gathering the right tools before you begin will make the Moen kitchen faucet disassembly process smoother. Here’s what you’ll likely need:
- Screwdrivers: Both flathead and Phillips head.
- Adjustable Wrench: For loosening and tightening nuts.
- Allen Wrench Set: Moen faucets often use Allen screws.
- Penetrating Oil: To help loosen stubborn parts.
- New Replacement Parts: O-rings, cartridge, aerator, etc.
- Plumber’s Grease: To lubricate new parts.
- Clean Rags or Towels: To wipe up water and protect surfaces.
- Basin Wrench: Useful for accessing hard-to-reach nuts under the sink.
- Pliers: For gripping and removing small parts.
Step-by-Step Moen Kitchen Faucet Disassembly
1. Turn Off the Water Supply
Before you start any work, shut off the water supply to the faucet. You’ll find shut-off valves under the sink. Turn both the hot and cold water valves clockwise until they are completely closed. Once this is done, turn on the faucet to release any remaining water pressure.
2. Remove Moen Faucet Handle
The first step in getting to the inner workings of your Moen faucet is to remove the handle. Here’s how:
- Identify the Handle Type: Moen faucets come in different styles. Some have a set screw, while others have a cap that needs to be pried off.
- Locate and Loosen the Set Screw: If your handle has a set screw, it’s usually located on the side or front of the handle. Use an Allen wrench to loosen the screw. Turn the wrench counterclockwise.
- Pry Off the Handle Cap: If there’s no set screw, look for a decorative cap. Use a small flathead screwdriver to gently pry it off. Be careful not to scratch the faucet finish.
- Remove the Handle Screw: Once the cap is off, you’ll see a screw. Remove it with the appropriate screwdriver.
- Pull Off the Handle: With the screw removed, you should be able to pull the handle straight off. You might need to wiggle it a bit.
3. Accessing the Cartridge or Valve
After removing the handle, you’ll need to access the cartridge or valve. This part controls the water flow and temperature.
- Remove the Handle Adapter: Some models have a handle adapter or extension. This is usually a cylindrical piece that sits between the handle and the cartridge. You can typically unscrew it by hand.
- Remove the Retaining Clip or Nut: Most Moen faucets have a retaining clip or nut that holds the cartridge in place.
- Retaining Clip: Use pliers or a small screwdriver to carefully remove the clip. Note its orientation for reinstallation.
- Retaining Nut: Use an adjustable wrench to loosen and remove the nut.
- Pull Out the Cartridge: Once the clip or nut is removed, you should be able to pull the cartridge straight up and out. If it’s stuck, try gently wiggling it or using a cartridge puller tool.
4. Inspecting and Replacing the Cartridge
With the cartridge removed, inspect it for damage or wear. Look for cracks, breaks, or mineral buildup.
- Clean the Cartridge Area: Before installing the new cartridge, clean the area inside the faucet body. Use a clean rag to remove any debris or mineral deposits.
- Install the New Cartridge: Lubricate the O-rings on the new cartridge with plumber’s grease. This will help it slide in smoothly and create a better seal. Align the cartridge correctly and push it into place.
- Reinstall the Retaining Clip or Nut: Secure the cartridge with the retaining clip or nut. Make sure it’s properly seated.
- Reattach the Handle Adapter (if applicable): Screw the handle adapter back onto the faucet body.
5. Faucet Aerator Removal
The faucet aerator can sometimes cause problems, such as reduced water flow or splashing. Cleaning or replacing it is a simple task.
- Locate the Aerator: The aerator is usually screwed onto the tip of the faucet spout.
- Remove the Aerator: Some aerators can be unscrewed by hand. If it’s too tight, use pliers or an aerator wrench. Wrap the aerator with a cloth to protect the finish.
- Clean or Replace the Aerator: Clean the aerator by rinsing it with water and removing any debris. If it’s damaged or heavily corroded, replace it with a new one.
- Reinstall the Aerator: Screw the aerator back onto the faucet spout. Don’t overtighten it.
6. Reassembling the Faucet
Now that you’ve replaced the necessary parts, it’s time to reassemble the faucet.
- Reattach the Handle: Slide the handle back onto the faucet stem.
- Secure the Handle with the Screw: Tighten the handle screw.
- Replace the Handle Cap: If your handle has a cap, snap it back into place.
- Tighten the Set Screw (if applicable): If your handle has a set screw, tighten it with an Allen wrench.
7. Testing for Leaks
After reassembling the faucet, turn the water supply back on slowly. Check for leaks around the handle, spout, and connections. If you see any leaks, tighten the connections or recheck the installation of the cartridge and O-rings.
Moen Faucet Troubleshooting: Common Issues
Here are some common Moen faucet troubleshooting tips to help you resolve specific issues:
- Dripping Faucet: This is often caused by a worn-out cartridge. Replace the cartridge to solve the problem.
- Low Water Pressure: Check the aerator for clogs. Also, inspect the supply lines for kinks or obstructions.
- No Hot or Cold Water: This could be due to a faulty cartridge or a problem with the shut-off valves.
- Leaking at the Base of the Faucet: This could be caused by a loose mounting nut or worn-out O-rings.
Faucet Parts Identification
Familiarizing yourself with faucet parts identification will make troubleshooting and repairs easier. Here are some common parts:
| Part | Description | Function |
|---|---|---|
| Handle | The lever or knob you use to control the water flow and temperature. | Allows you to turn the water on/off and adjust the temperature. |
| Spout | The part of the faucet that delivers the water. | Channels the water from the faucet body to the sink. |
| Aerator | A device screwed onto the tip of the spout that mixes air with the water. | Reduces splashing and provides a smooth, even flow of water. |
| Cartridge | A cylindrical component that controls the water flow and temperature. | Mixes hot and cold water and regulates the water pressure. |
| O-Rings | Small rubber rings that create a watertight seal between parts. | Prevents leaks by sealing connections between various faucet components. |
| Valve Seats | The surfaces against which the valve closes to stop the flow of water. | Provides a sealing surface for the valve to prevent leaks when the faucet is turned off. |
| Supply Lines | Flexible tubes that connect the faucet to the hot and cold water supply. | Carries water from the supply lines to the faucet. |
| Mounting Nut | A nut that secures the faucet to the sink or countertop. | Holds the faucet securely in place on the sink or countertop. |
| Retaining Clip | A clip that holds the cartridge in place. | Prevents the cartridge from dislodging and ensures it functions properly. |
Faucet Maintenance Tips
Regular faucet maintenance can prevent leaks and extend the life of your faucet. Here are some tips:
- Clean the Faucet Regularly: Wipe down the faucet with a mild soap and water solution to remove dirt and grime.
- Check for Leaks: Periodically inspect the faucet for leaks around the handle, spout, and connections.
- Lubricate Moving Parts: Apply plumber’s grease to the cartridge and O-rings to keep them working smoothly.
- Replace Worn Parts: Replace worn O-rings, cartridges, and aerators as needed.
- Avoid Harsh Cleaners: Avoid using abrasive cleaners that can damage the faucet finish.
FAQ: Troubleshooting Your Moen Faucet
- What is the most common cause of a leaking Moen faucet? The most common cause is a worn-out cartridge or O-rings.
- Can I replace a Moen faucet cartridge myself? Yes, with the right tools and instructions, you can replace a Moen faucet cartridge yourself.
- How do I identify the correct replacement parts for my Moen faucet? Check the Moen website or contact Moen customer service for assistance. You’ll likely need the faucet model number.
- What tools do I need to disassemble a Moen kitchen faucet? You’ll need screwdrivers, an adjustable wrench, Allen wrenches, pliers, and possibly a basin wrench.
- Is it necessary to use plumber’s grease when replacing O-rings or a cartridge? Yes, plumber’s grease helps lubricate the parts and create a better seal, preventing leaks.
- Who is responsible for fixing a leaky faucet in a rental property? Typically, the landlord is responsible for repairs, but it’s best to check your lease agreement.
- Can I use vinegar to clean a faucet aerator? Yes, soaking the aerator in vinegar can help dissolve mineral deposits and improve water flow.
- What should I do if I can’t remove a stuck faucet handle? Try applying penetrating oil to the handle and letting it sit for a few minutes before attempting to remove it again.
- How often should I replace my faucet cartridge? It depends on water quality and usage, but typically every 5-10 years.
- What is the best way to prevent mineral buildup on my faucet? Regularly clean your faucet with a mild soap and water solution and consider installing a water softener if you have hard water.
By following this faucet repair guide, you should be able to successfully complete your Moen kitchen faucet disassembly, troubleshoot any issues, and fix leaks. Remember to take your time, be patient, and don’t hesitate to seek professional help if needed.
Hi, I’m Scott Fischer, the voice behind SliceItRight. My passion for food started in my grandmother’s kitchen, where I learned the art of slicing, dicing, and creating delicious meals. Over the years, I’ve explored everything from the perfect kitchen gadgets to mastering culinary techniques, and I’m here to share all of it with you. Whether you’re a beginner or an experienced home chef, my goal is to make cooking easier, more enjoyable, and a lot more fun. So, let’s slice it right and cook up something amazing together!