Can I paint my kitchen cabinets with a sprayer? Yes, you absolutely can! Painting kitchen cabinets with a sprayer is an excellent way to achieve a smooth, professional-looking finish. This guide will walk you through every step, from preparation to the final coat, ensuring a beautiful and durable result.
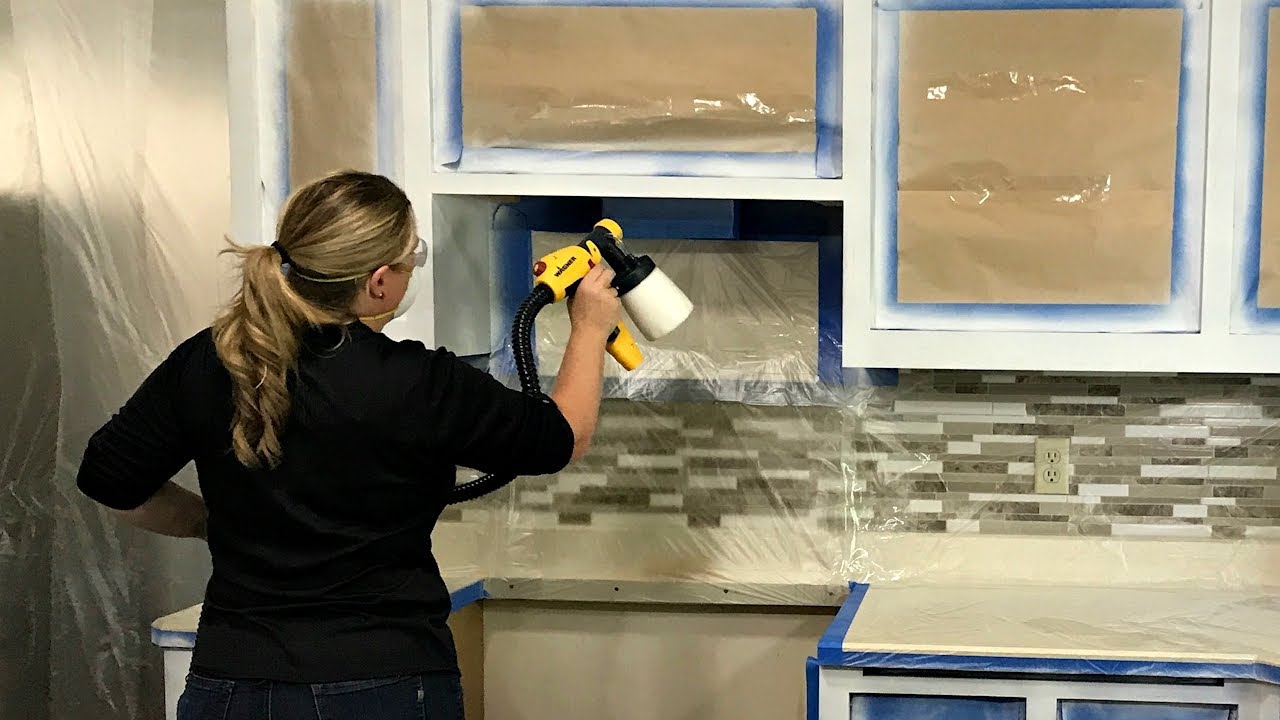
Image Source: i.ytimg.com
Why Choose Spraying Over Brushing?
While a brush and roller can do the job, spraying offers several advantages, making it the preferred method for many DIYers and professionals alike.
- Superior Finish: Sprayers provide an incredibly smooth and even finish, free from brushstrokes or roller marks.
- Efficiency: Spraying covers large surfaces quickly, reducing the overall painting time.
- Detail Work: Sprayers excel at reaching intricate details and crevices that can be challenging to paint with a brush.
- Professional Look: The results achieved with a sprayer closely resemble a factory finish, adding value to your home.
Grasping the Basics: Different Types of Sprayers
Choosing the right sprayer is crucial for a successful cabinet painting project. Here’s a breakdown of the most common types:
- Airless Sprayers: These sprayers use high pressure to atomize the paint, creating a fine mist. They are powerful and suitable for large projects, providing excellent coverage and a professional finish.
- Pros: Fast coverage, excellent finish, handles thick paints.
- Cons: Higher cost, requires more skill to operate, generates more overspray.
- HVLP (High Volume Low Pressure) Sprayers: HVLP sprayers use a high volume of air at low pressure to atomize the paint. This results in less overspray and better control, making them ideal for detailed work and achieving a smooth finish.
- Pros: Less overspray, better control, good for fine finishes.
- Cons: Slower coverage, may require thinning paint, can be expensive.
- Airless/HVLP Combo Sprayers: These sprayers offer the benefits of both airless and HVLP technology, providing versatility and control.
- Pros: Combines speed and quality, adjustable pressure, suitable for various projects.
- Cons: Higher cost, can be complex to operate.
- Aerosol Spray Cans: While not technically a sprayer, aerosol spray cans are a convenient option for small touch-ups or very small cabinet projects.
- Pros: Easy to use, inexpensive, no cleanup required.
- Cons: Limited color options, less control, not suitable for large projects, prone to uneven coverage.
Paint Sprayer for Cabinets Reviews
Before purchasing a paint sprayer, consider reading reviews and comparing models based on your project’s needs and budget. Some popular choices include:
- Graco Ultra Cordless Airless Handheld Sprayer: Ideal for small to medium-sized projects and offers excellent portability.
- Wagner Flexio 590 HVLP Paint Sprayer: A versatile option for both indoor and outdoor projects, with adjustable settings for different materials.
- Fuji Spray Semi-PRO 2 HVLP Spray System: A professional-grade system for achieving a flawless finish on cabinets and furniture.
Essential Materials and Tools
Before you begin, gather all the necessary materials and tools to ensure a smooth and efficient painting process.
- Paint Sprayer: Choose the right type of sprayer for your project size and desired finish.
- Paint: Select a high-quality paint specifically designed for cabinets (more on this below).
- Primer: A good primer is essential for adhesion and a uniform finish.
- Degreaser: To clean cabinets.
- Tack Cloth: For removing dust.
- Drop Cloths/Plastic Sheeting: To protect your work area.
- Painter’s Tape: For masking off areas you don’t want to paint.
- Sandpaper (120-grit, 220-grit, 320-grit): For preparing the cabinet surfaces.
- Wood Filler/Putty: For repairing any imperfections.
- Screwdriver/Drill: For removing cabinet doors and hardware.
- Respirator/Mask: To protect yourself from paint fumes.
- Safety Glasses: To protect your eyes.
- Spray Shelter/Booth: To contain overspray and ensure a clean finish.
- Paint Thinner/Cleaner: For cleaning your sprayer.
- Mixing Buckets: To mix paints and primers.
- Stir Sticks: For mixing paints and primers.
- Spray gun filters: For straining paints.
Best Paint for Spraying Cabinets
Choosing the right paint is just as important as choosing the right sprayer. Here are some of the best options for kitchen cabinets:
- Acrylic Latex Paint: Water-based, durable, and easy to clean. Ideal for cabinets due to its excellent adhesion and resistance to chipping.
- Pros: Low VOC, easy cleanup, good durability.
- Cons: May require more coats, can be affected by humidity.
- Alkyd Paint: Oil-based, provides a hard, durable finish. Offers excellent leveling and a smooth, professional look.
- Pros: Excellent durability, smooth finish, resists stains.
- Cons: High VOC, requires mineral spirits for cleanup, longer drying time.
- Hybrid Enamel Paint: Combines the benefits of both acrylic and alkyd paints. Water-based with the durability and leveling properties of oil-based paints.
- Pros: Low VOC, easy cleanup, excellent durability, smooth finish.
- Cons: Can be more expensive than other options.
Note: Always check the manufacturer’s recommendations for thinning the paint if using a sprayer.
Table: Comparison of Cabinet Paint Types
| Feature | Acrylic Latex Paint | Alkyd Paint | Hybrid Enamel Paint |
|---|---|---|---|
| Base | Water-based | Oil-based | Water-based |
| VOC Content | Low | High | Low |
| Durability | Good | Excellent | Excellent |
| Finish | Smooth | Very Smooth | Very Smooth |
| Cleanup | Soap and Water | Mineral Spirits | Soap and Water |
| Drying Time | Fast | Slow | Medium |
| Cost | Moderate | Moderate | High |
Prepping Kitchen Cabinets for Spraying: The Key to Success
Proper preparation is the most critical step in achieving a flawless finish. Taking the time to prep your cabinets thoroughly will ensure the paint adheres properly and the final result is smooth and professional.
- Remove Cabinet Doors and Hardware: Use a screwdriver or drill to remove all cabinet doors, drawers, hinges, knobs, and pulls. Label each door and drawer with its corresponding cabinet location to ensure easy reinstallation.
- Clean the Cabinets: Use a degreaser to thoroughly clean all cabinet surfaces, removing any grease, dirt, or grime. Rinse with clean water and allow to dry completely.
- Sand the Surfaces: Sand all surfaces with 120-grit sandpaper to create a slightly rough texture for the primer to grip. Focus on removing any existing gloss or imperfections.
- Fill Imperfections: Use wood filler or putty to fill any holes, dents, or scratches. Allow the filler to dry completely and then sand smooth with 220-grit sandpaper.
- Dust and Wipe: Use a tack cloth to remove all dust and debris from the cabinets and doors.
- Mask Off Areas: Use painter’s tape to mask off any areas you don’t want to paint, such as the inside of the cabinets or adjacent walls.
Cabinet Spraying Techniques: Achieving a Smooth Finish
Now that your cabinets are prepped, it’s time to start spraying. Follow these tips and techniques for achieving a smooth, professional finish:
- Prime the Cabinets: Apply a thin, even coat of primer to all surfaces. Allow the primer to dry completely according to the manufacturer’s instructions. Sand lightly with 320-grit sandpaper to smooth out any imperfections.
- Thin the Paint (If Necessary): Some paints may need to be thinned to achieve the correct consistency for spraying. Check the manufacturer’s recommendations and use the appropriate thinner.
- Adjust Cabinet Sprayer Settings: Experiment with the sprayer settings to find the right combination of pressure and flow rate for your paint and sprayer. Start with a low pressure setting and gradually increase it until you achieve a fine, even mist.
- Practice Your Technique: Before spraying the cabinets, practice on a piece of cardboard or scrap wood to get a feel for the sprayer and your technique.
- Spray in Even Strokes: Hold the sprayer 6-8 inches away from the surface and move it in smooth, even strokes, overlapping each stroke by about 50%.
- Apply Thin Coats: Apply several thin coats of paint rather than one thick coat. This will prevent drips and runs and result in a smoother, more durable finish.
- Allow Sufficient Drying Time: Allow each coat of paint to dry completely before applying the next coat. Follow the manufacturer’s recommendations for drying times.
- Sand Between Coats (Optional): If desired, you can lightly sand between coats with 320-grit sandpaper to remove any imperfections and create an even smoother surface.
- Apply a Clear Coat (Optional): For added durability and protection, you can apply a clear coat of polyurethane or varnish over the painted cabinets.
Kitchen Cabinet Paint Sprayer Tips
- Maintain a Consistent Distance: Keep the sprayer at a consistent distance from the surface to ensure even coverage.
- Avoid Overlapping Too Much: Overlapping too much can lead to drips and runs.
- Clean Your Sprayer Regularly: Clean your sprayer after each use to prevent clogs and ensure optimal performance.
- Use a Spray Shelter: A spray shelter will help contain overspray and keep your work area clean.
Cabinet Sprayer Settings: Getting It Just Right
Finding the right sprayer settings is crucial for achieving a flawless finish. Here’s a general guide:
- Pressure: Start with a low pressure setting and gradually increase it until you achieve a fine, even mist. Too much pressure can cause the paint to splatter or run.
- Flow Rate: Adjust the flow rate to control the amount of paint being sprayed. A lower flow rate is ideal for detailed work, while a higher flow rate is better for covering large surfaces quickly.
- Nozzle Size: Choose the right nozzle size for your paint and sprayer. A smaller nozzle is best for thin paints, while a larger nozzle is better for thicker paints.
- Spray Pattern: Adjust the spray pattern to match the size and shape of the surface you are painting. A fan pattern is good for covering large areas, while a round pattern is better for detailed work.
Refer to your sprayer’s manual for specific instructions on adjusting the settings.
DIY Cabinet Refinishing with Sprayer: Step-by-Step Guide
Here’s a step-by-step guide to help you refinish your kitchen cabinets with a sprayer:
- Preparation: Follow the steps outlined in the “Prepping Kitchen Cabinets for Spraying” section.
- Priming: Apply a thin, even coat of primer to all cabinet surfaces. Allow to dry completely.
- Sanding (Optional): Lightly sand the primed surfaces with 320-grit sandpaper.
- Painting: Apply several thin coats of paint, allowing each coat to dry completely before applying the next.
- Sanding (Optional): Lightly sand between coats with 320-grit sandpaper.
- Clear Coating (Optional): Apply a clear coat of polyurethane or varnish for added durability.
- Reassembly: Reinstall the cabinet doors, drawers, hinges, knobs, and pulls.
Painting Kitchen Cabinets Professionally with Sprayer
If you want to achieve a truly professional-quality finish, consider hiring a professional cabinet painter. Professional painters have the experience, equipment, and expertise to deliver flawless results. They can also handle complex projects and offer warranties on their work.
Here are some benefits of hiring a professional:
- Expertise: Professionals have years of experience and know-how to handle any cabinet painting project.
- Equipment: Professionals have access to high-quality sprayers and other equipment that can deliver a superior finish.
- Efficiency: Professionals can complete the project quickly and efficiently, minimizing disruption to your home.
- Warranty: Many professionals offer warranties on their work, providing peace of mind.
Frequently Asked Questions (FAQ)
Q: How much does it cost to paint kitchen cabinets with a sprayer?
A: The cost varies depending on the size of your kitchen, the type of paint you use, and whether you hire a professional. DIY projects can cost anywhere from \$200 to \$500, while professional services can range from \$1,000 to \$5,000 or more.
Q: How long does it take to paint kitchen cabinets with a sprayer?
A: A DIY project can take several days to a week, depending on your skill level and the size of your kitchen. Professional painters can typically complete the job in 2-3 days.
Q: What if I don’t have a spray shelter?
A: You can create a temporary spray shelter using plastic sheeting and painter’s tape. Alternatively, you can spray the cabinets outdoors on a calm day.
Q: Can I paint my cabinets without removing the doors?
A: While it’s possible, it’s not recommended. Removing the doors allows you to paint all surfaces evenly and achieve a more professional finish.
Q: How do I prevent drips and runs when spraying?
A: Apply thin coats of paint and avoid overlapping too much. Keep the sprayer moving at a consistent speed and distance from the surface.
Hi, I’m Scott Fischer, the voice behind SliceItRight. My passion for food started in my grandmother’s kitchen, where I learned the art of slicing, dicing, and creating delicious meals. Over the years, I’ve explored everything from the perfect kitchen gadgets to mastering culinary techniques, and I’m here to share all of it with you. Whether you’re a beginner or an experienced home chef, my goal is to make cooking easier, more enjoyable, and a lot more fun. So, let’s slice it right and cook up something amazing together!